Larks Head Knot Tutorial
The larks head knot is used to attach cord to a dowel, so it’s quite essential to learn. It is also very, very easy. Here is a super easy-to-follow tutorial.
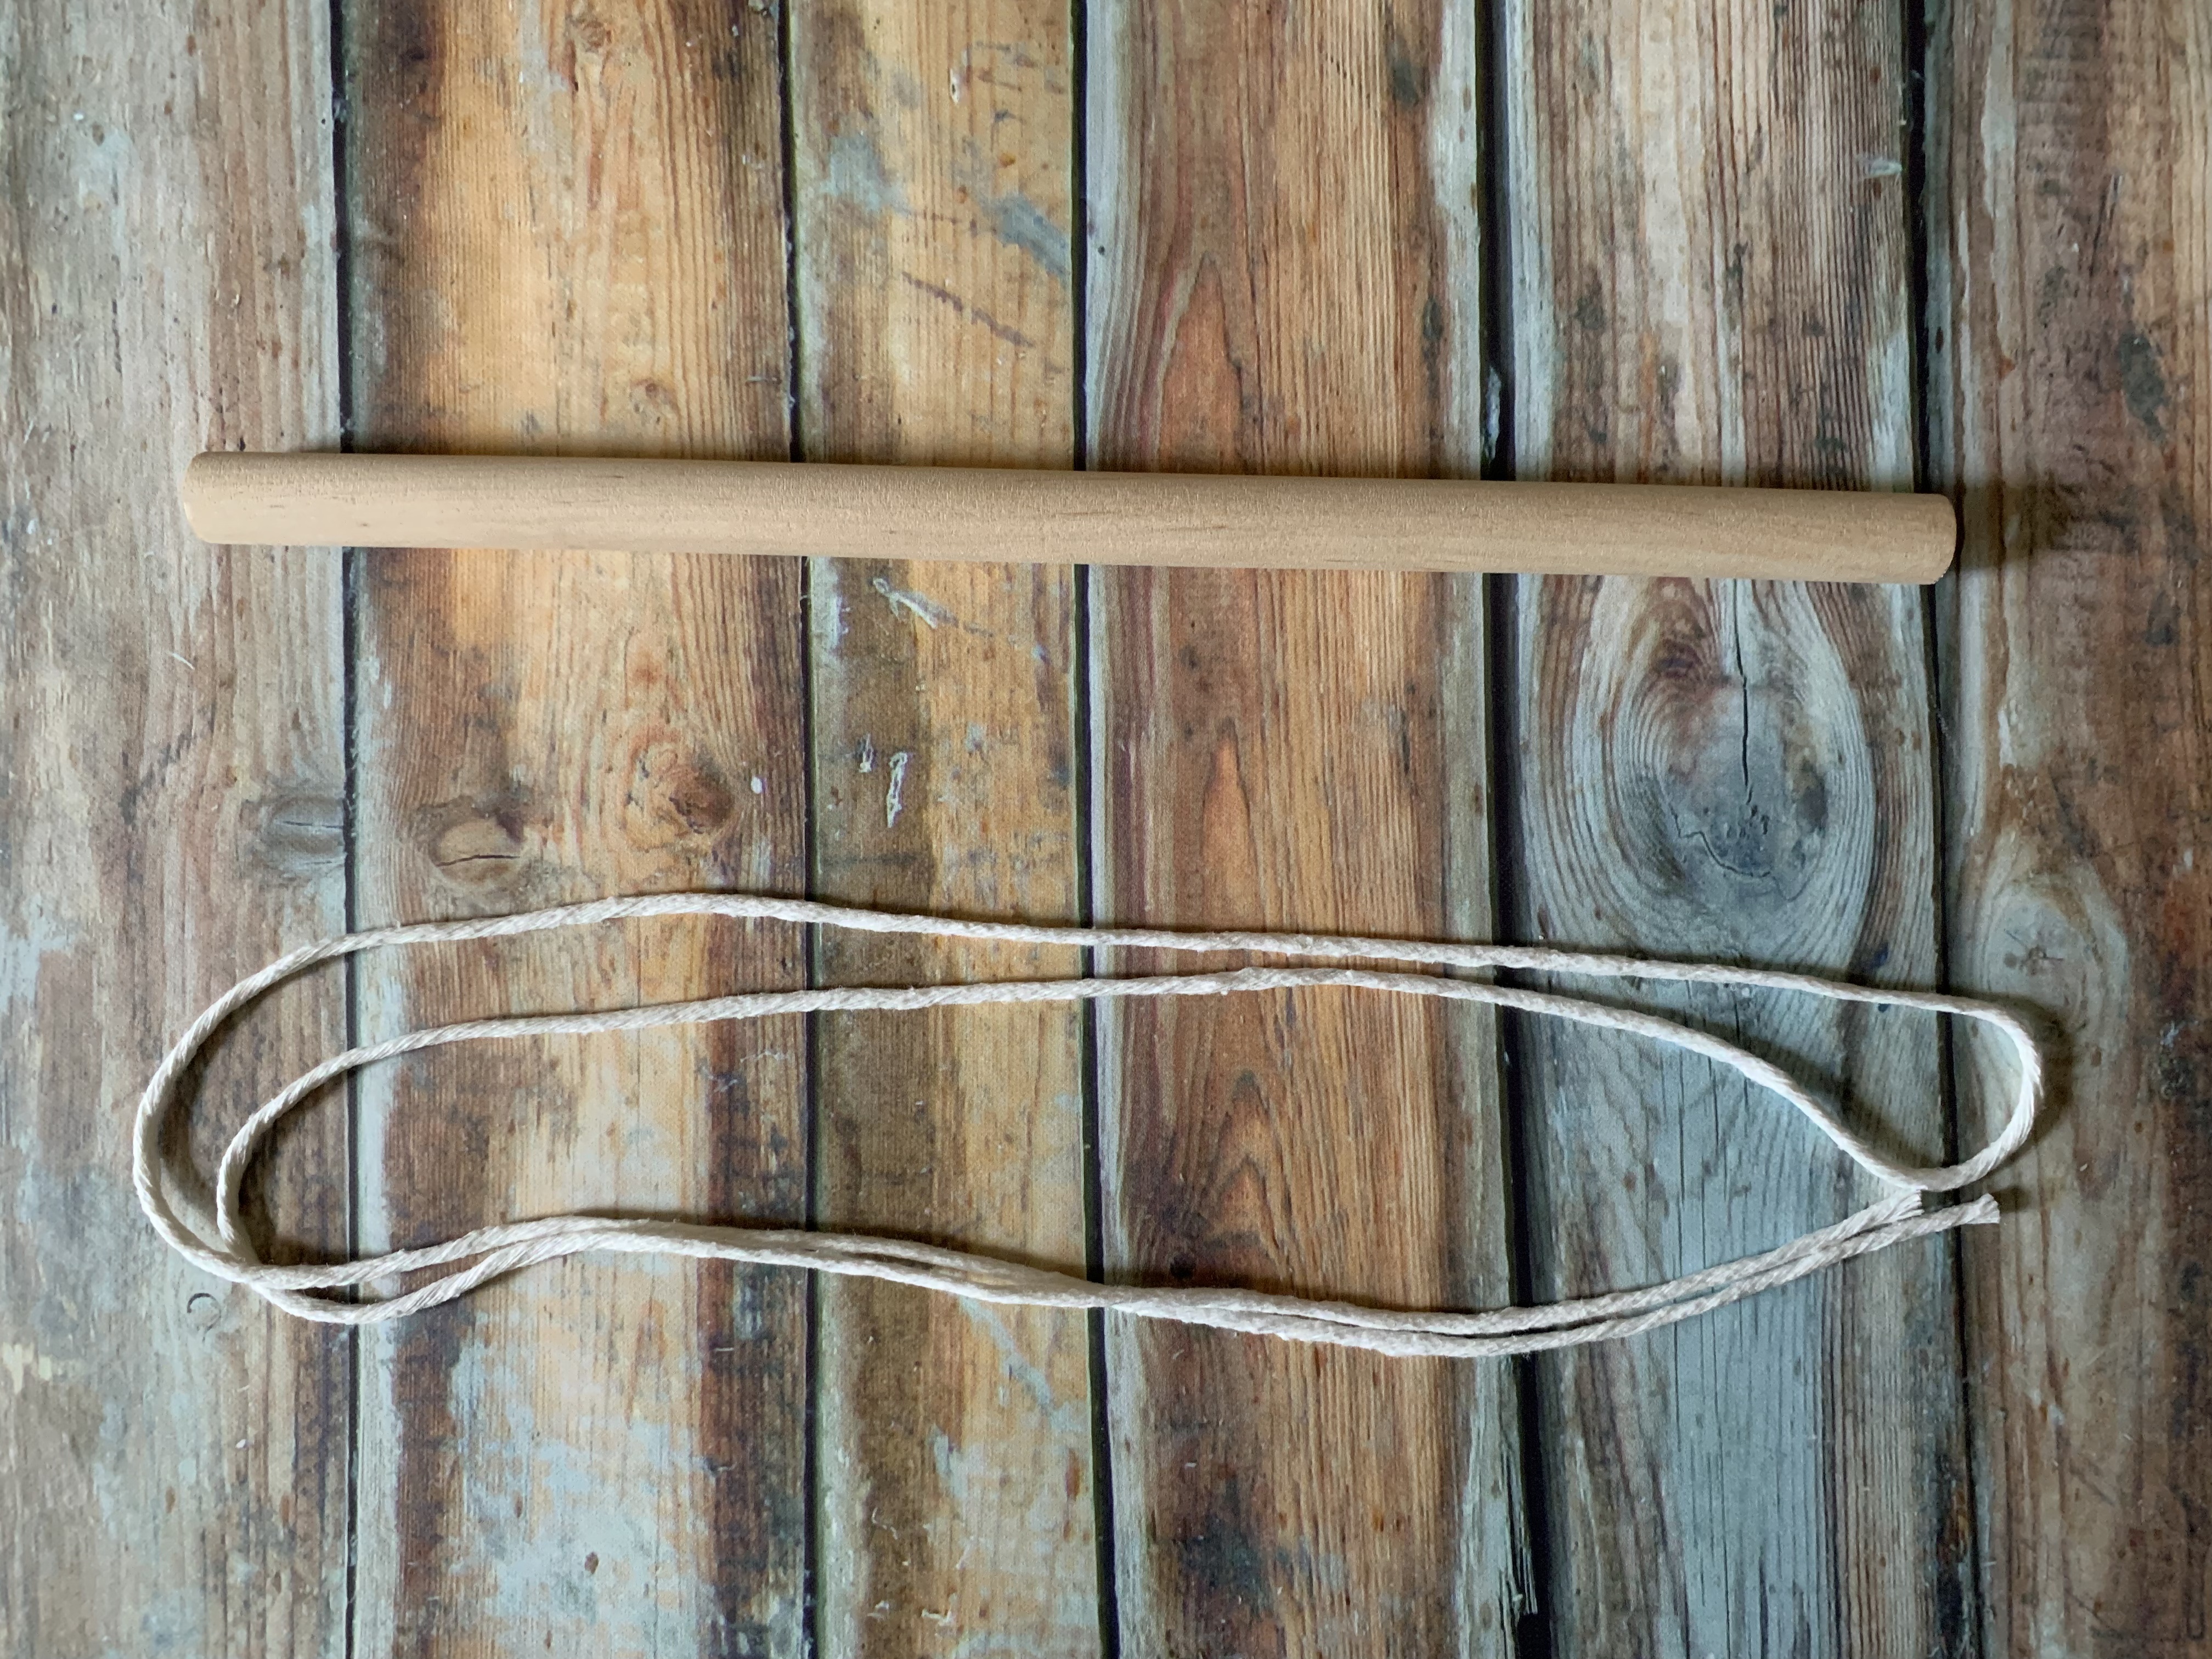
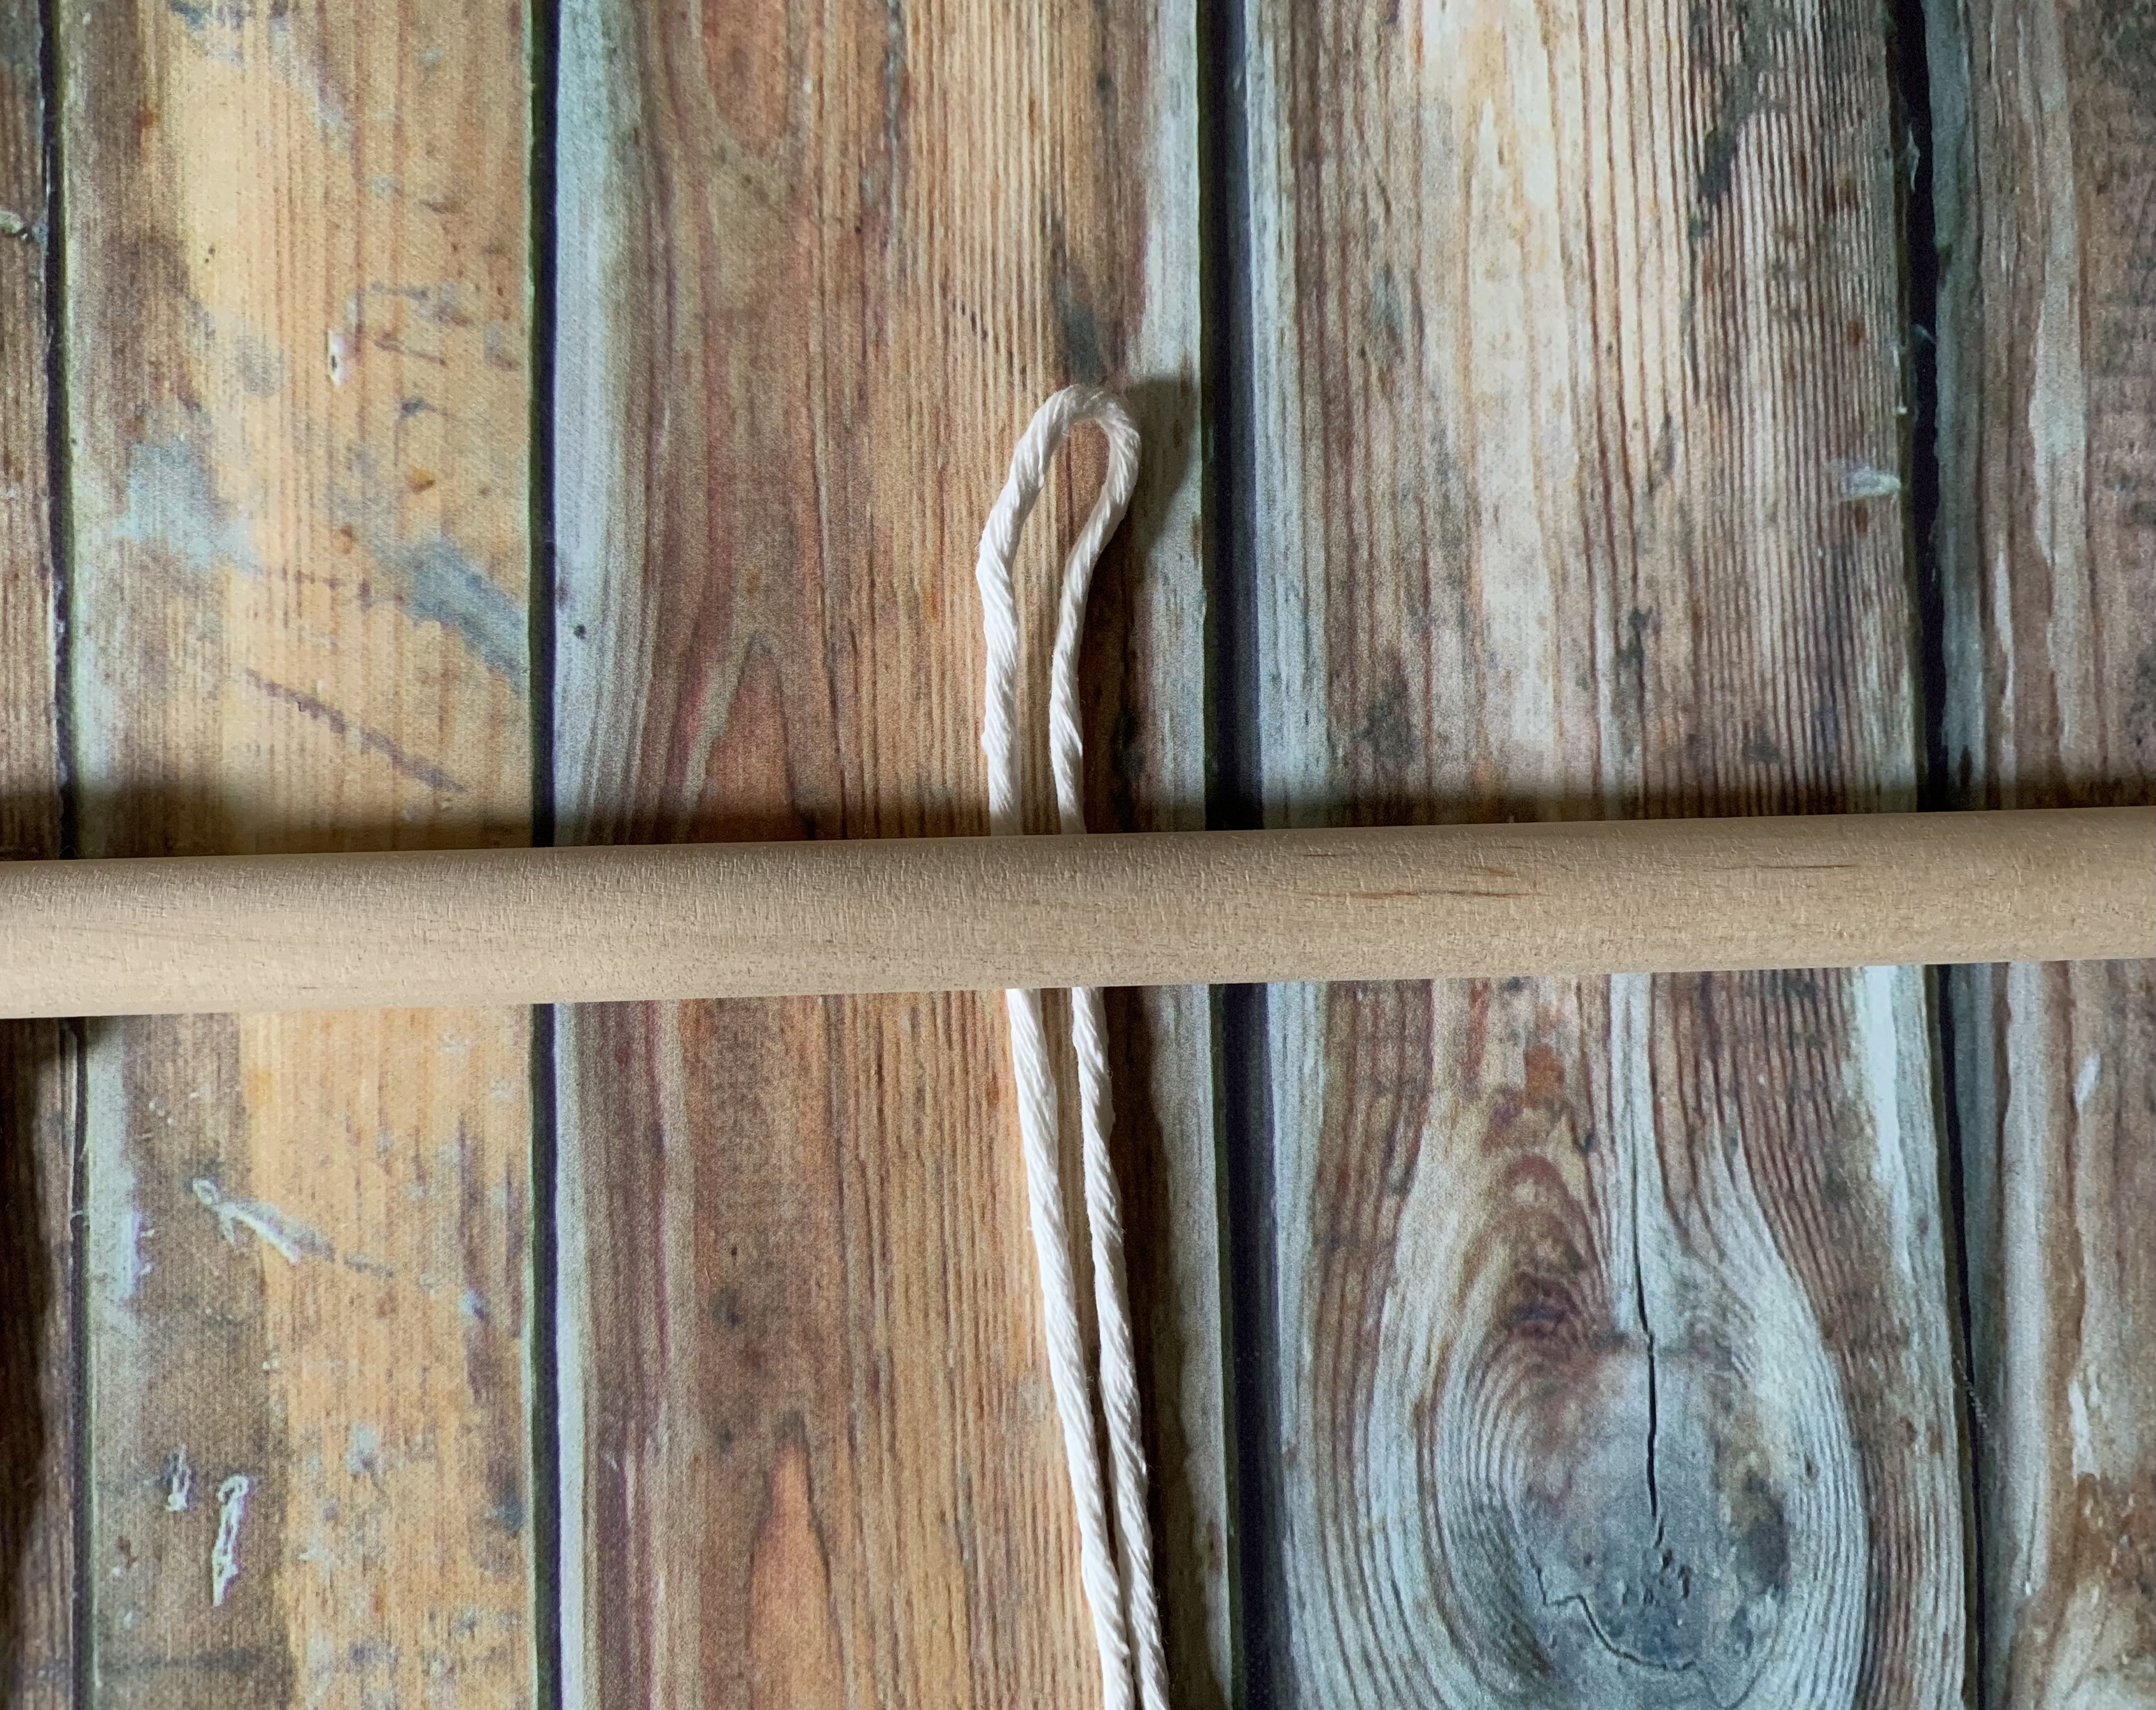
1. Prepare your dowel and cord. Cut the cord to the desired length and fold in half so you have a loop at one end.
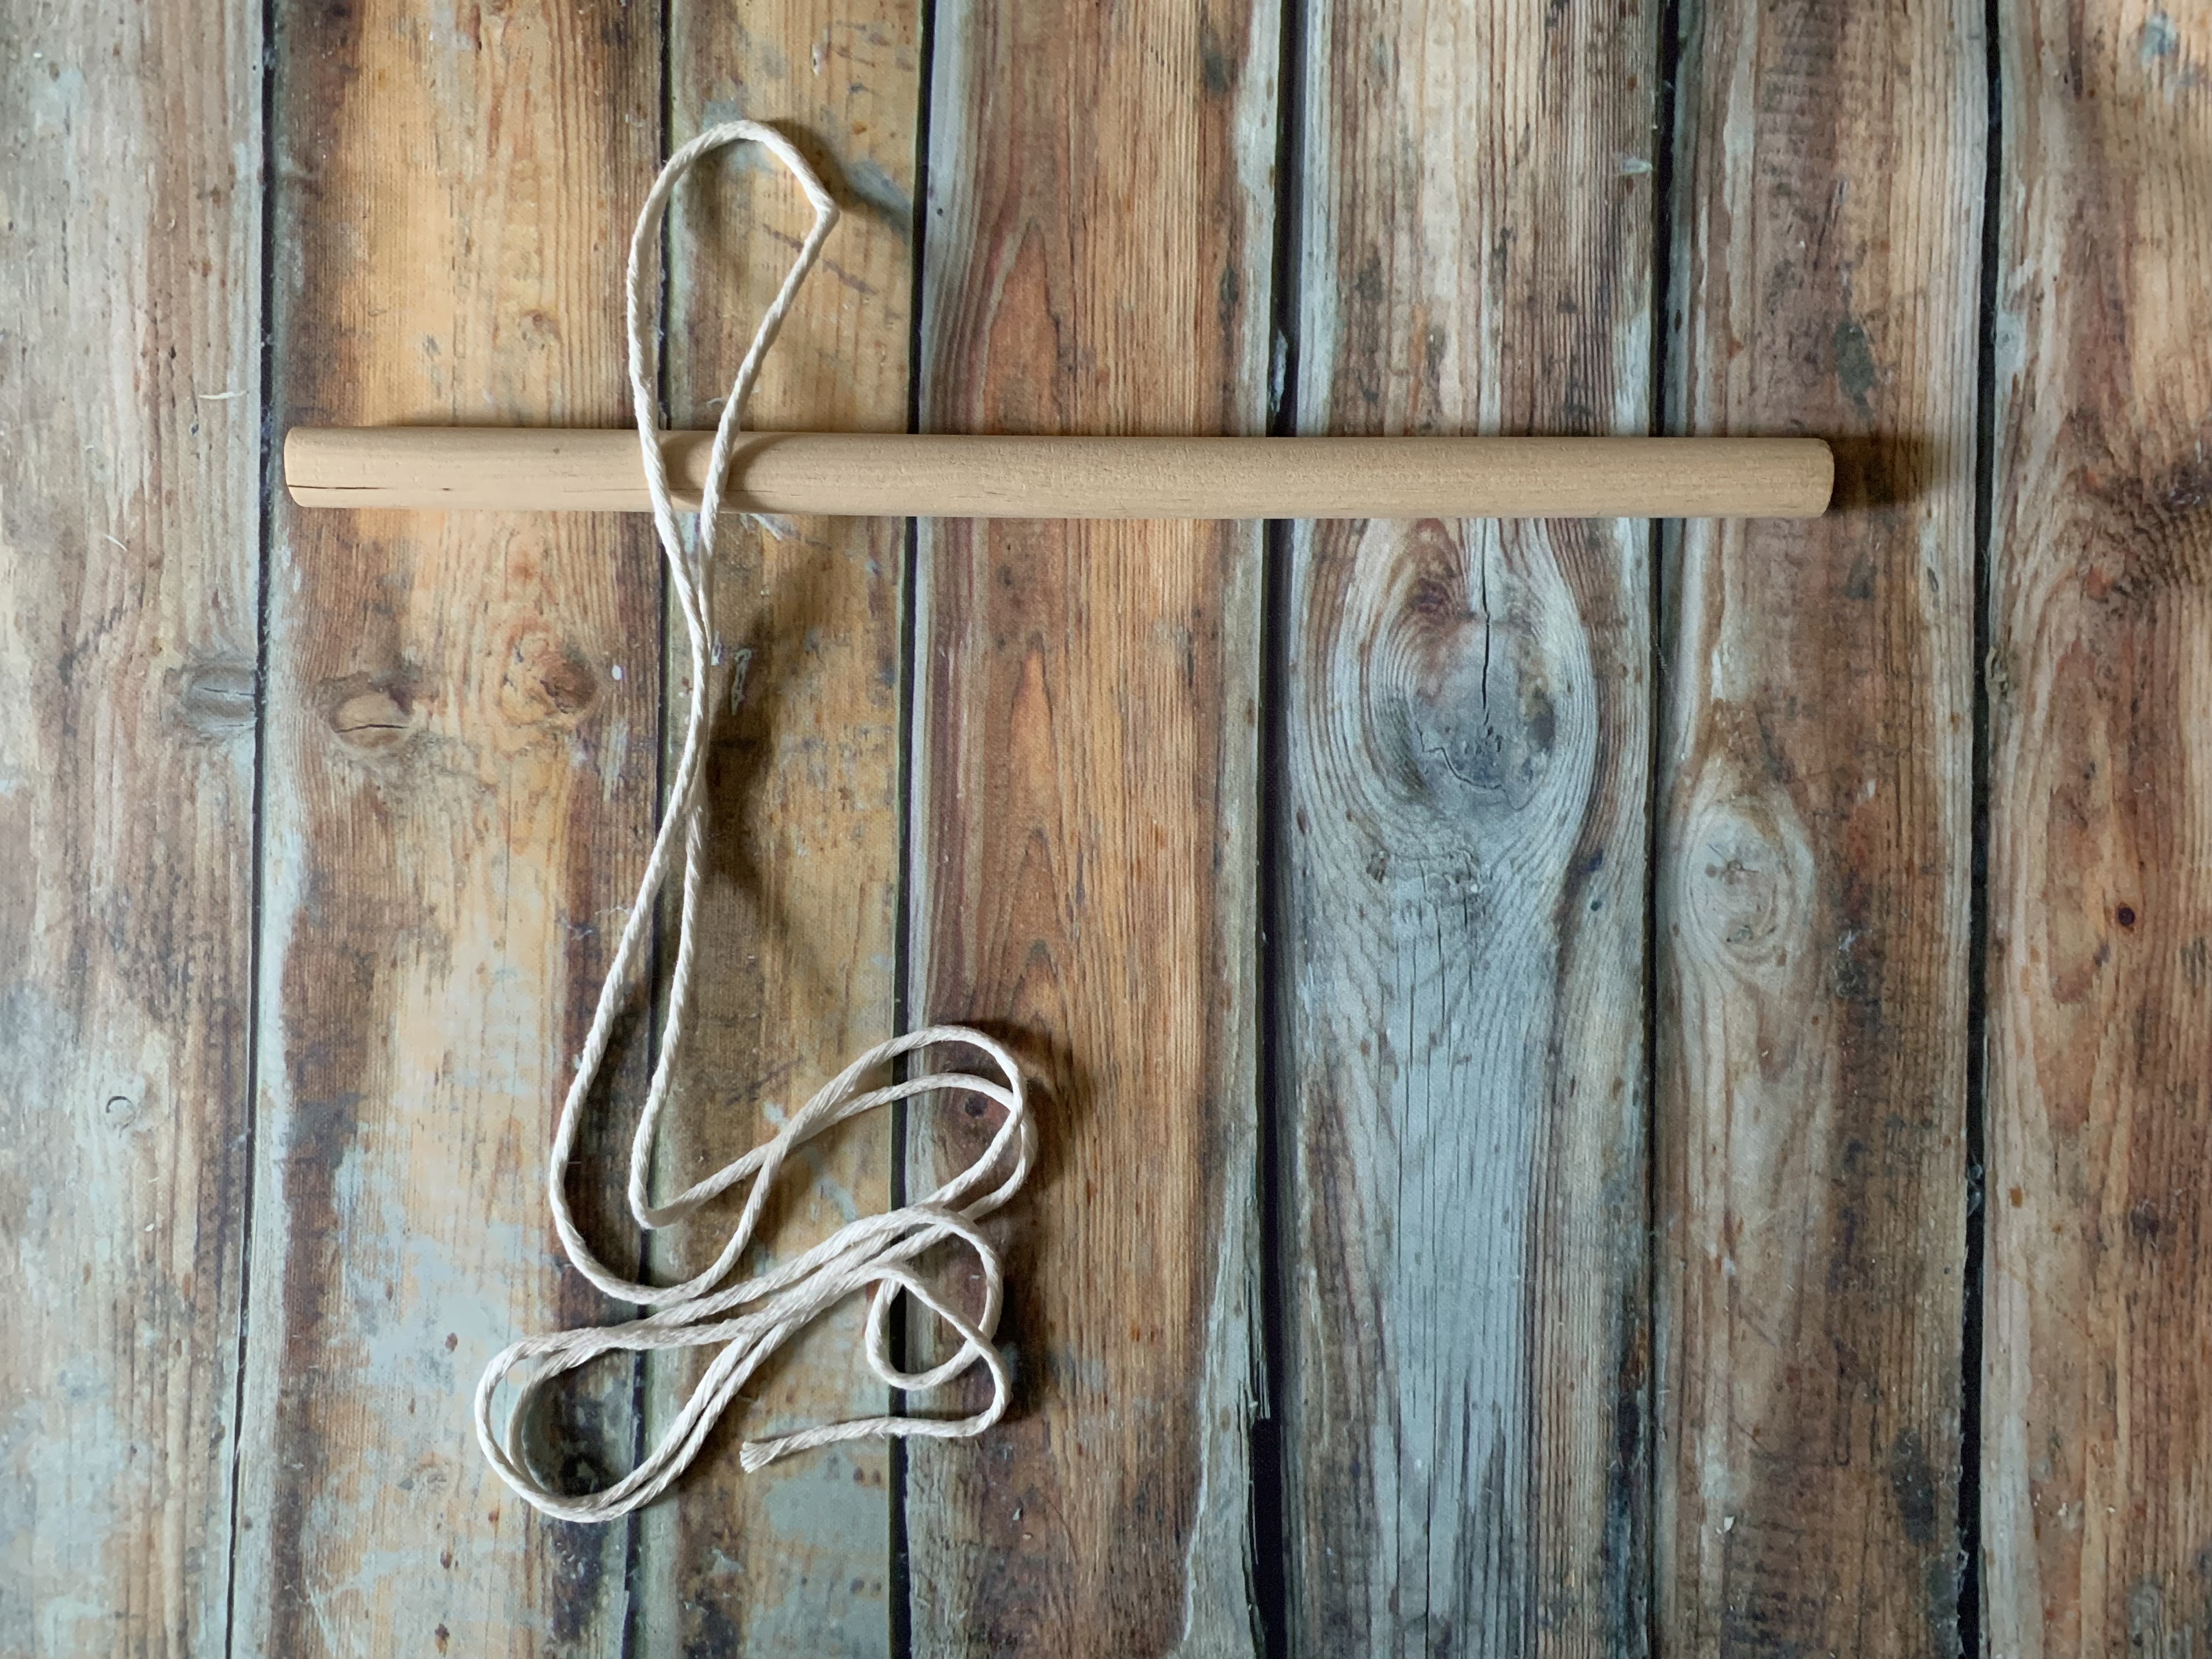
2. Take the loop end of the cord and lay over the top of the dowel
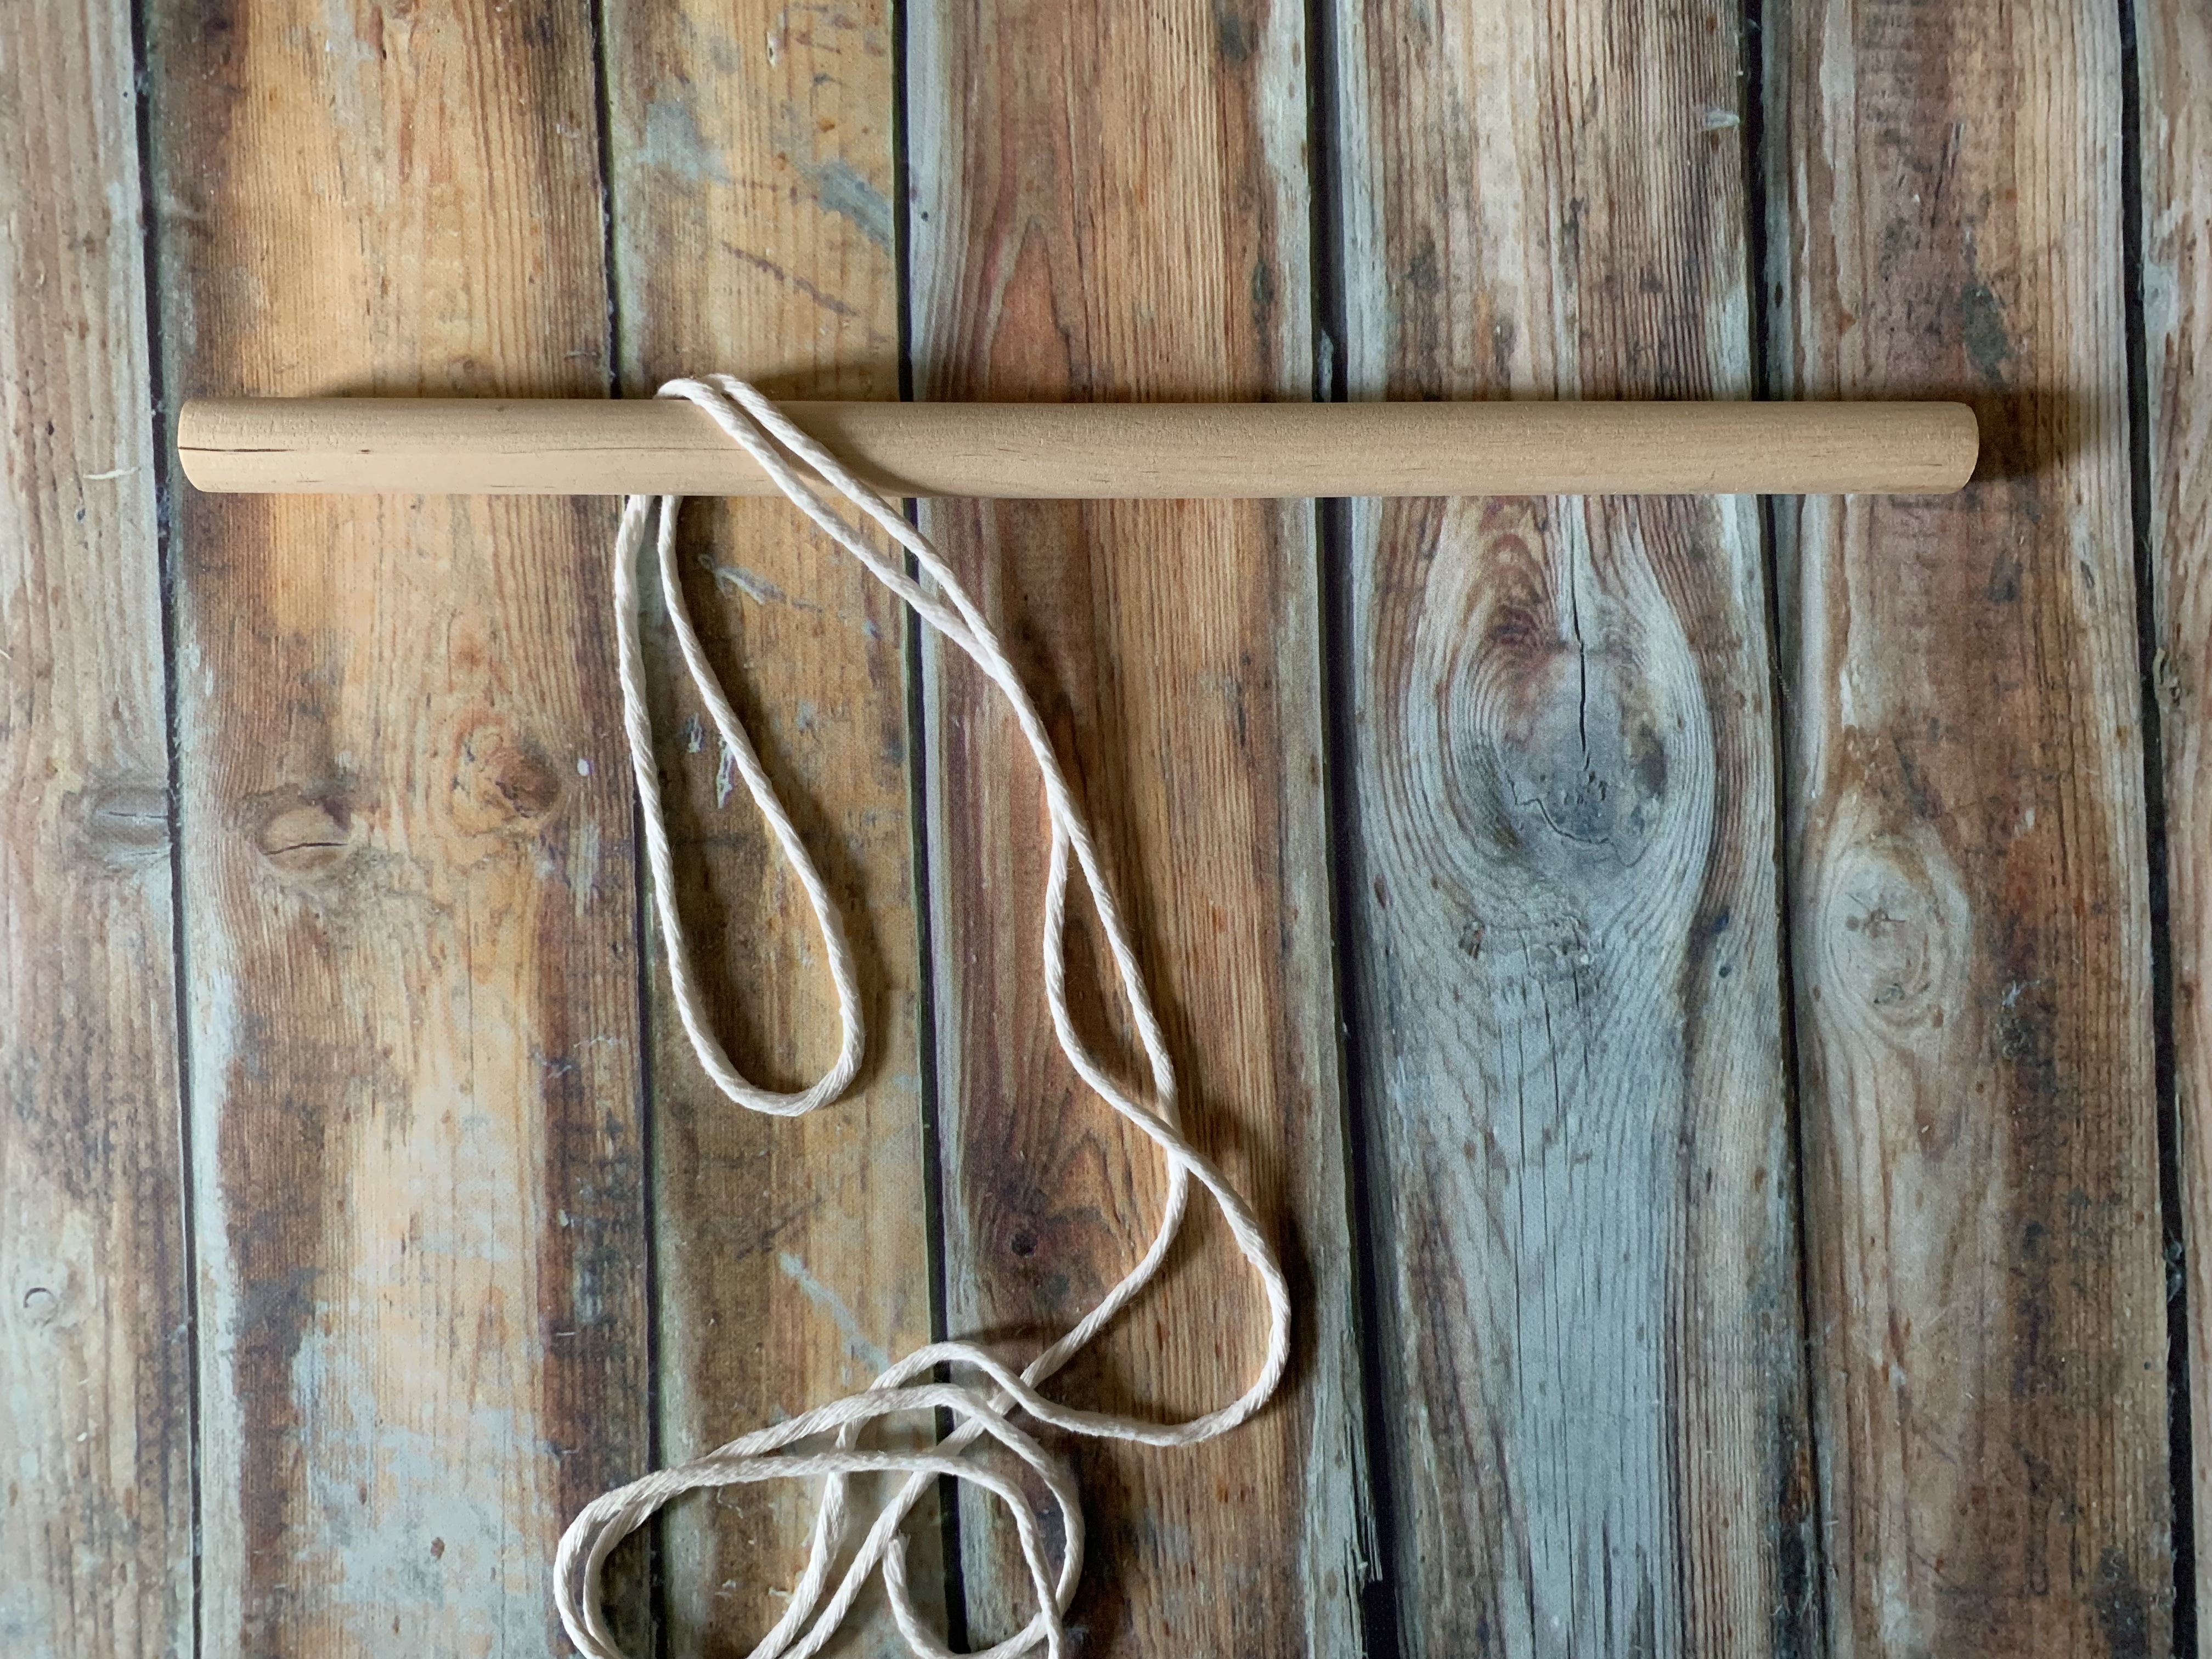
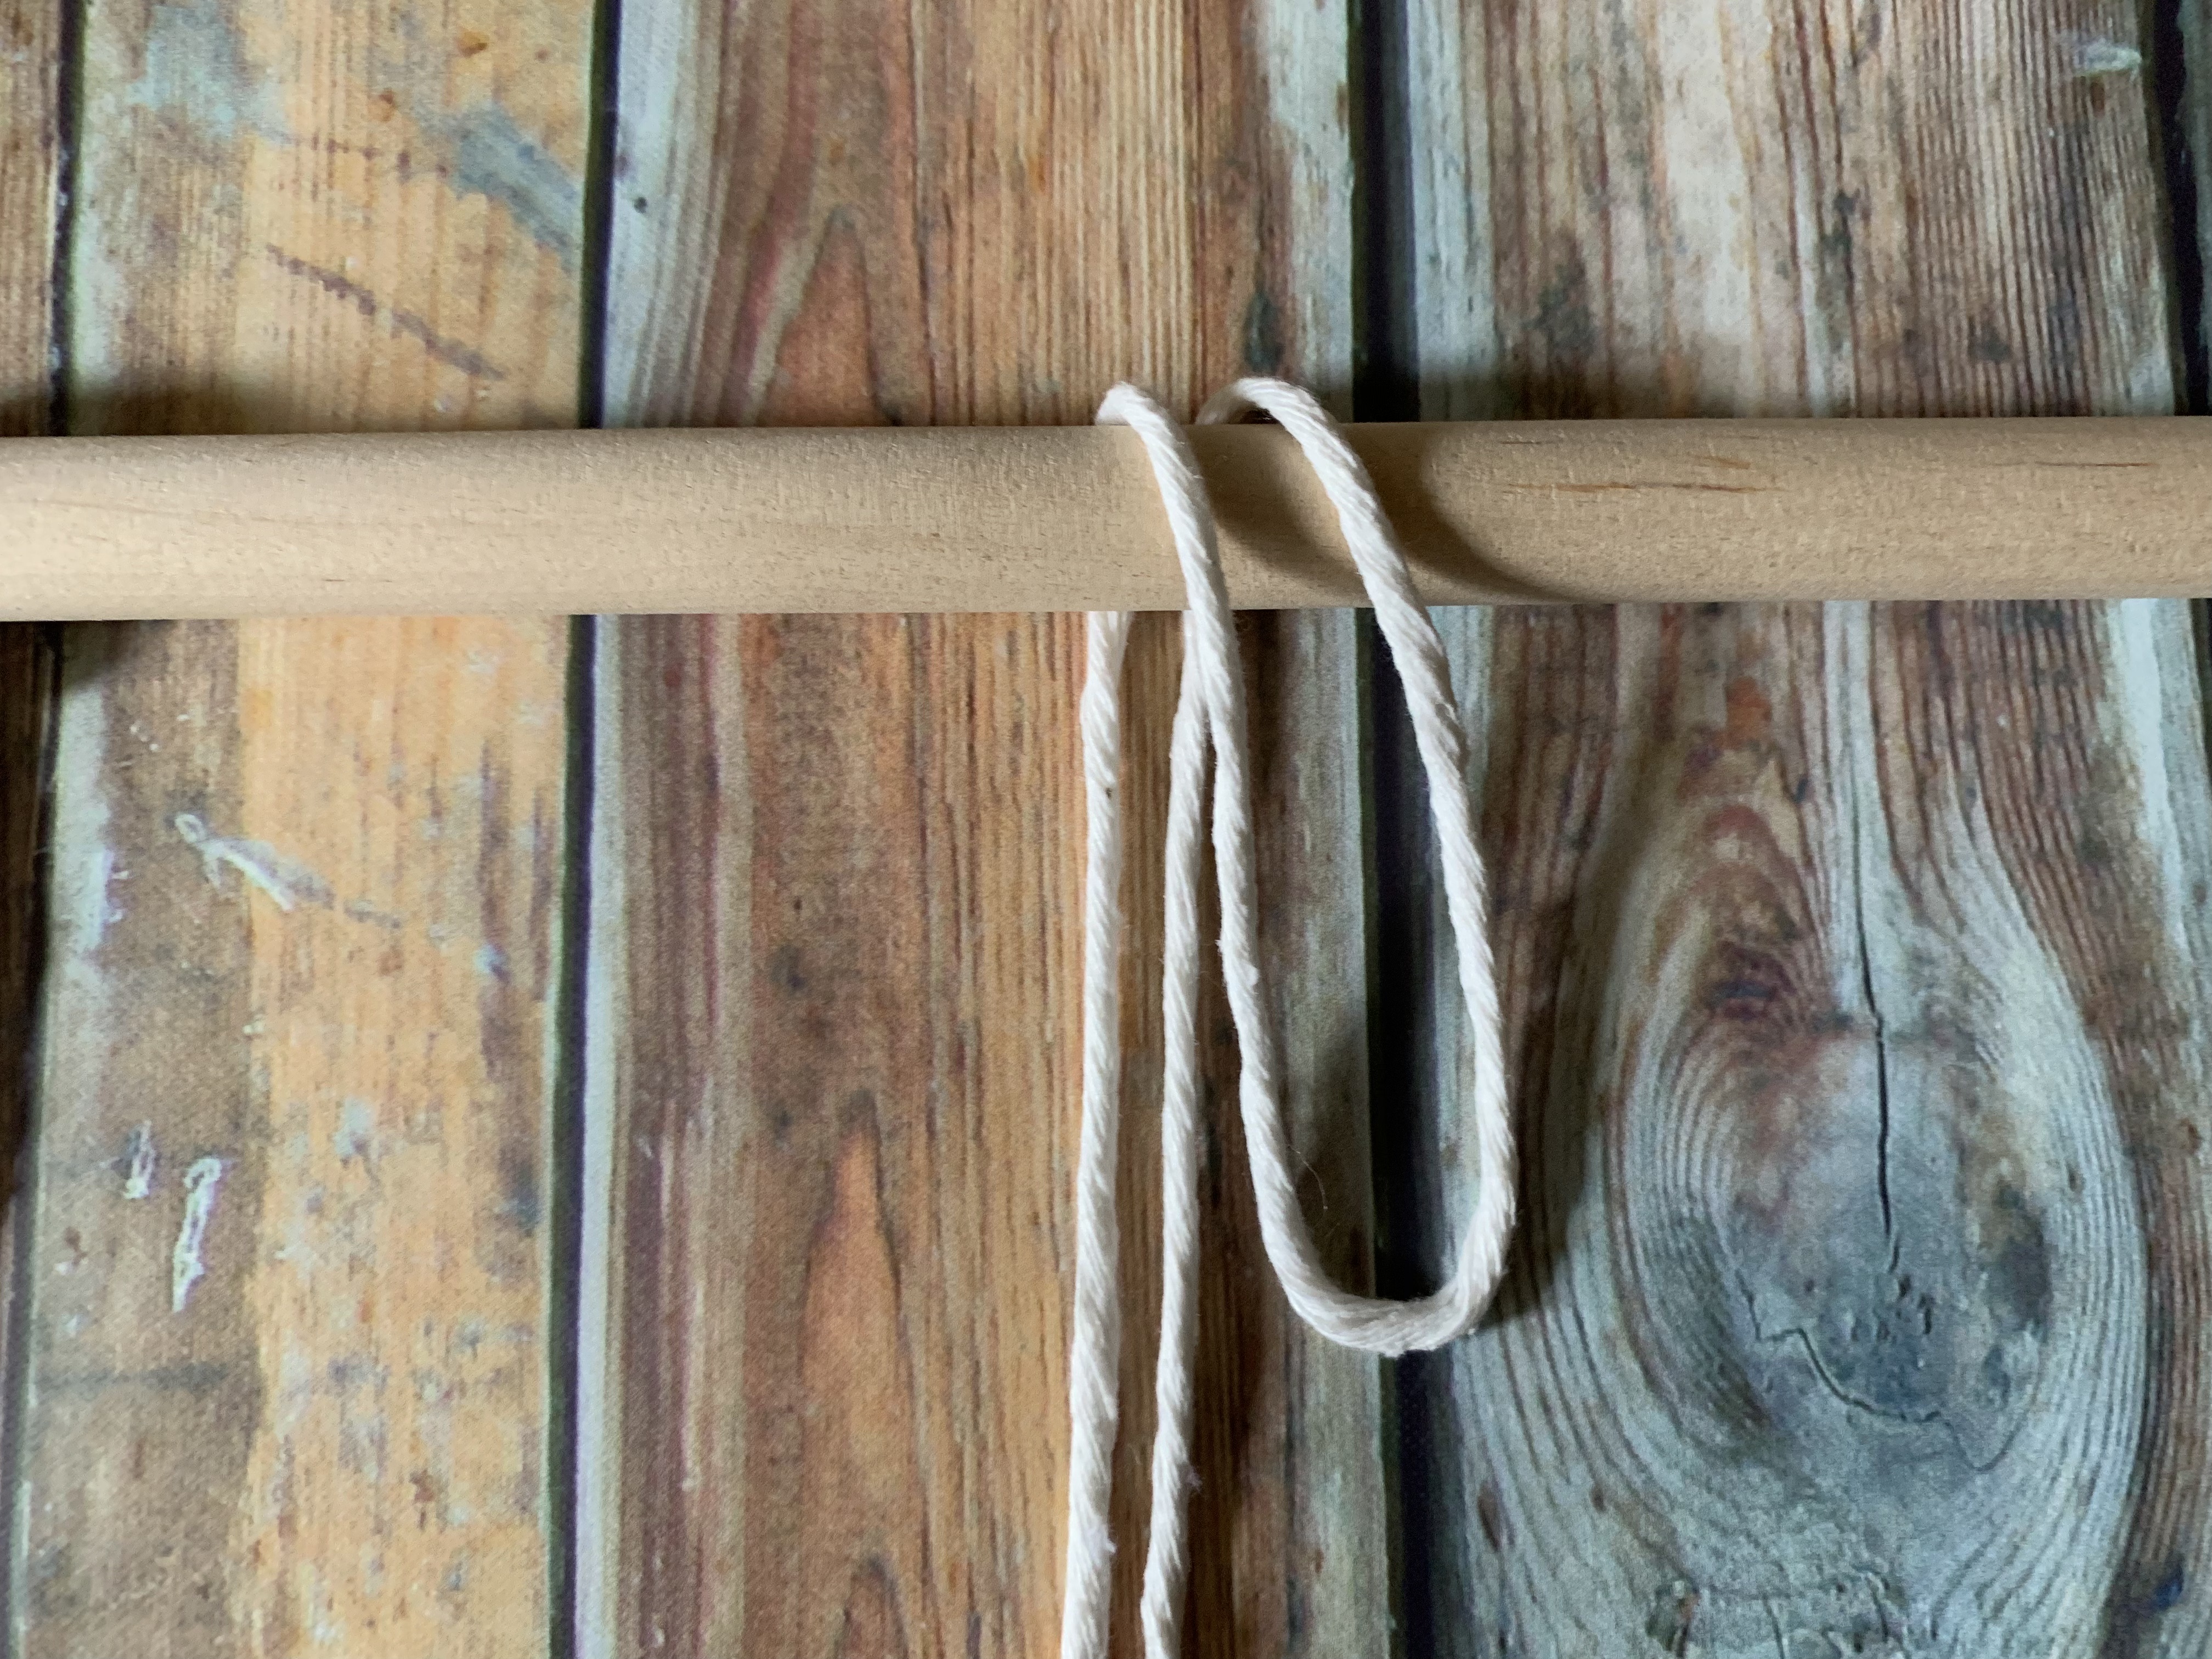
3. Pull the loop down behind the dowel
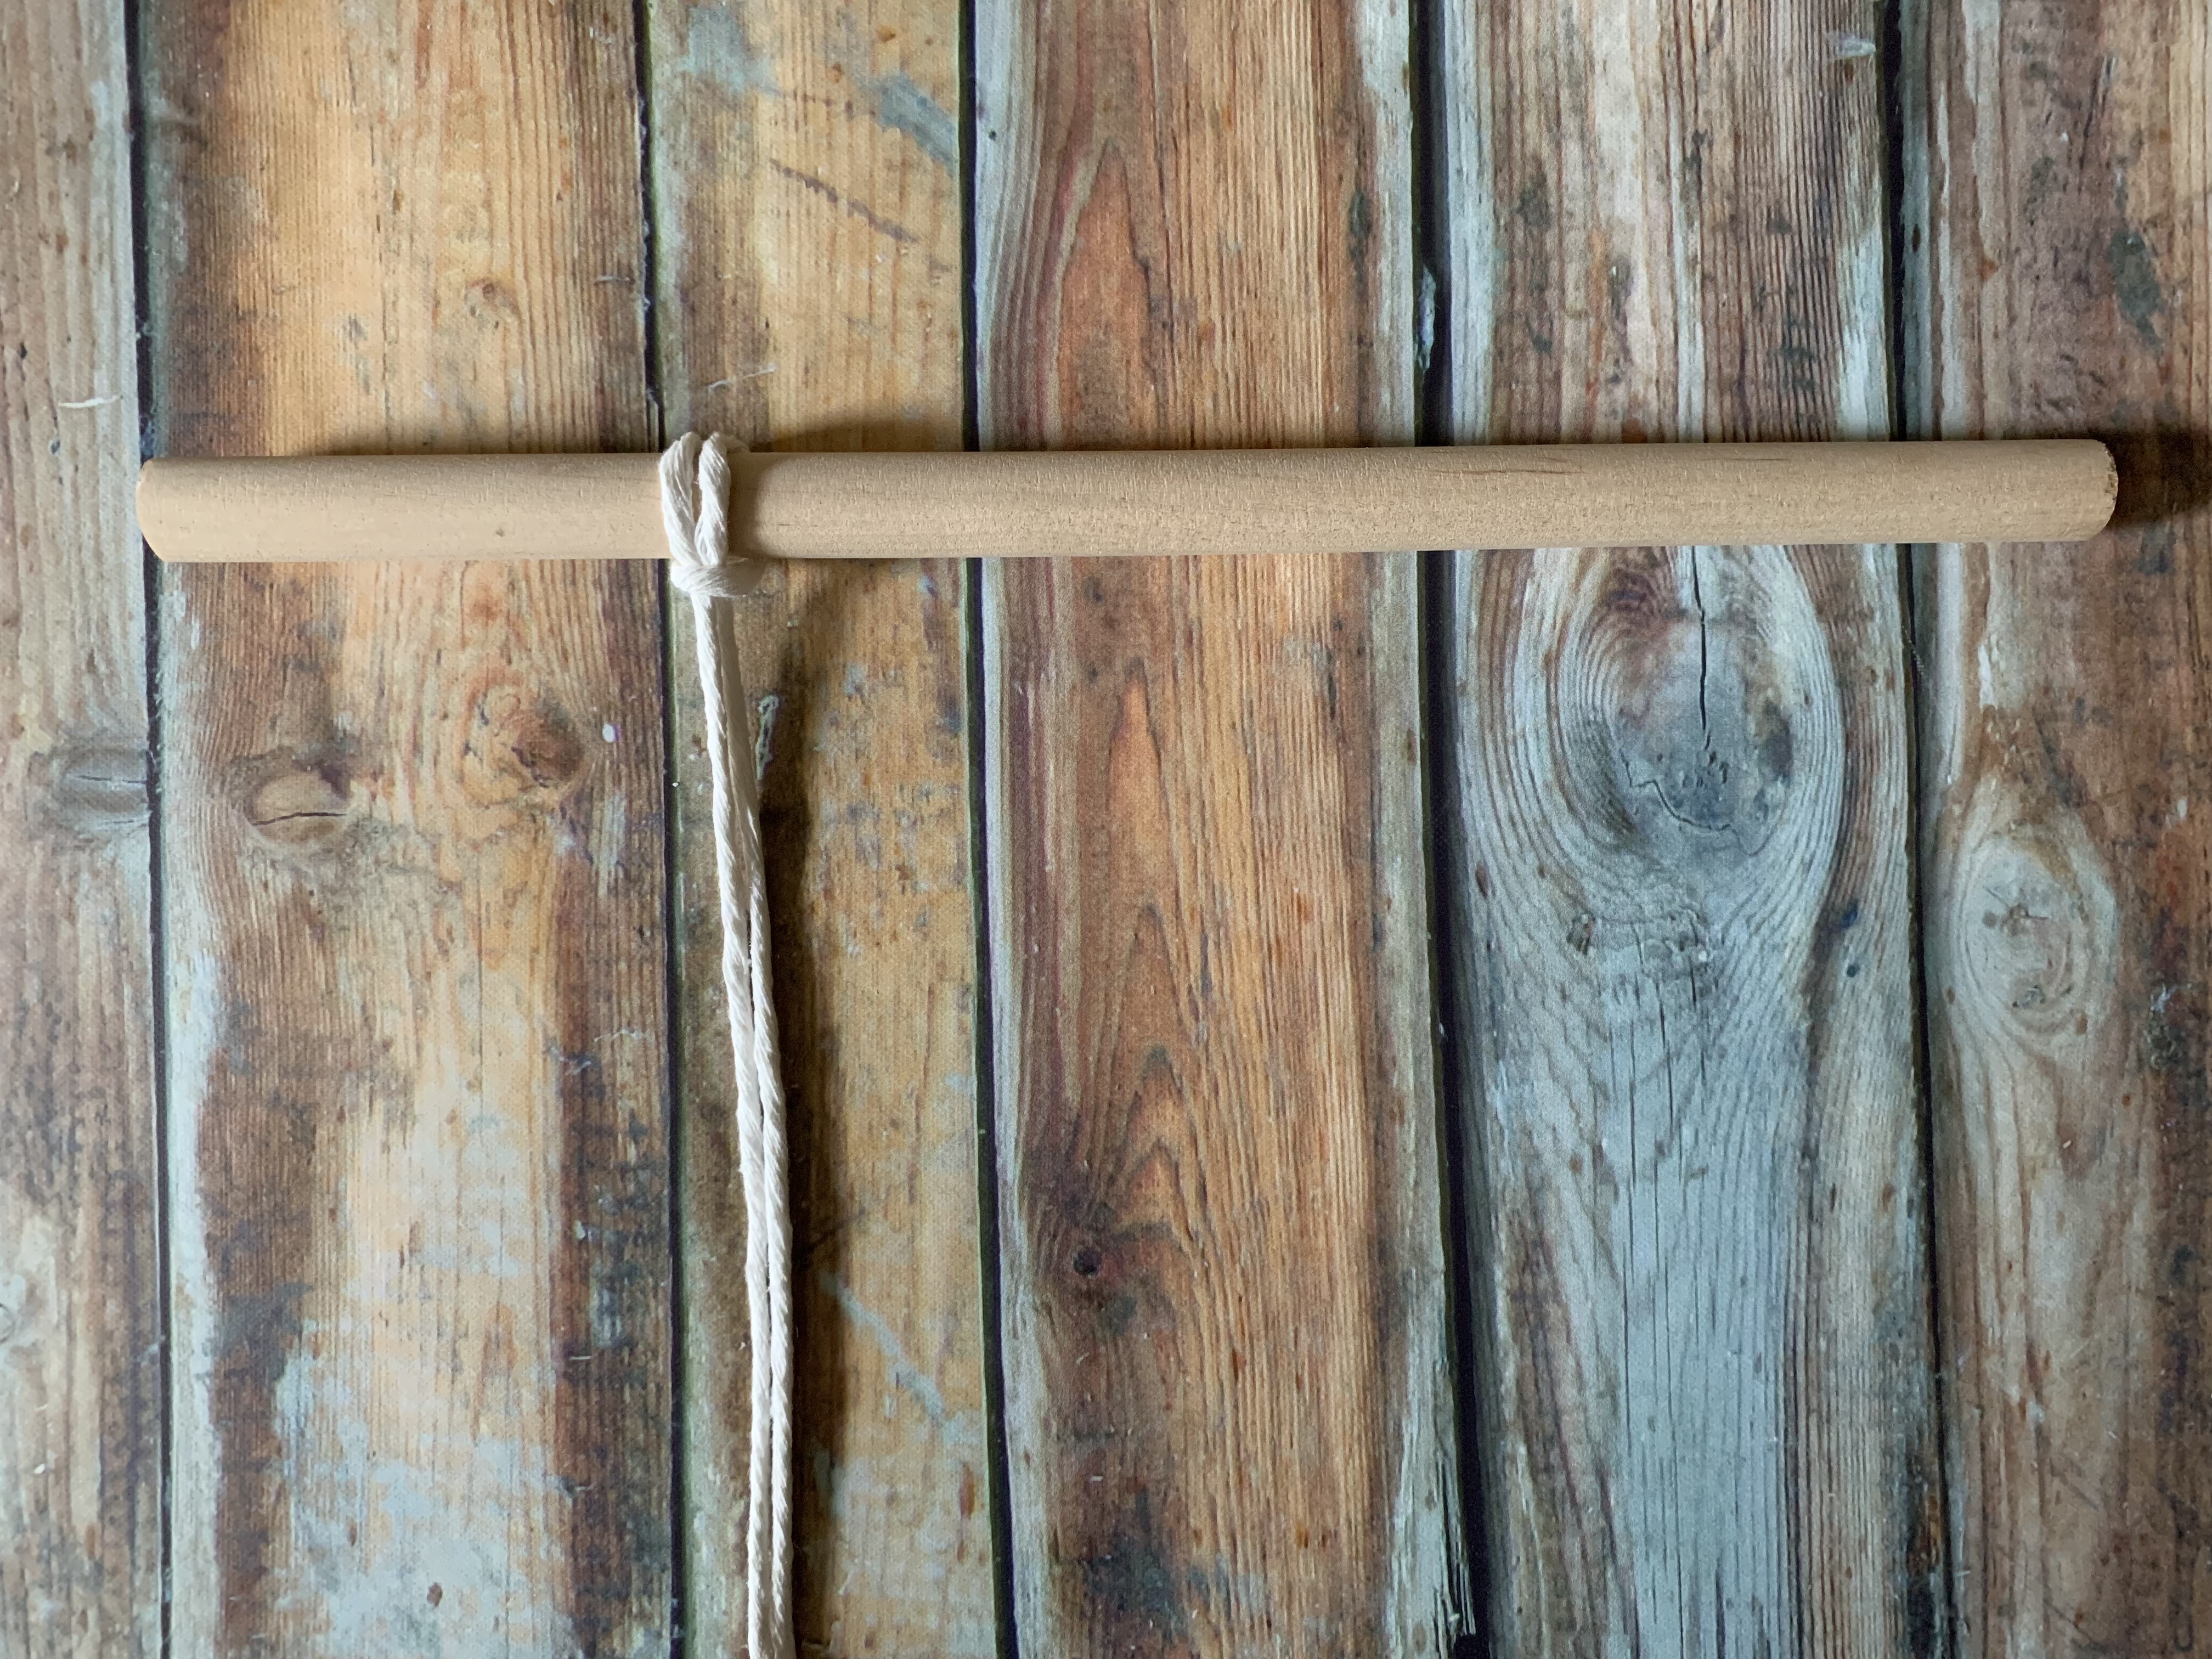
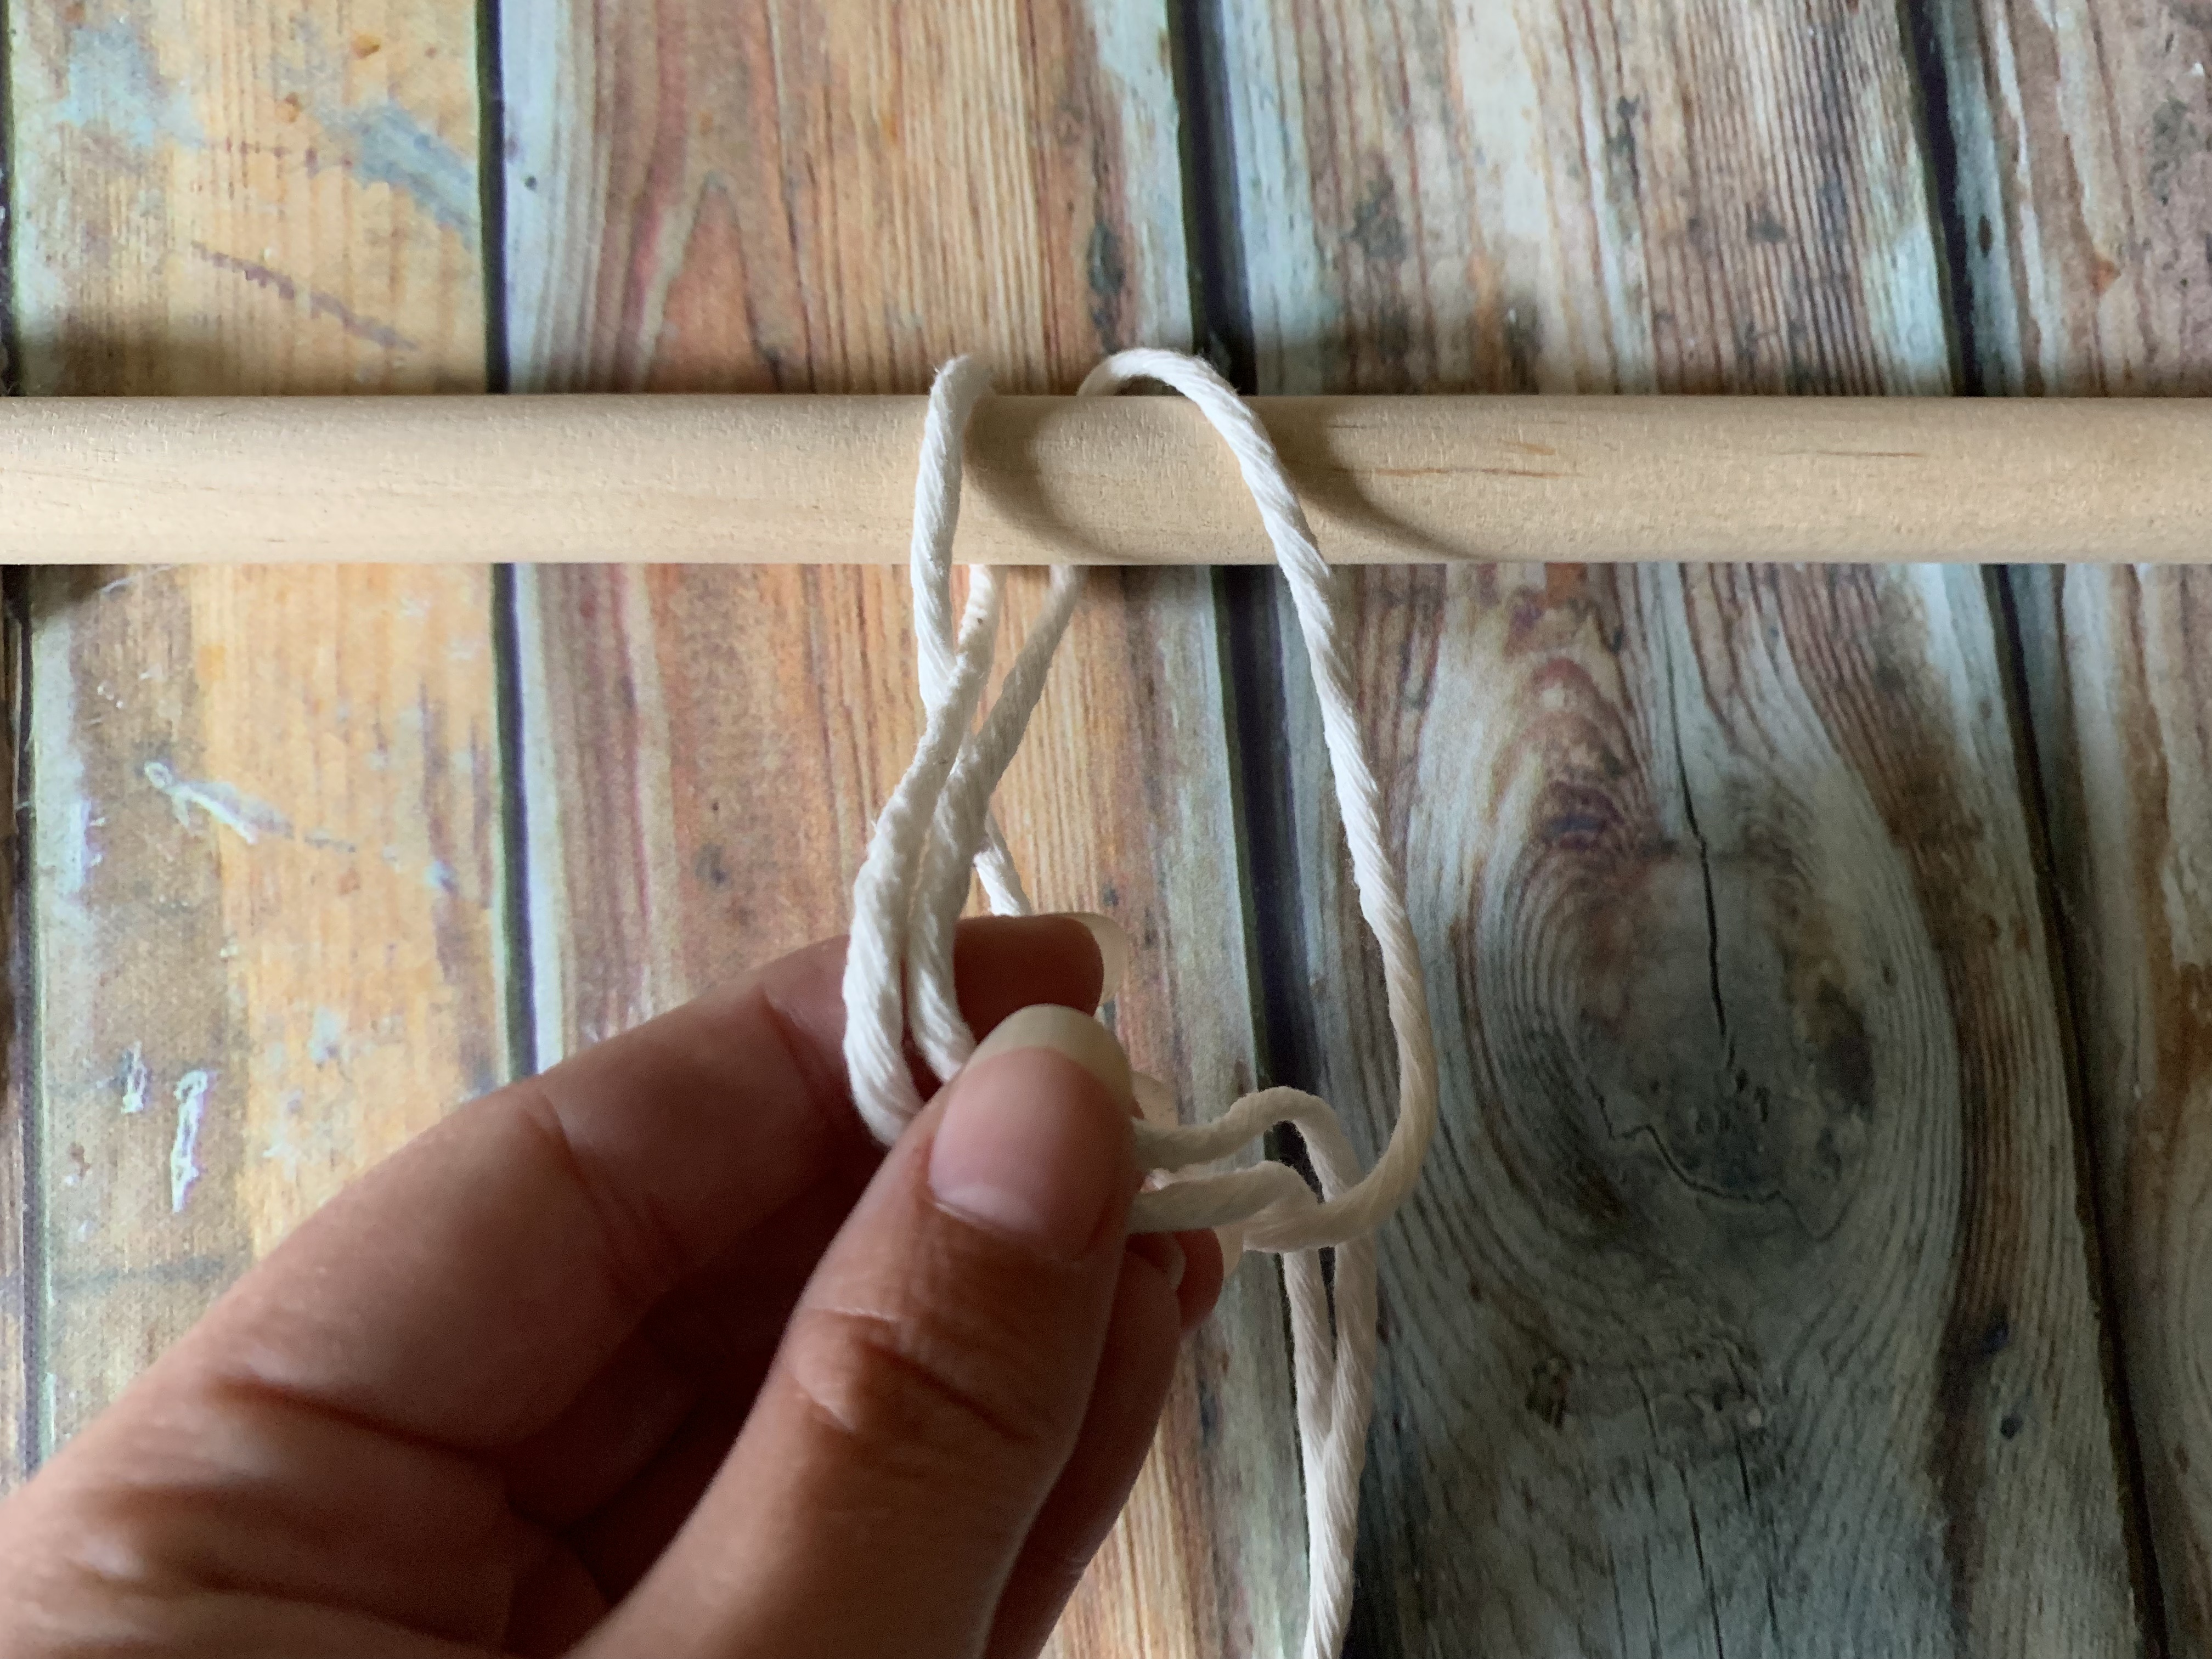
4. Pull the cord in front of the dowel through the loop

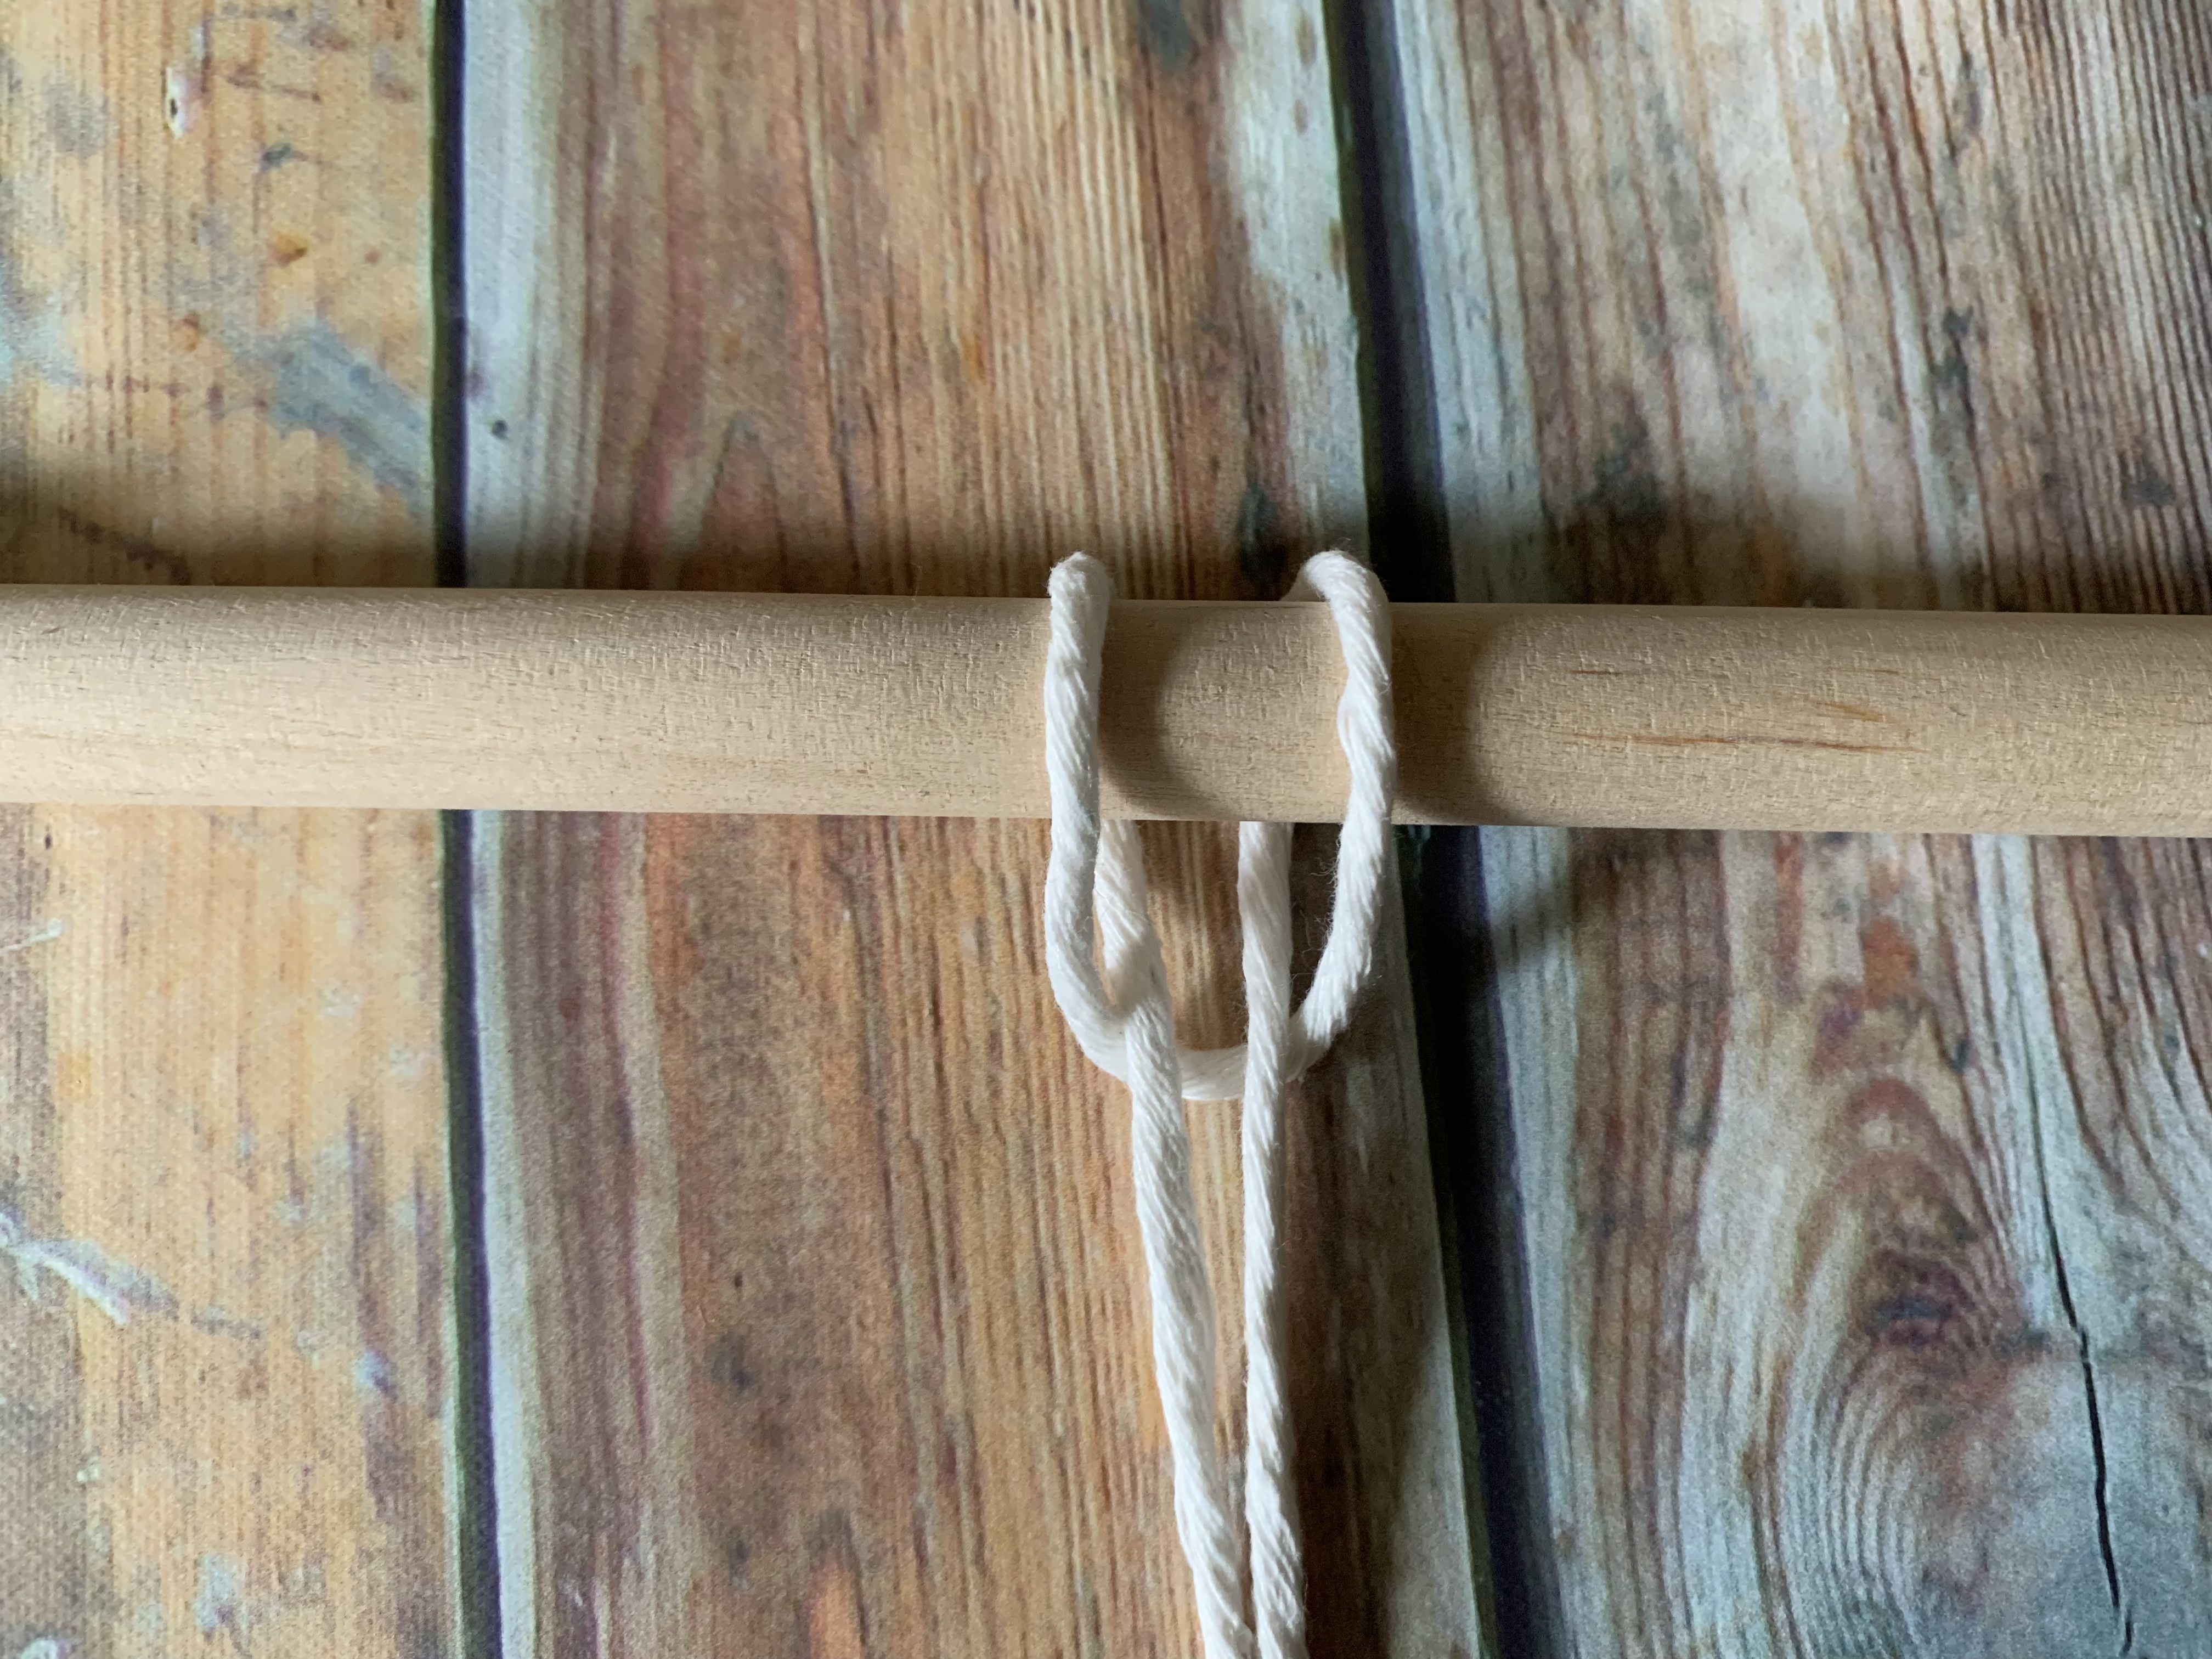
5. Pull to tighten so the loop/knot it flush against the dowel
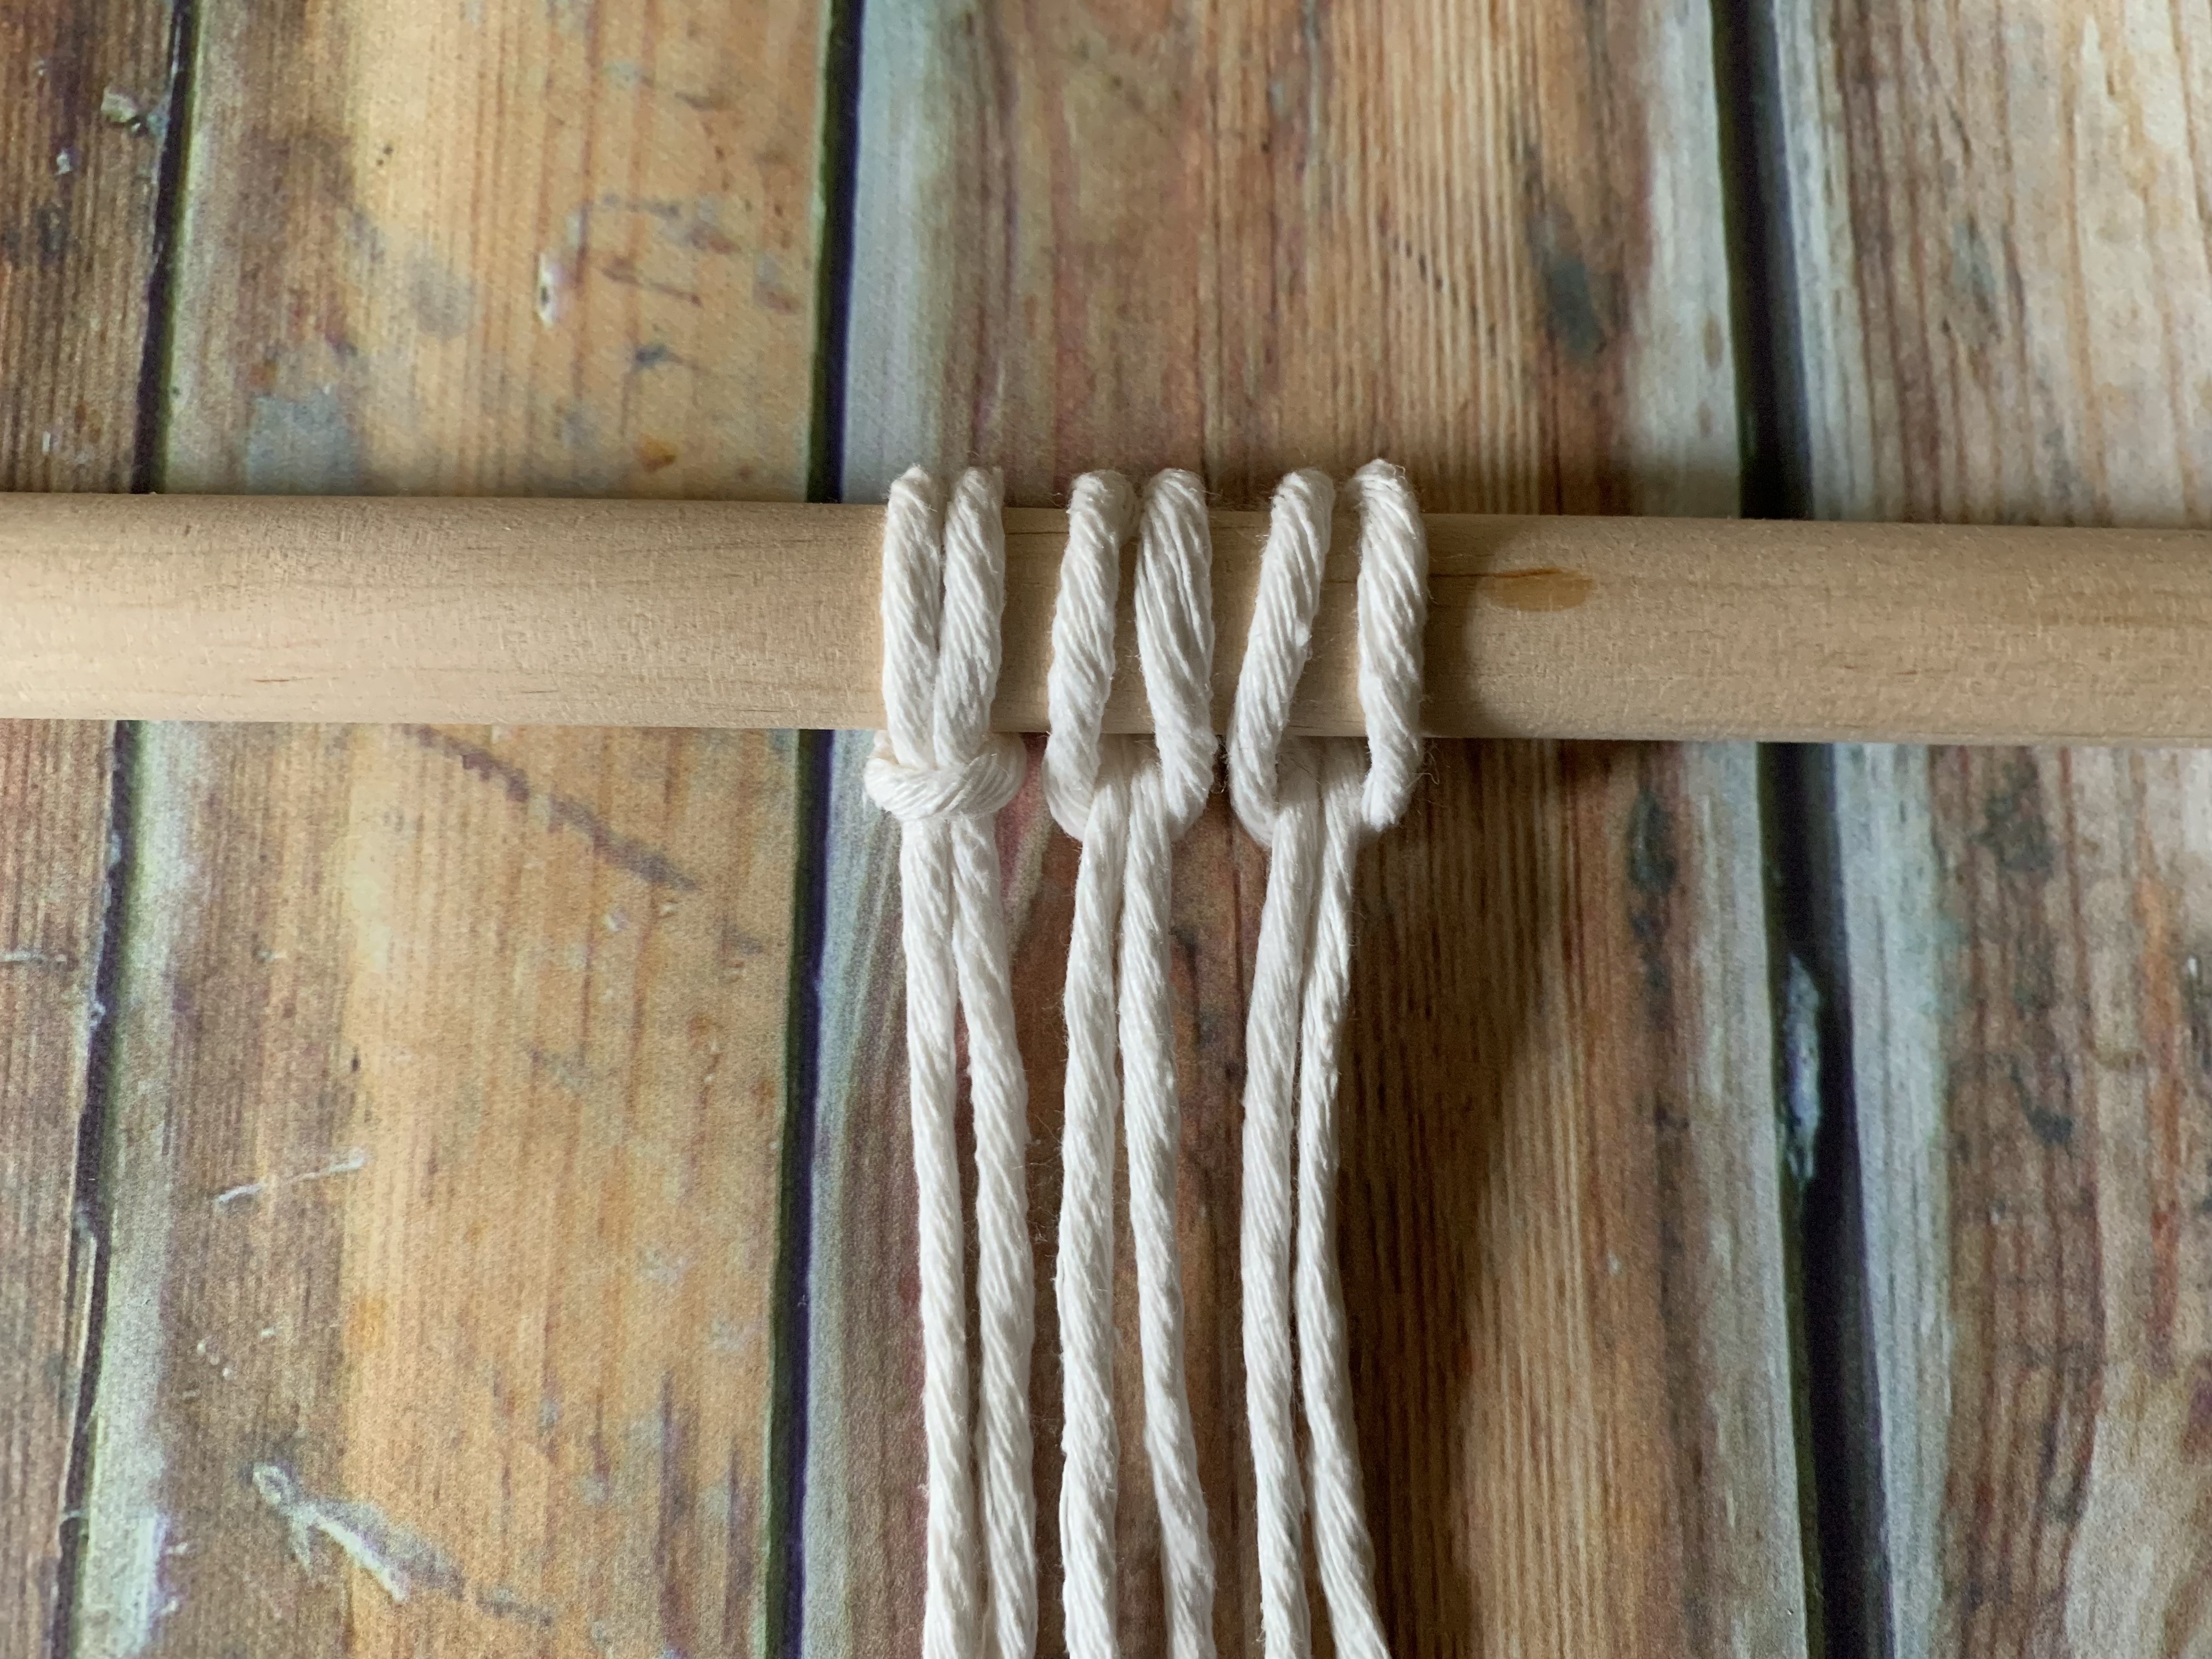
Repeat this process with each cord until you have the desired number on your dowel.
Alternatively, you could attach cord to a dowel with a reverse larks head knot. Instead of the loop going over and behind the dowel, place your cord behind the dowel and bring it up and over the top. Here is an example of how that would look. In the last photo you can see the difference. If you flip the dowel over, you will get the opposite; two larks head knots and one reverse larks head knot.
I appreciate you taking the time to check out this post and I hope this tutorial was helpful. Please subscribe to get alerted of new tutorials are posted.
You can also check out my IG @That_Yarn_Life for examples of my work, my Etsy Shop to purchase my work, and my YouTube which has video tutorials, if you prefer that over step by step with photos.