Double Half Hitch Knot Tutorial
The double half hitch knot can be used to create lines and shapes. I found this to be tricky when starting out, but once you get the hang of it, it becomes natural feeling and very easy to remember. You can do this from left to right or vice versa, swapping the direction of where you pull the cord through depending on which direction you are going.
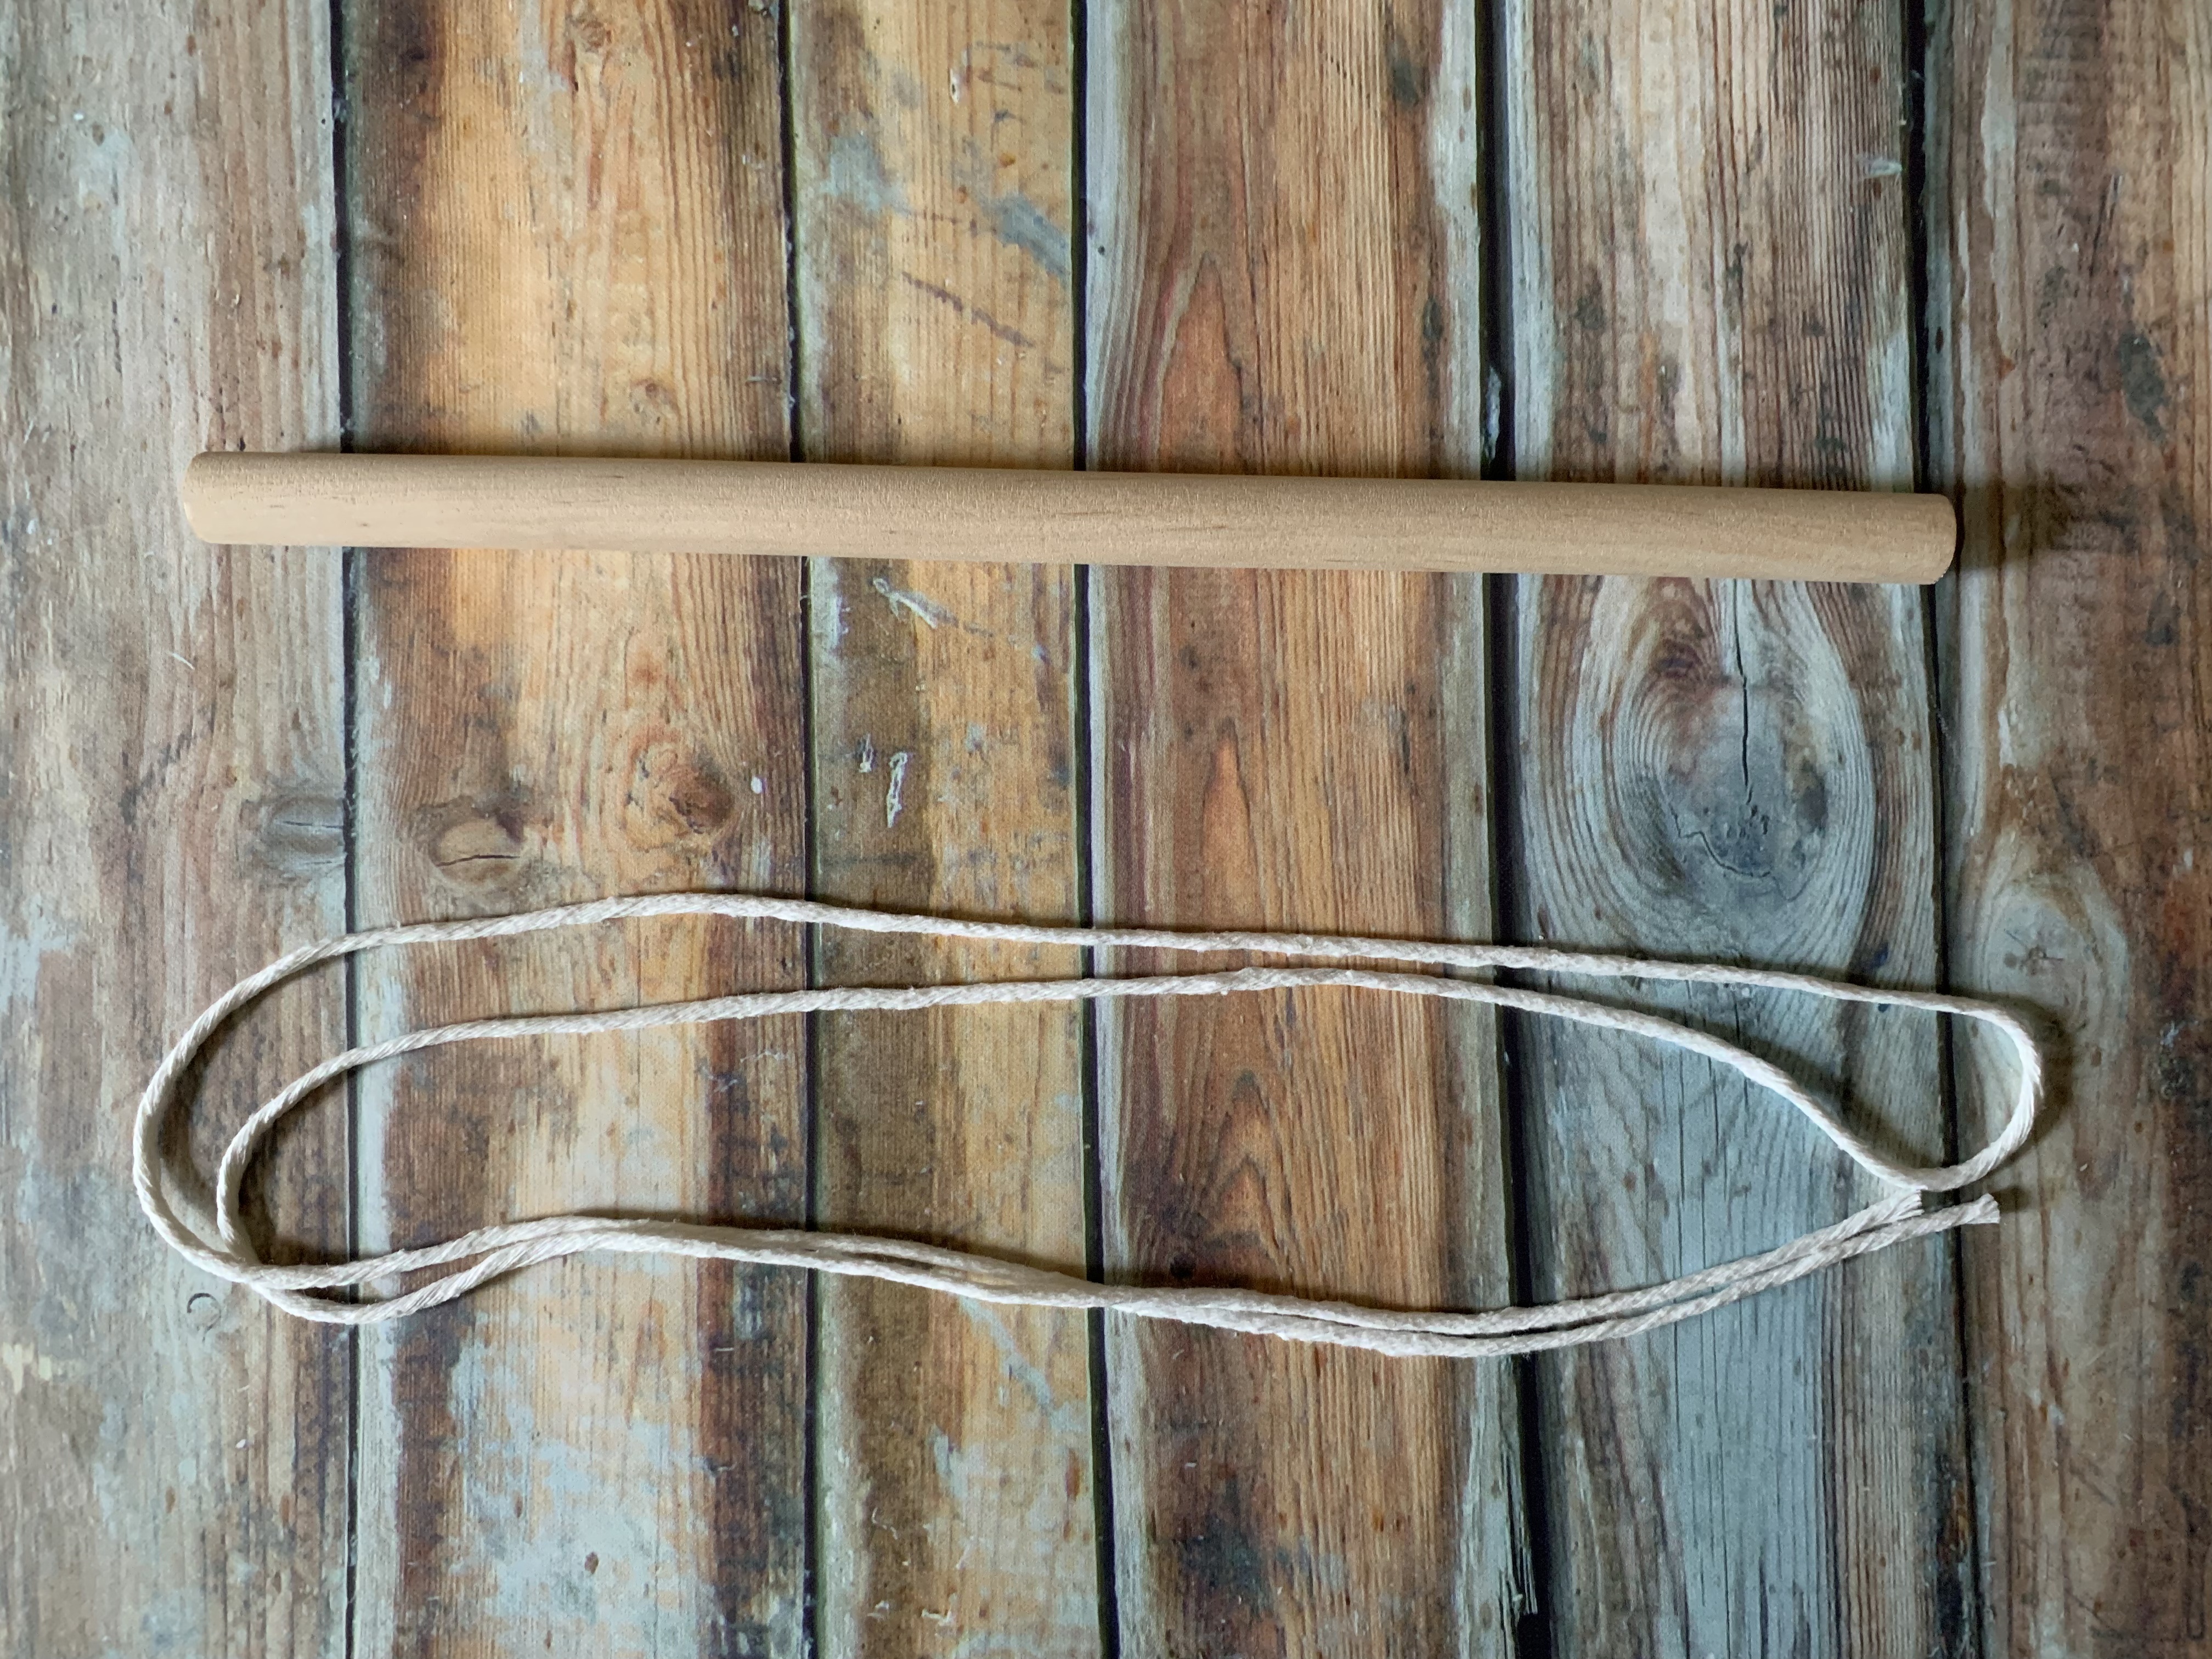
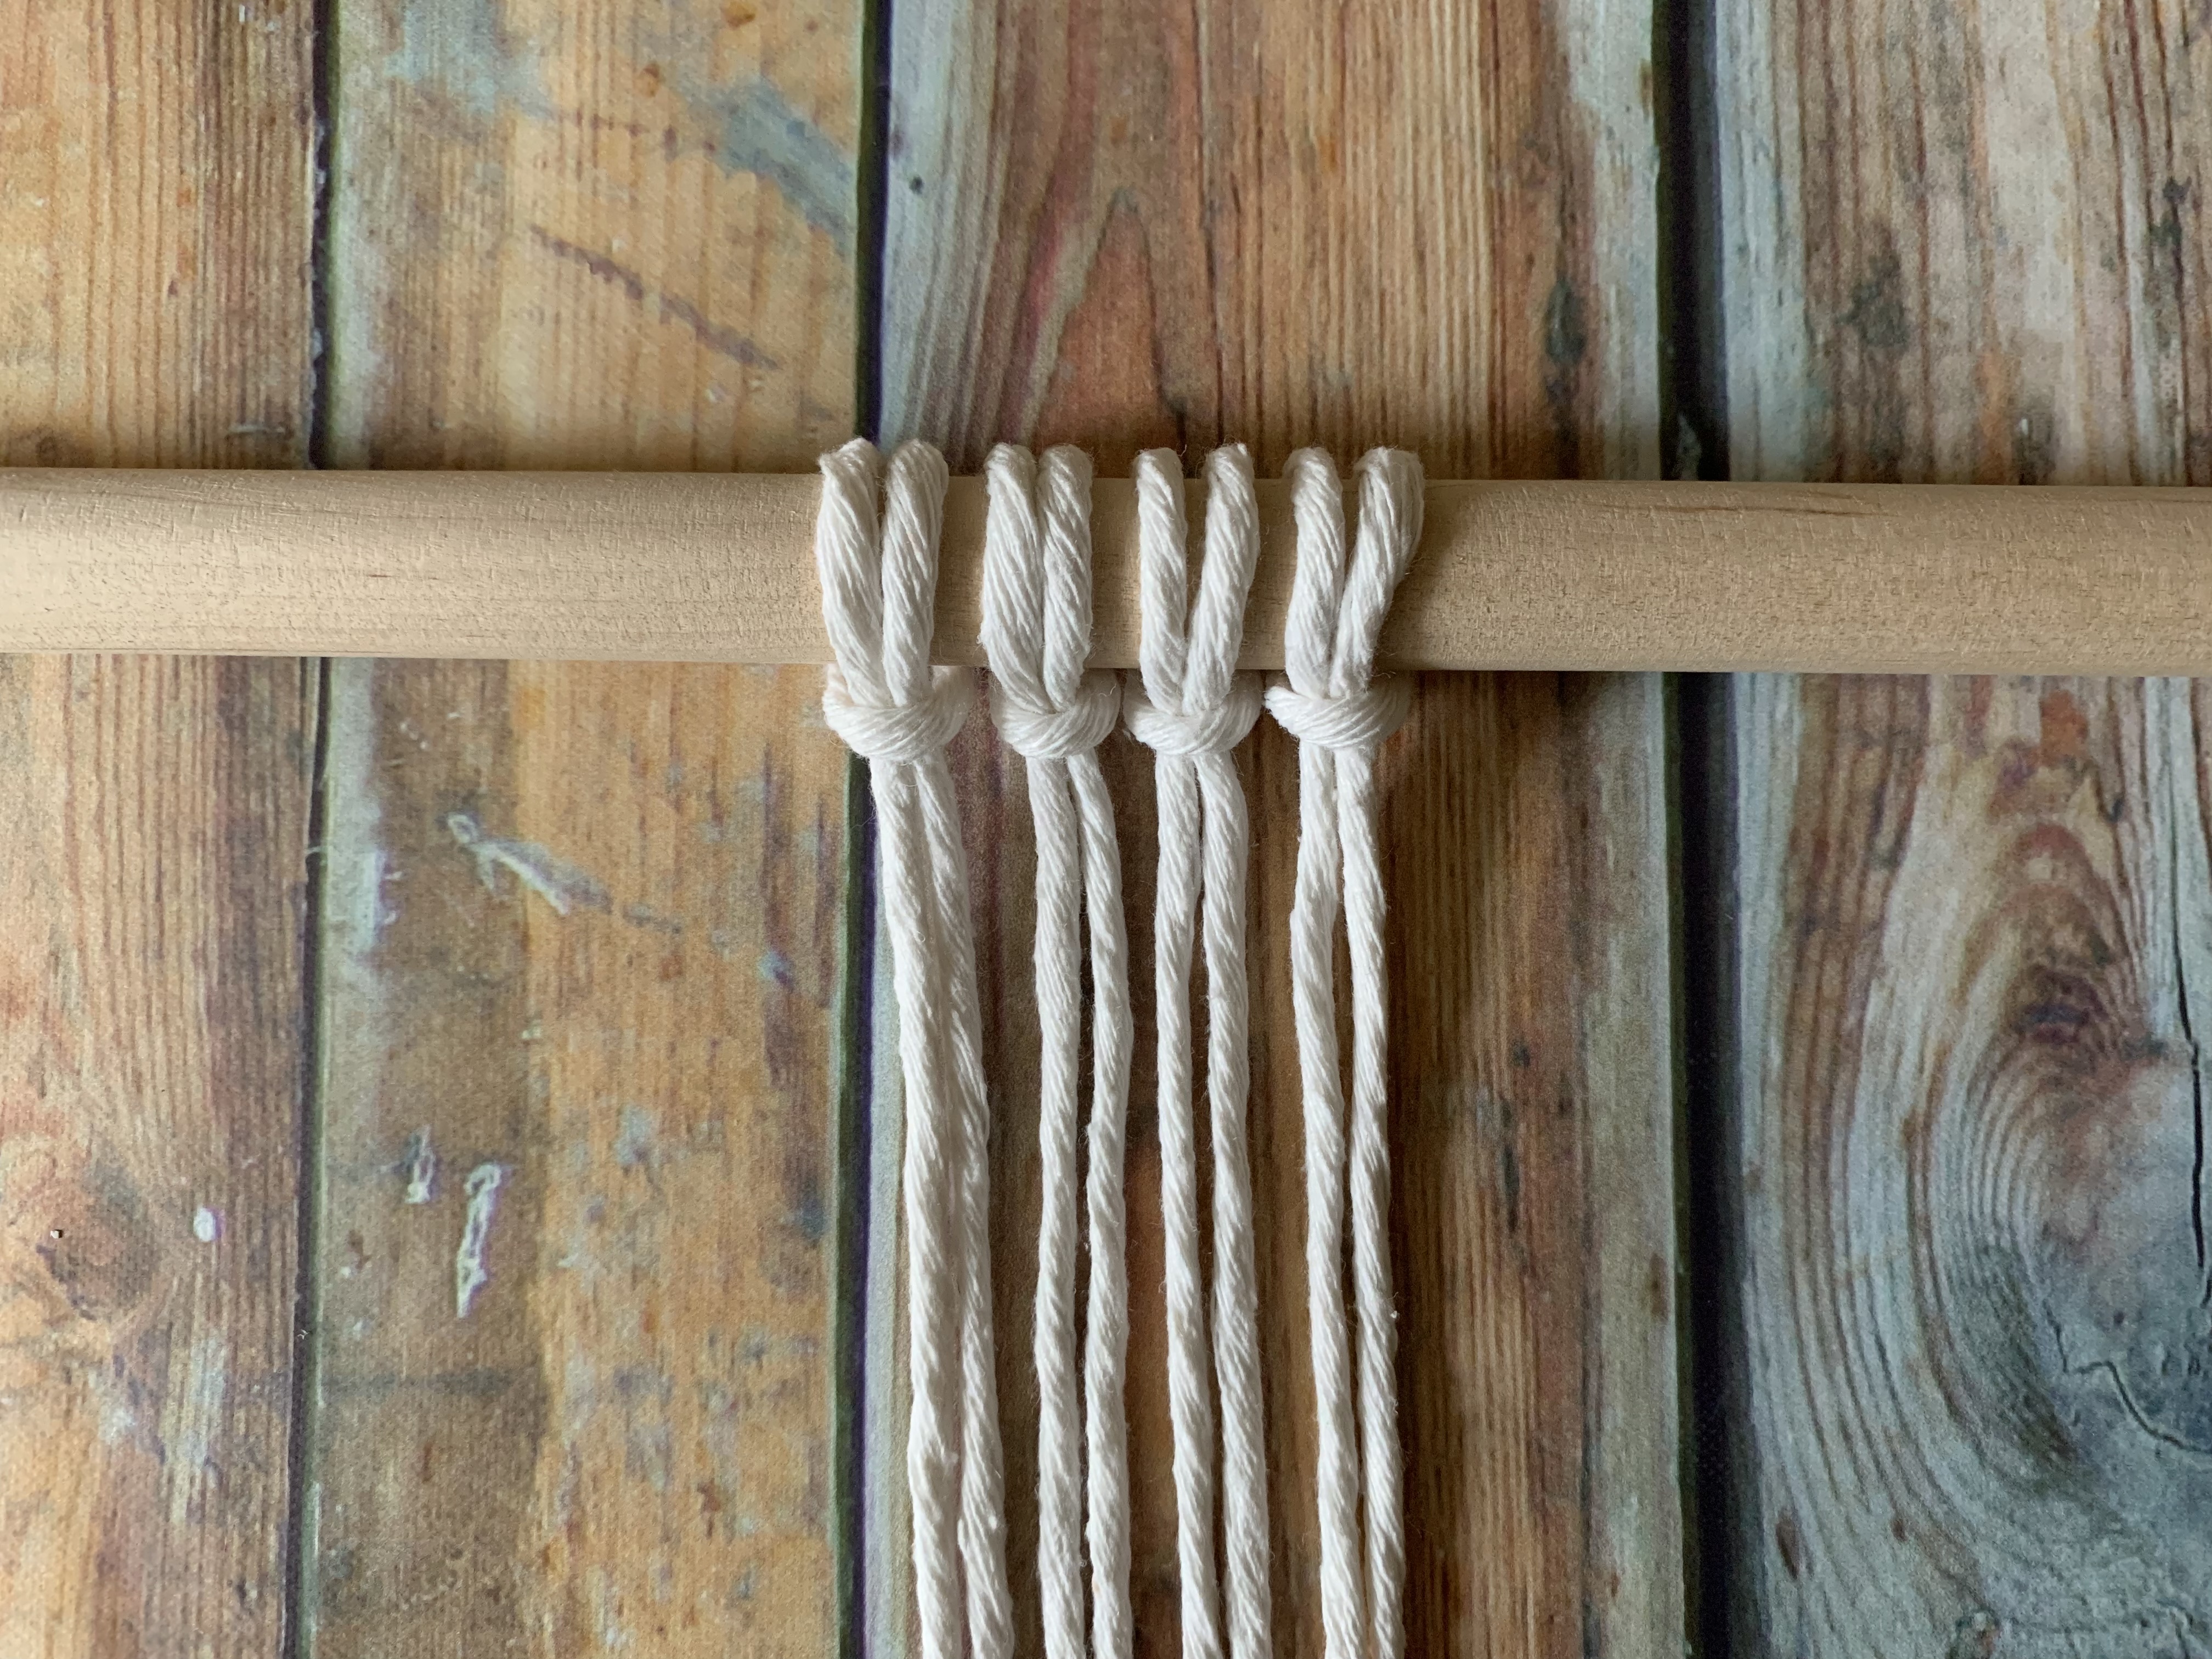
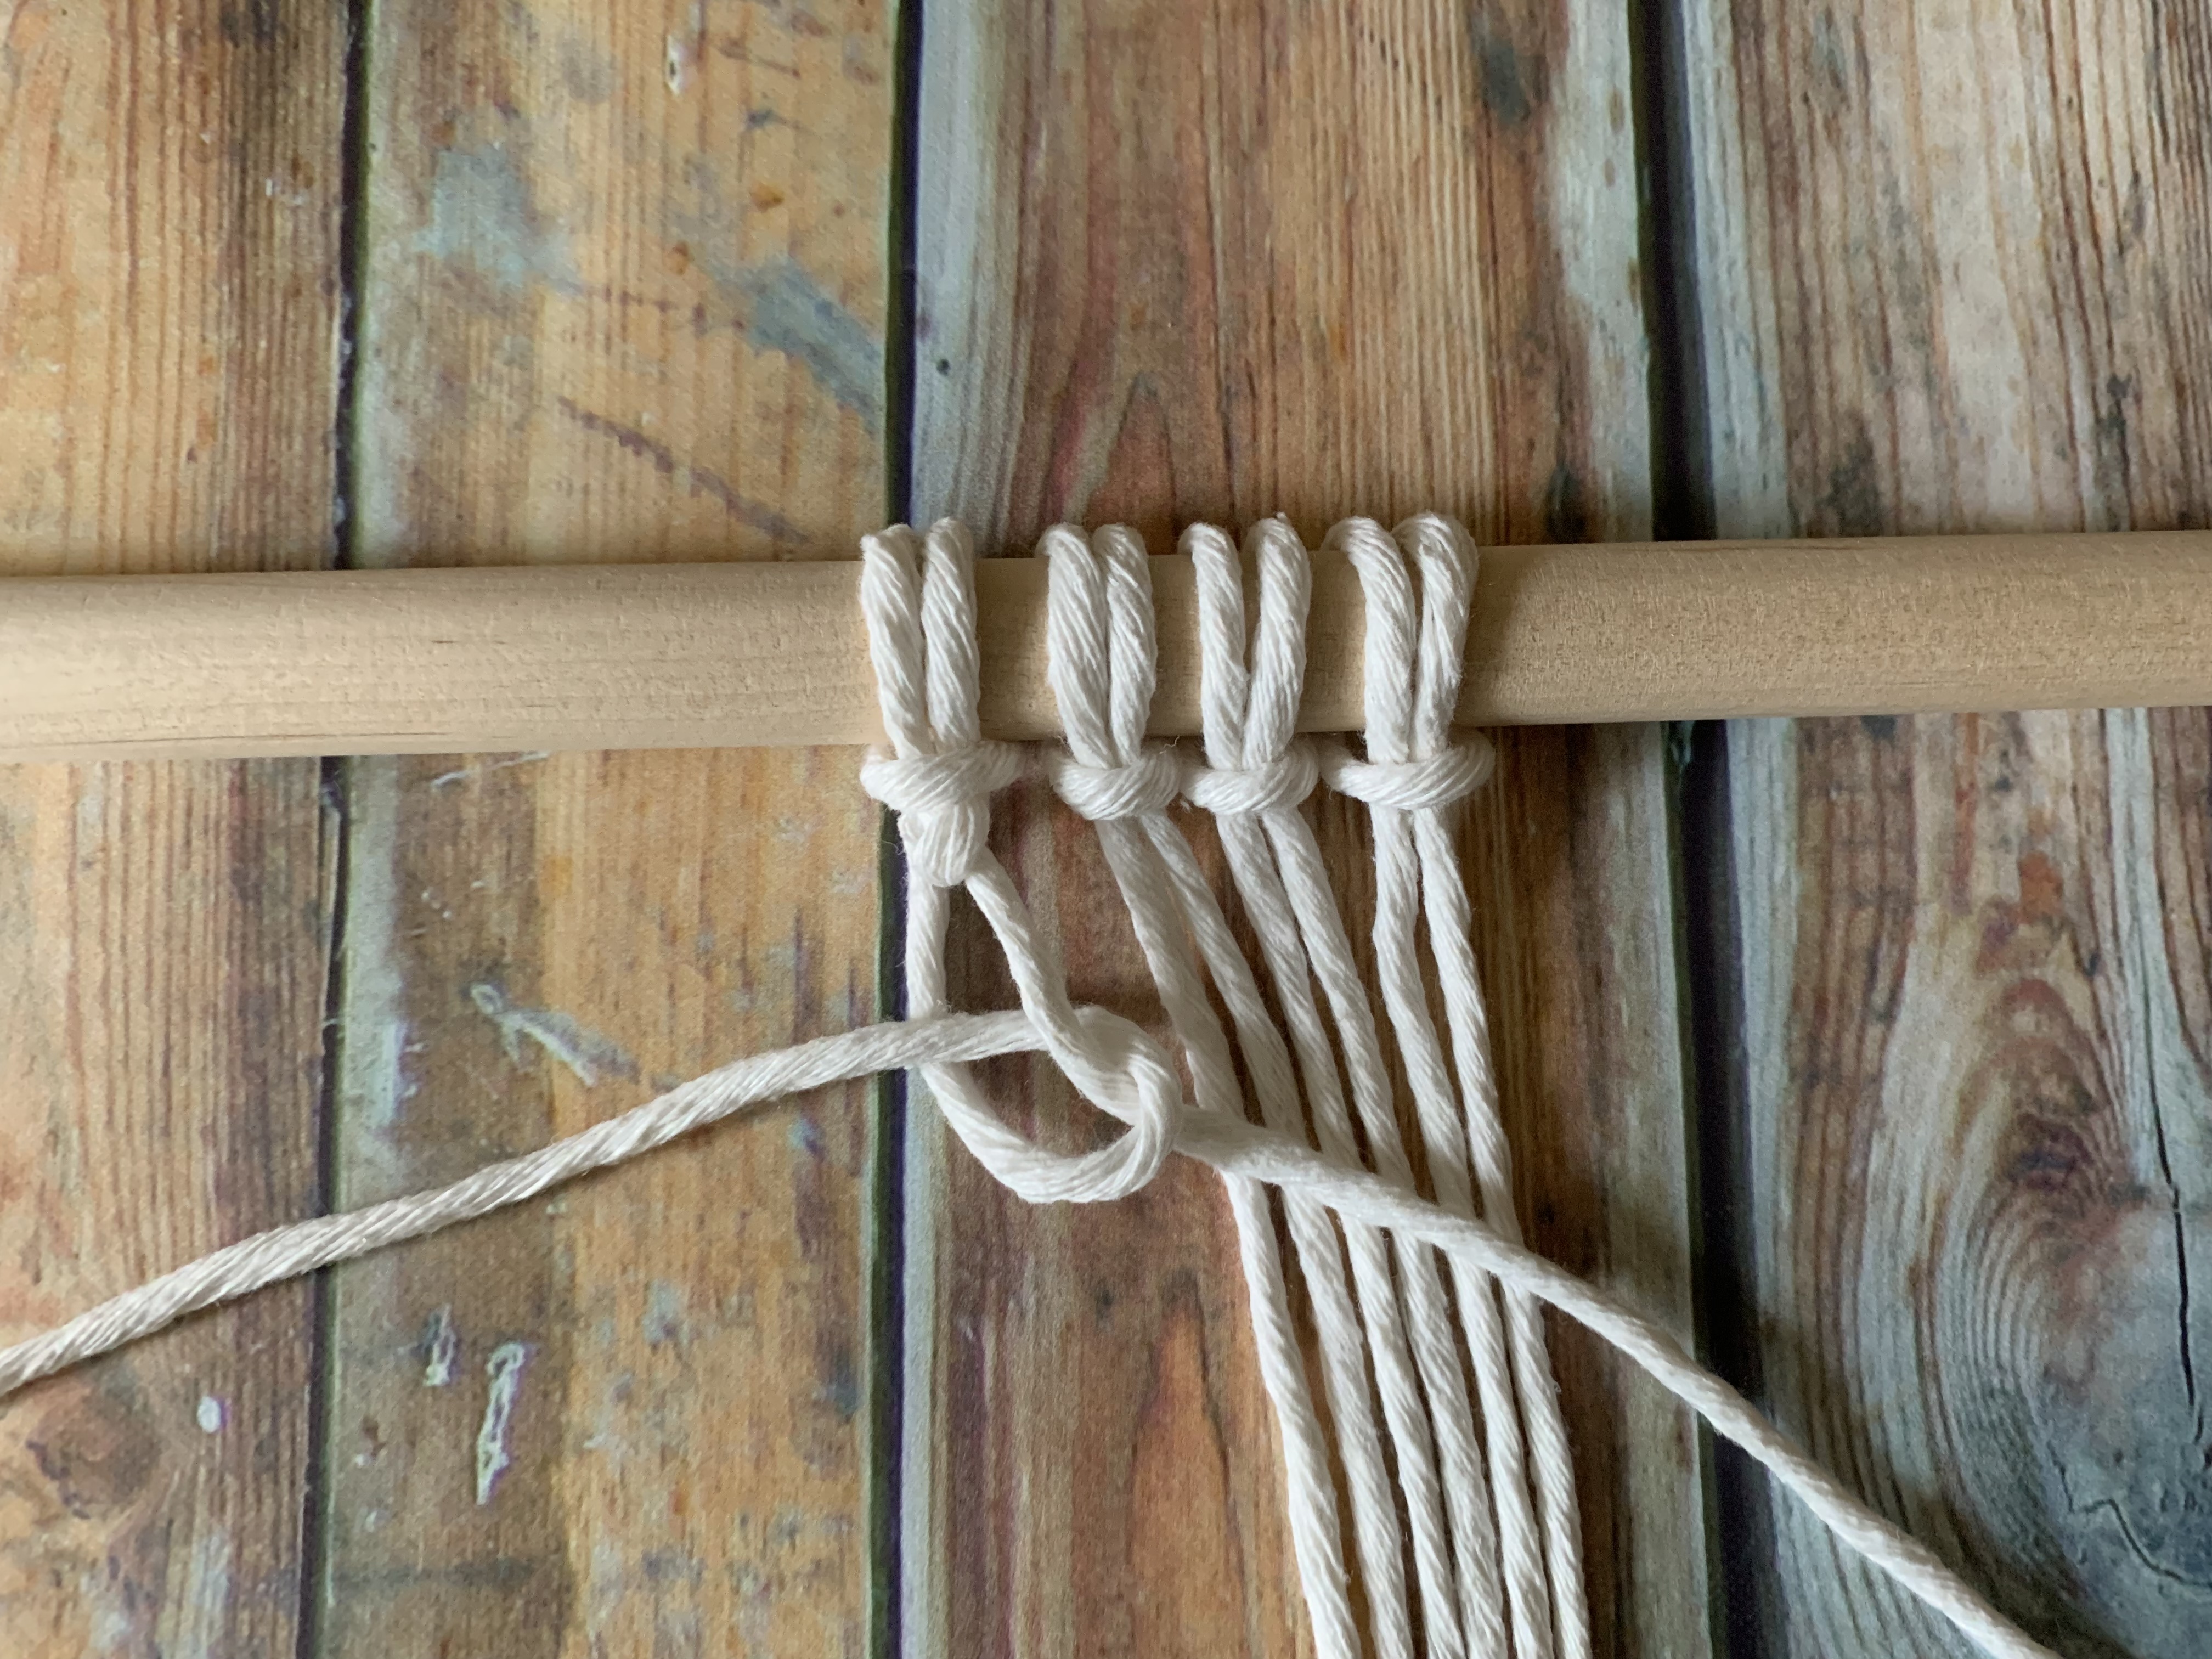
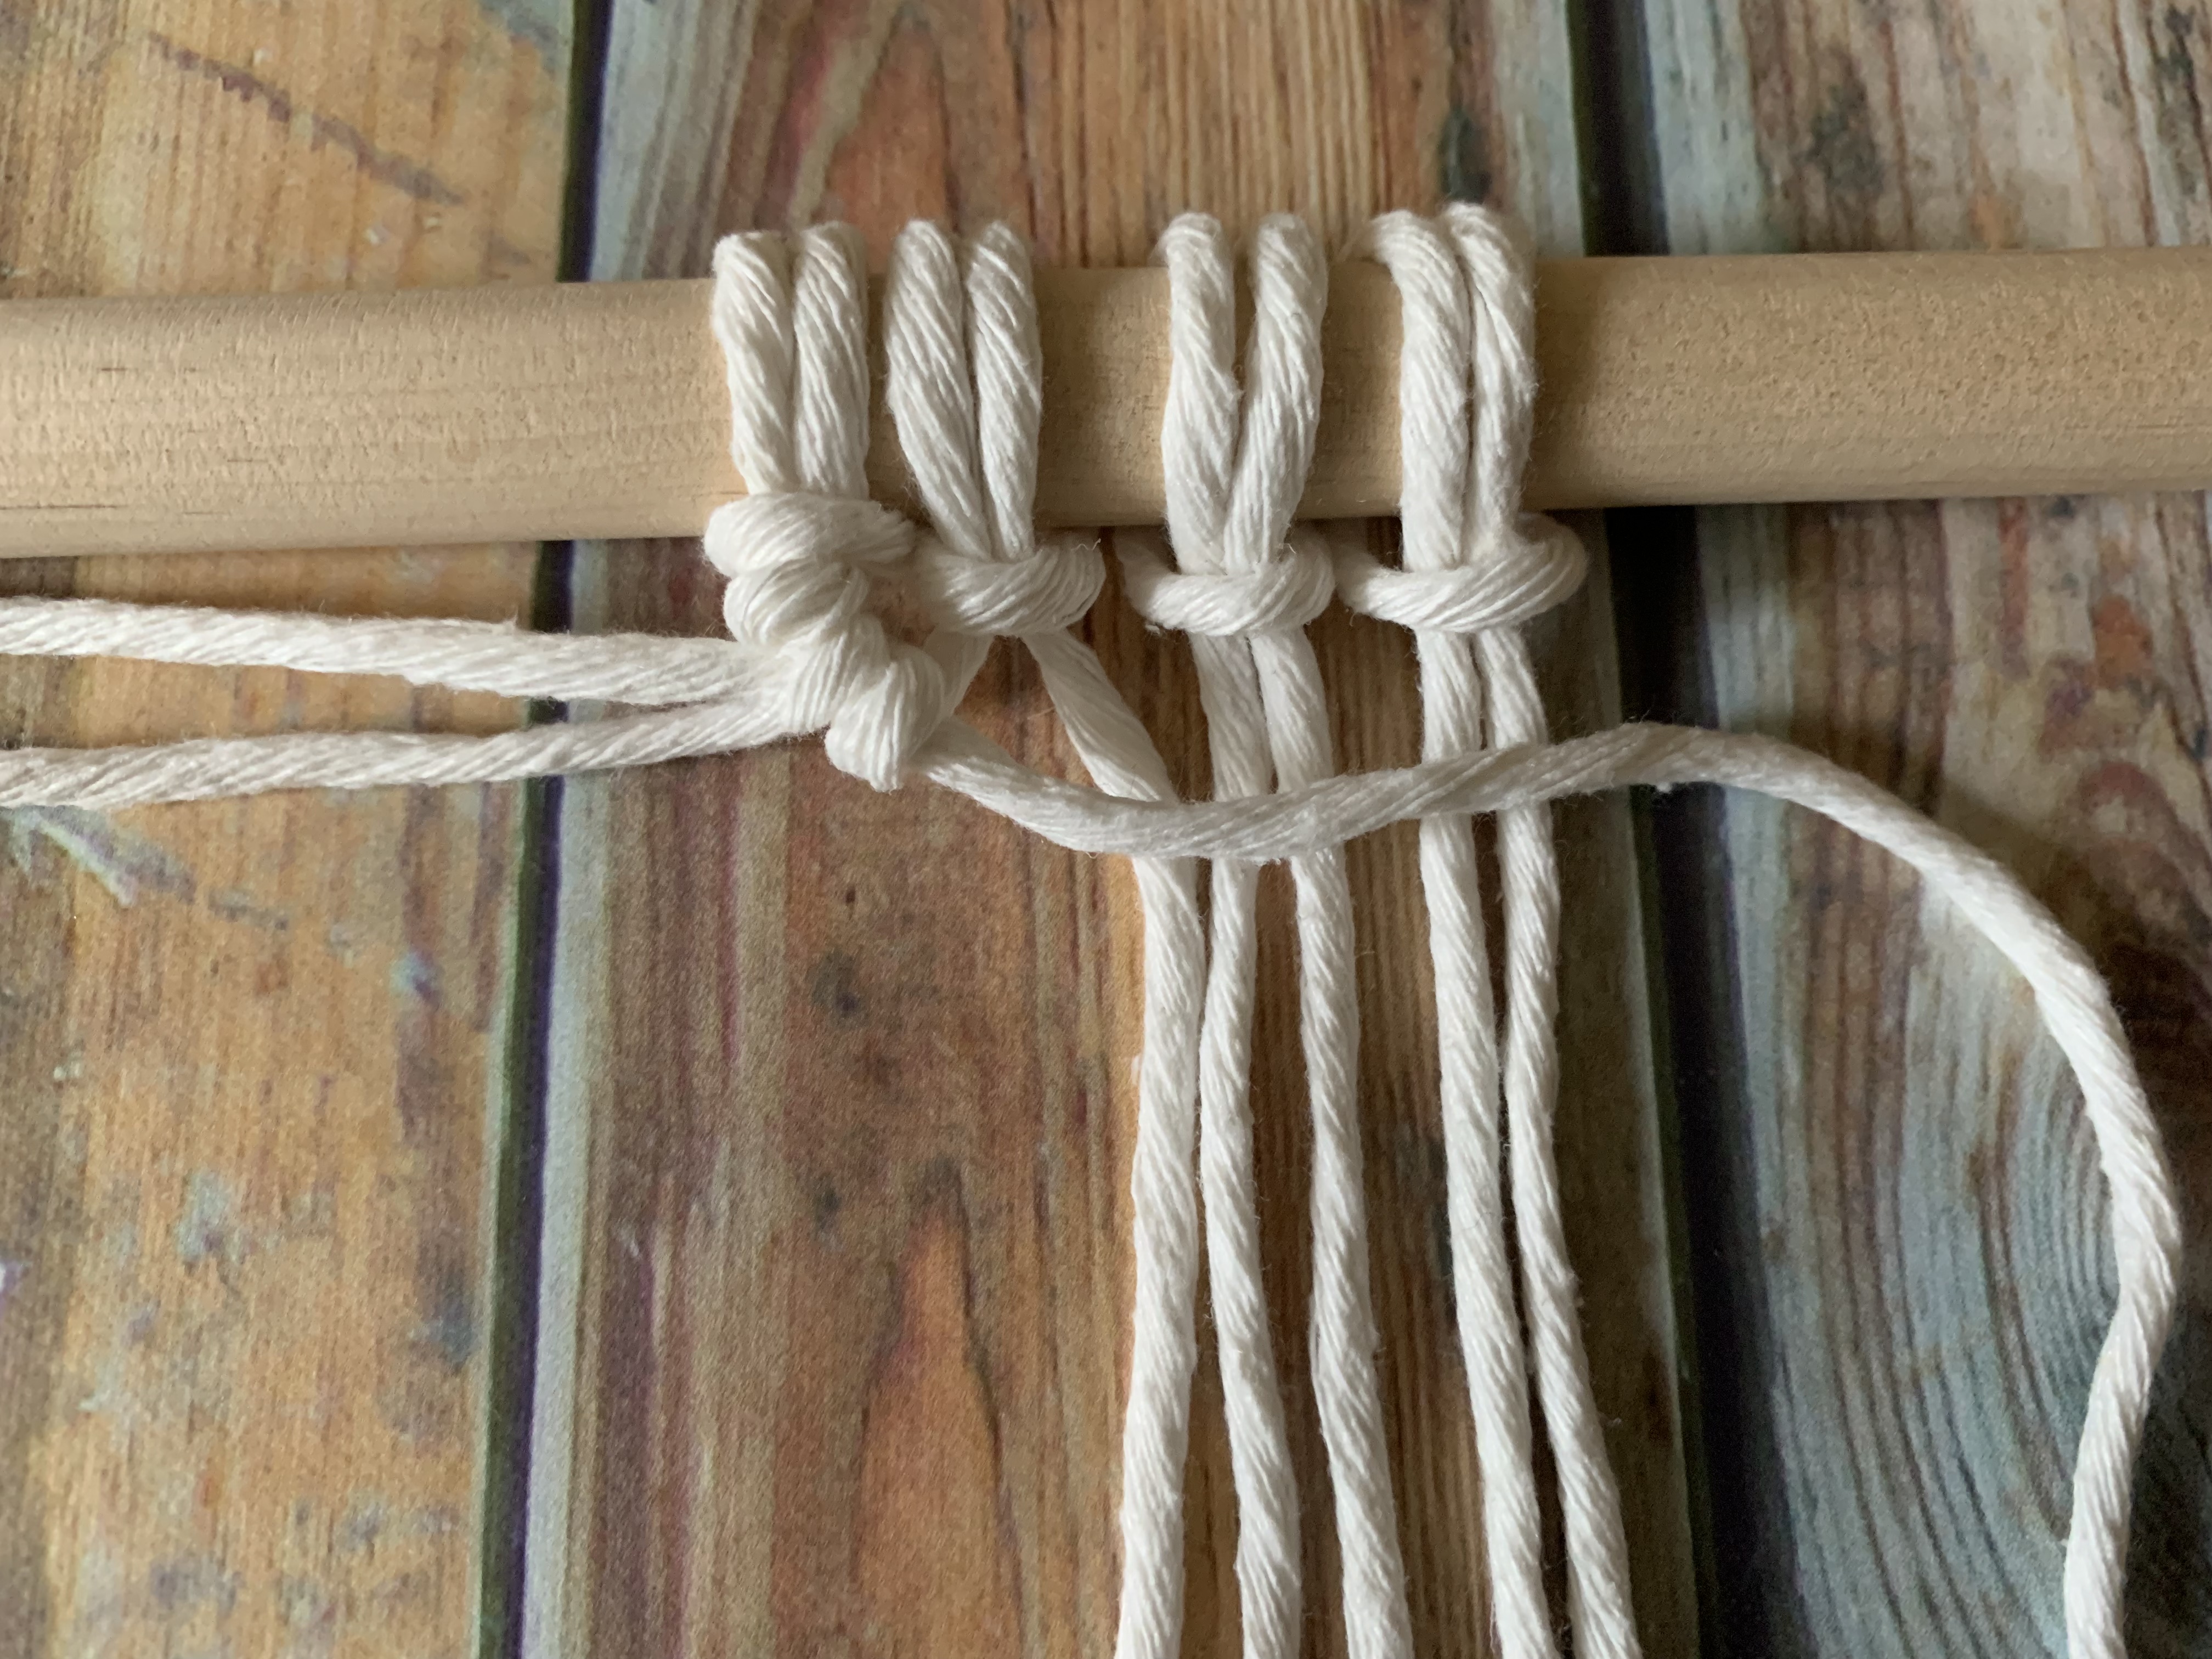
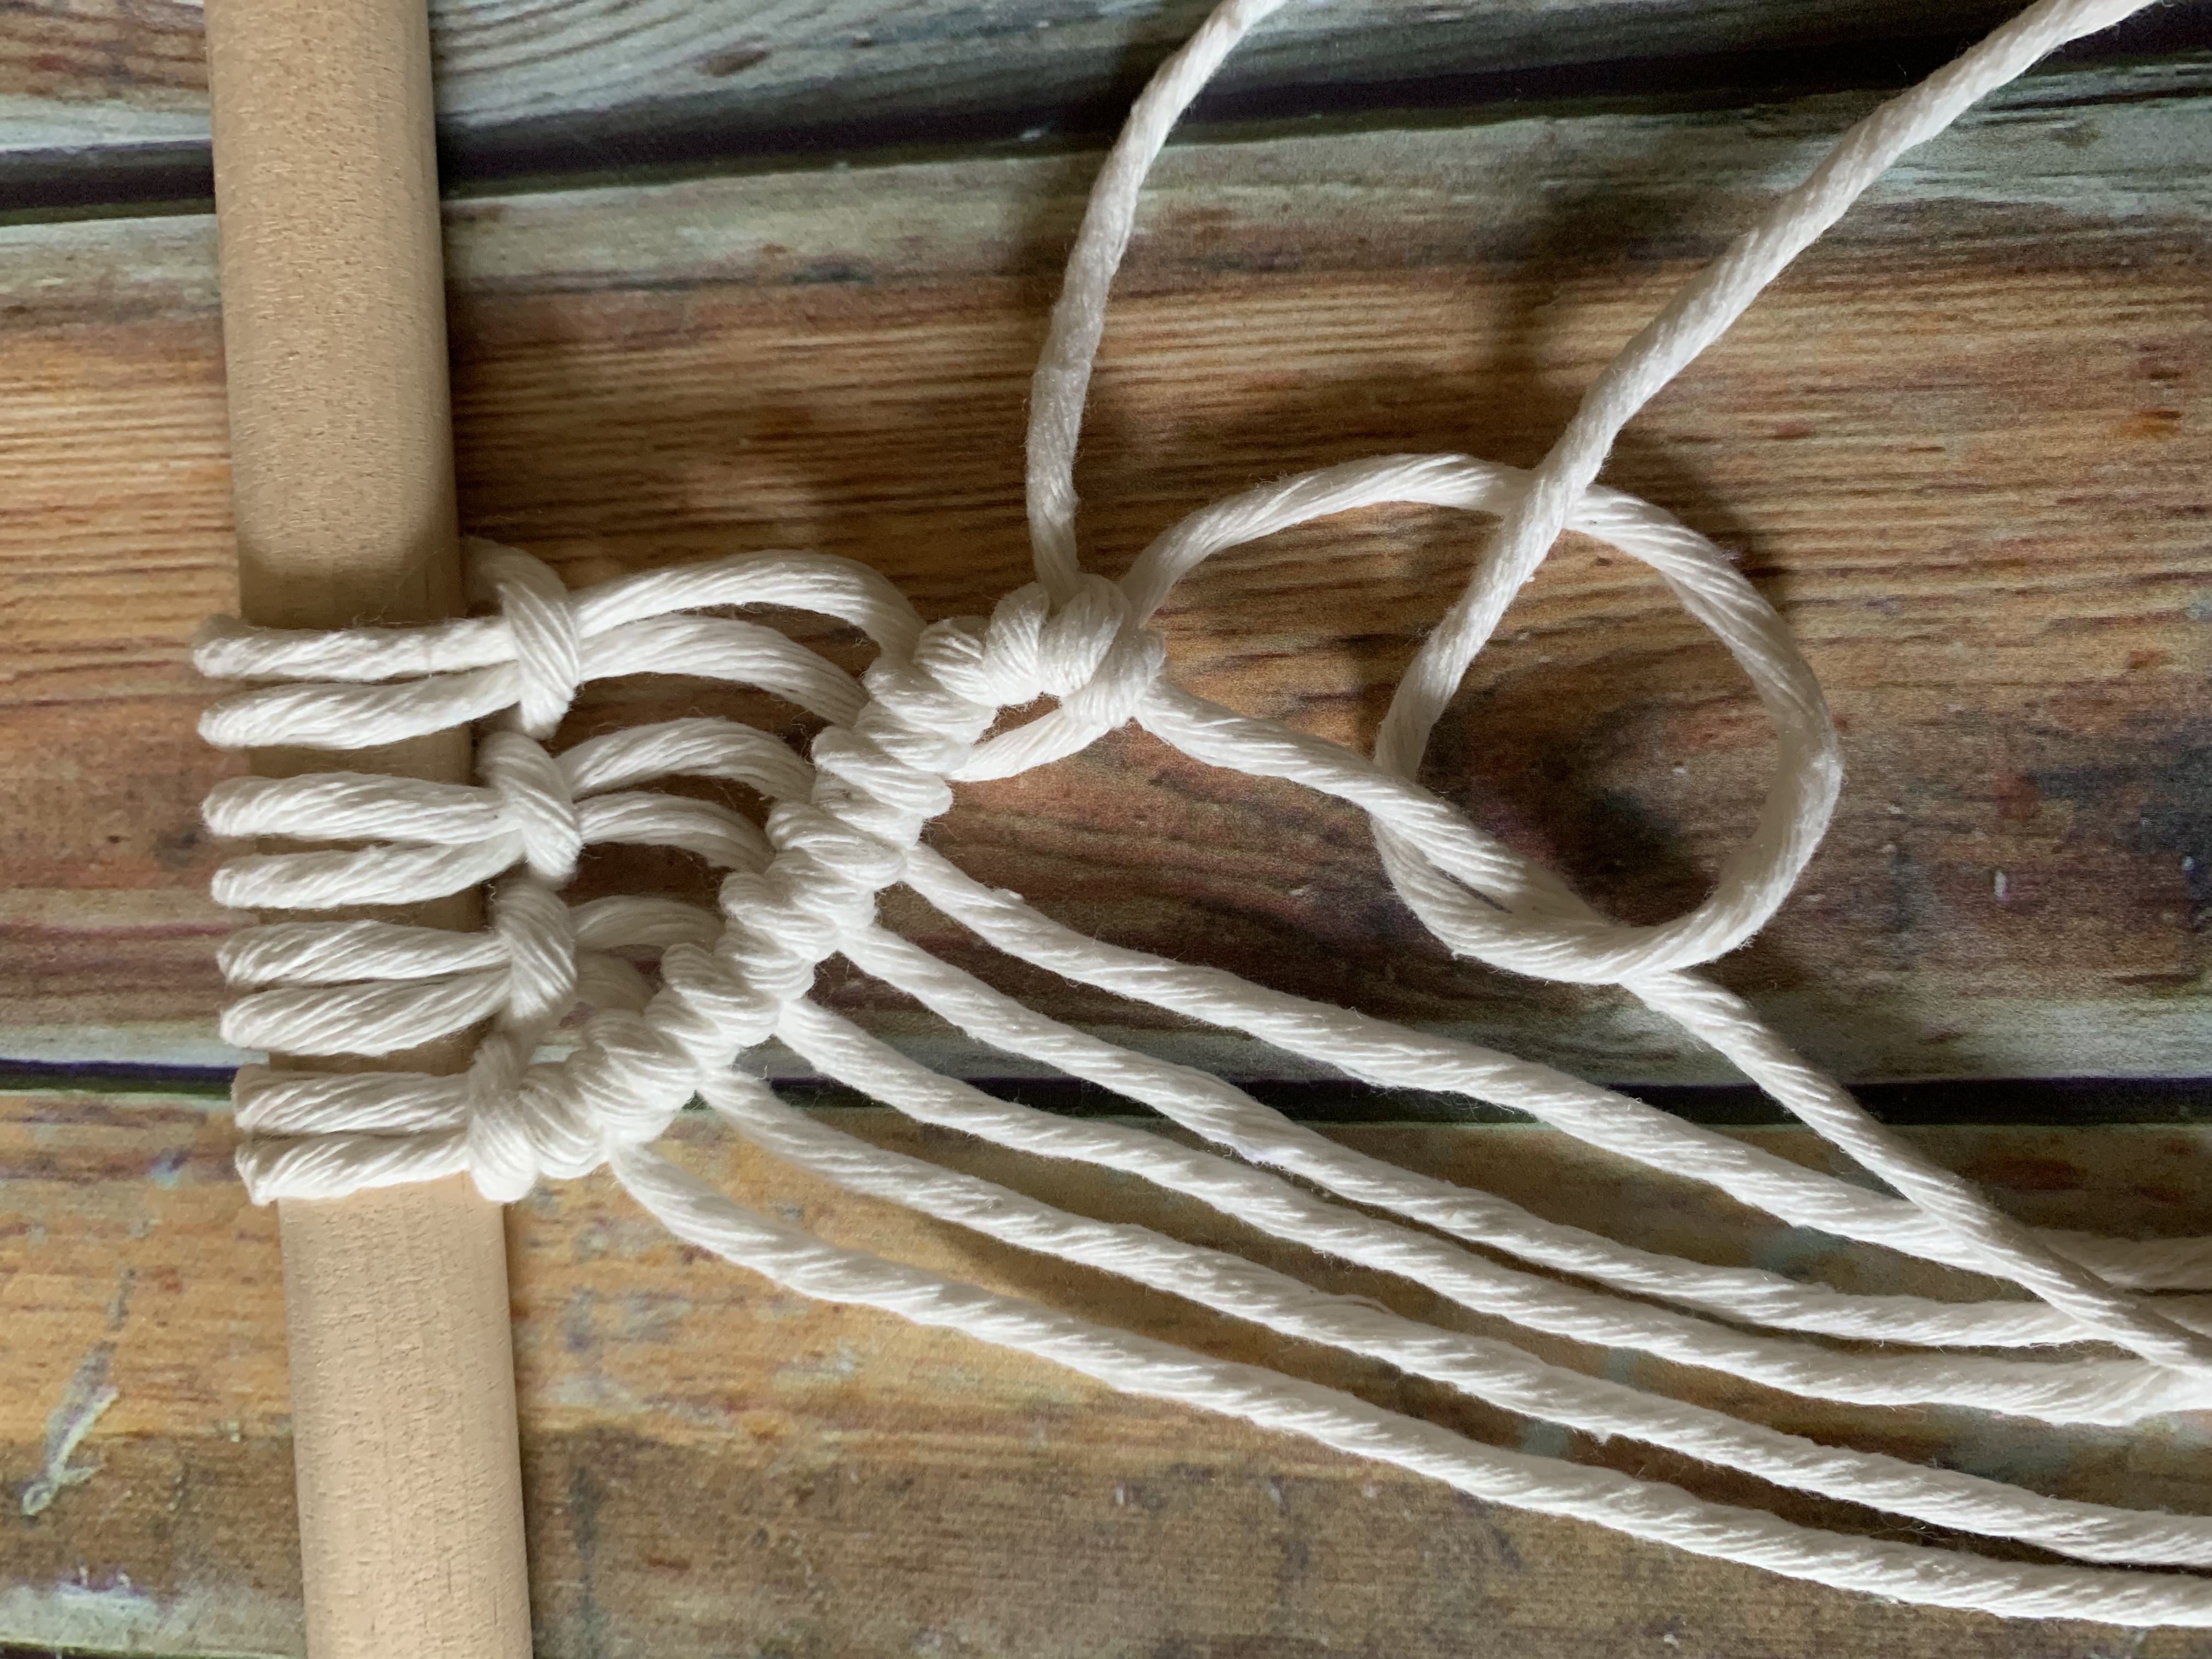
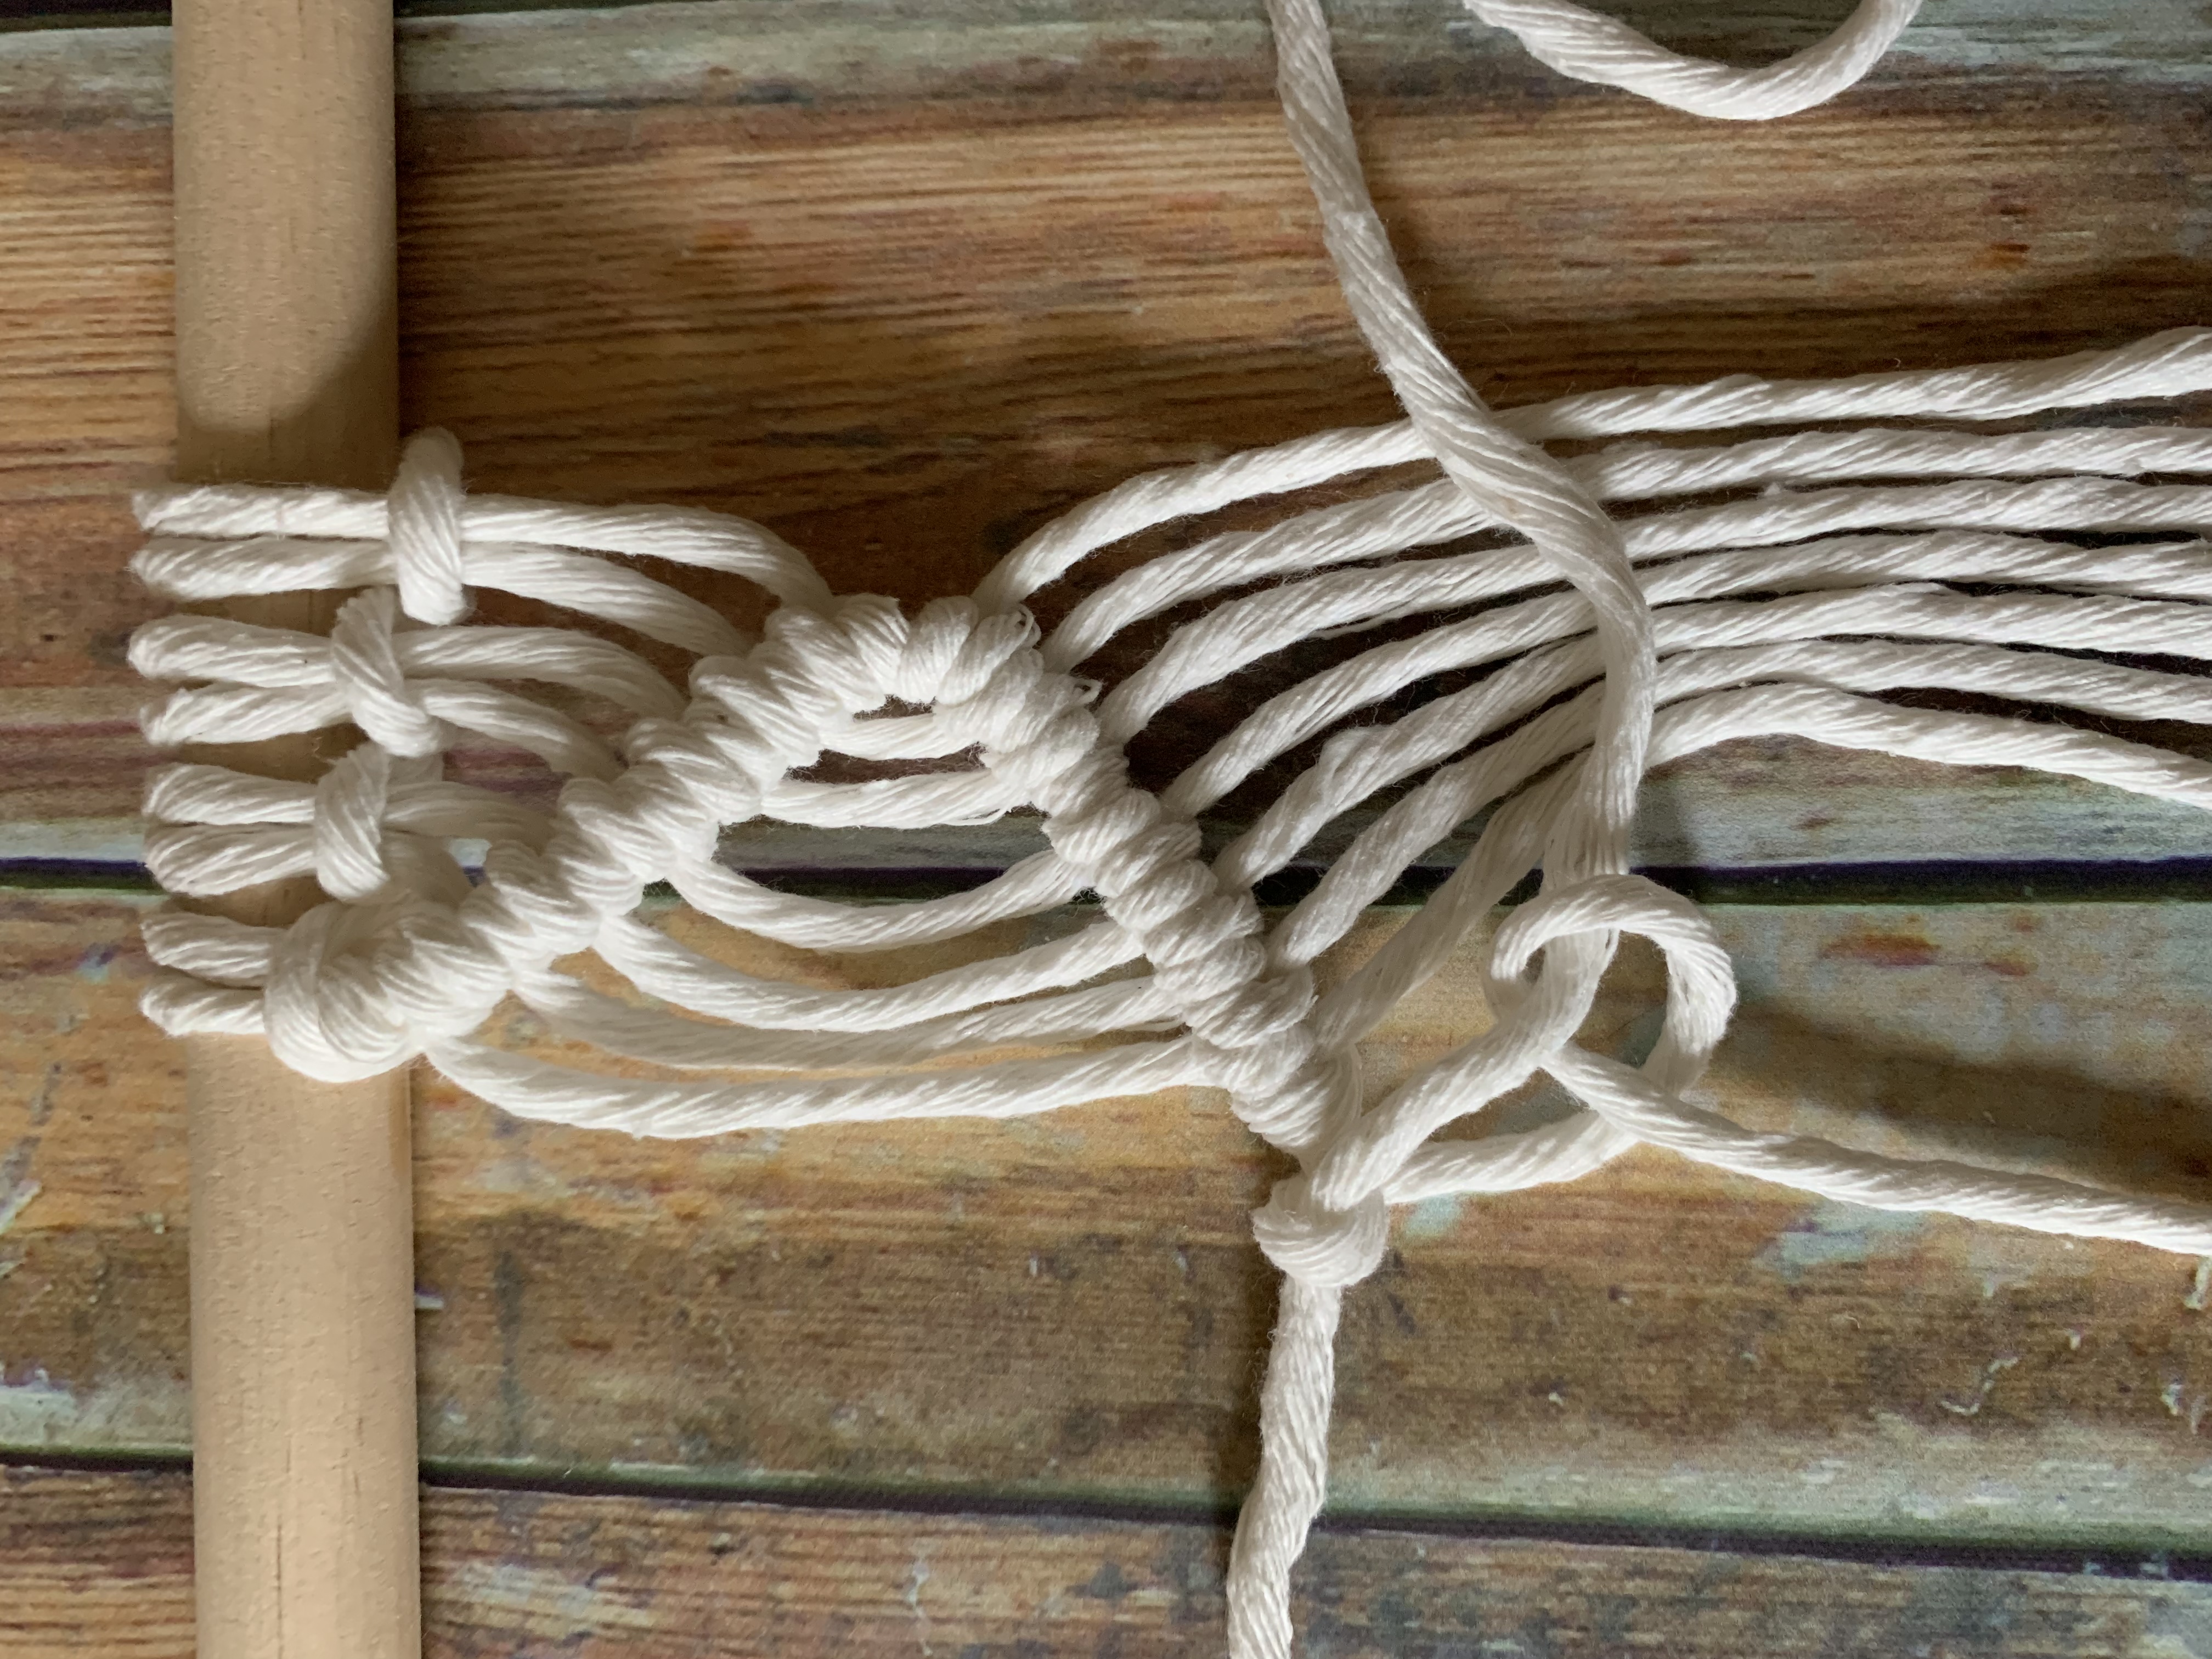
1. Have your supplies ready and attach your cord to your dowel, using a larks head knot.
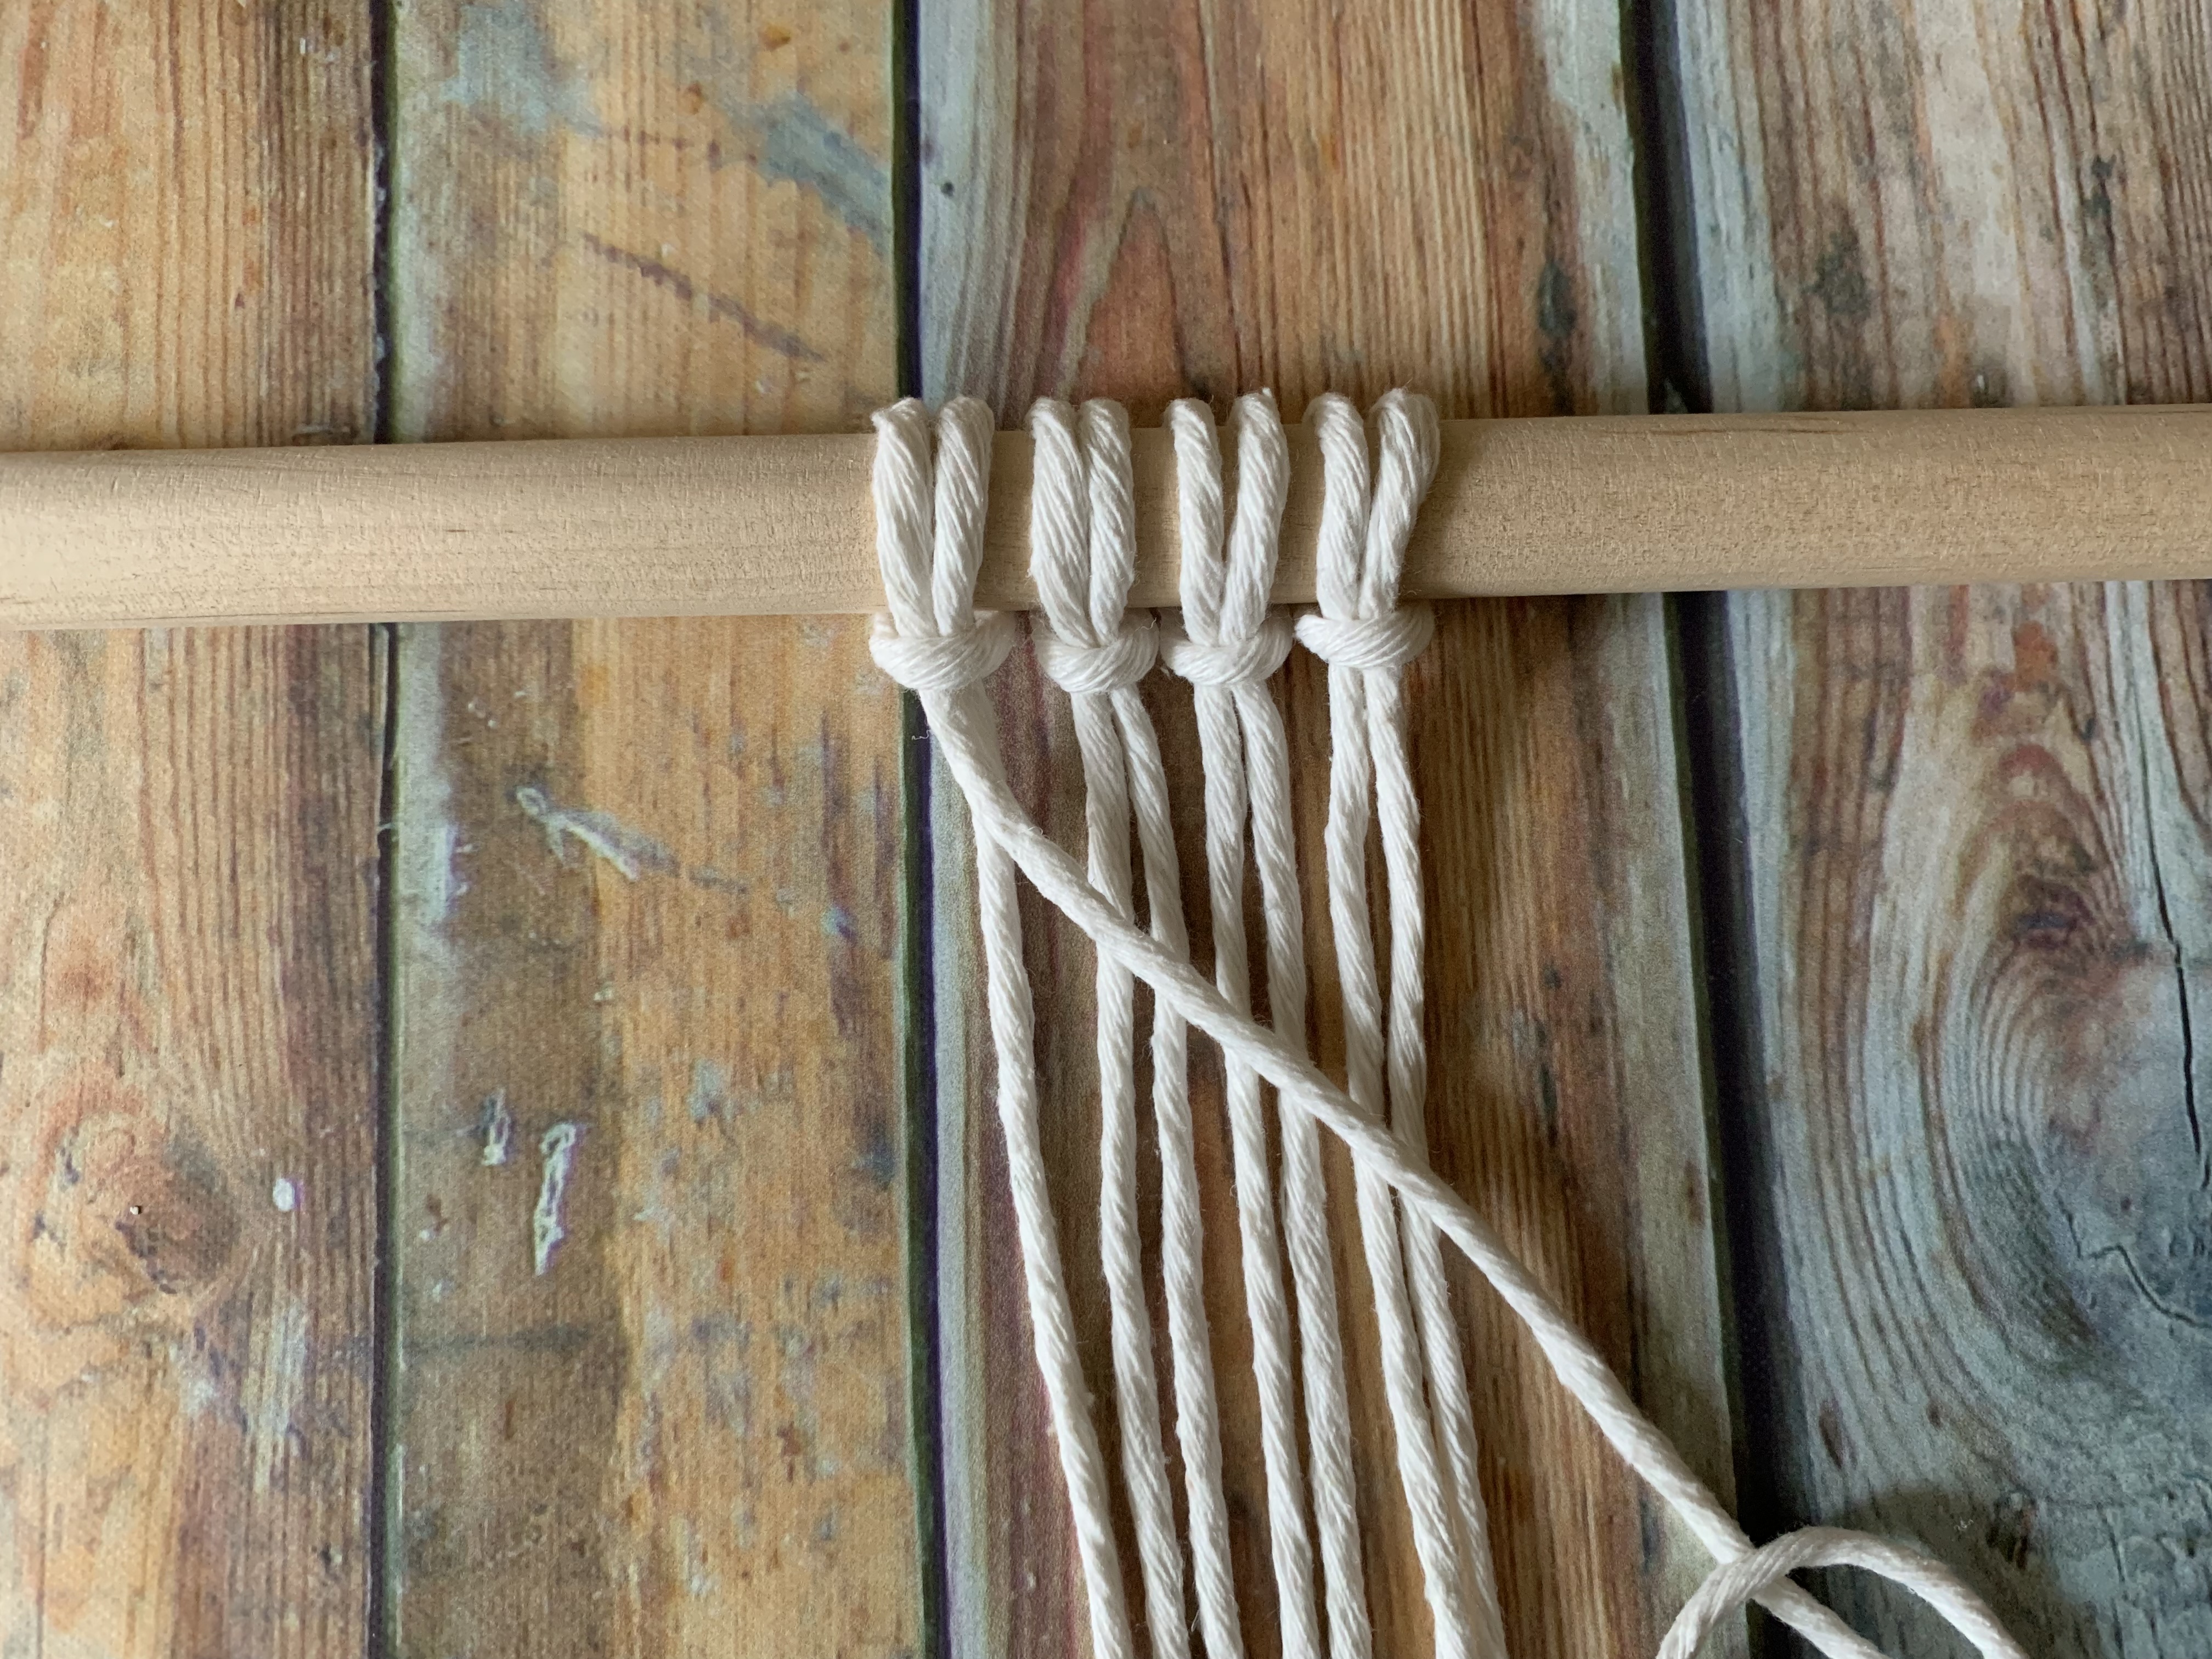
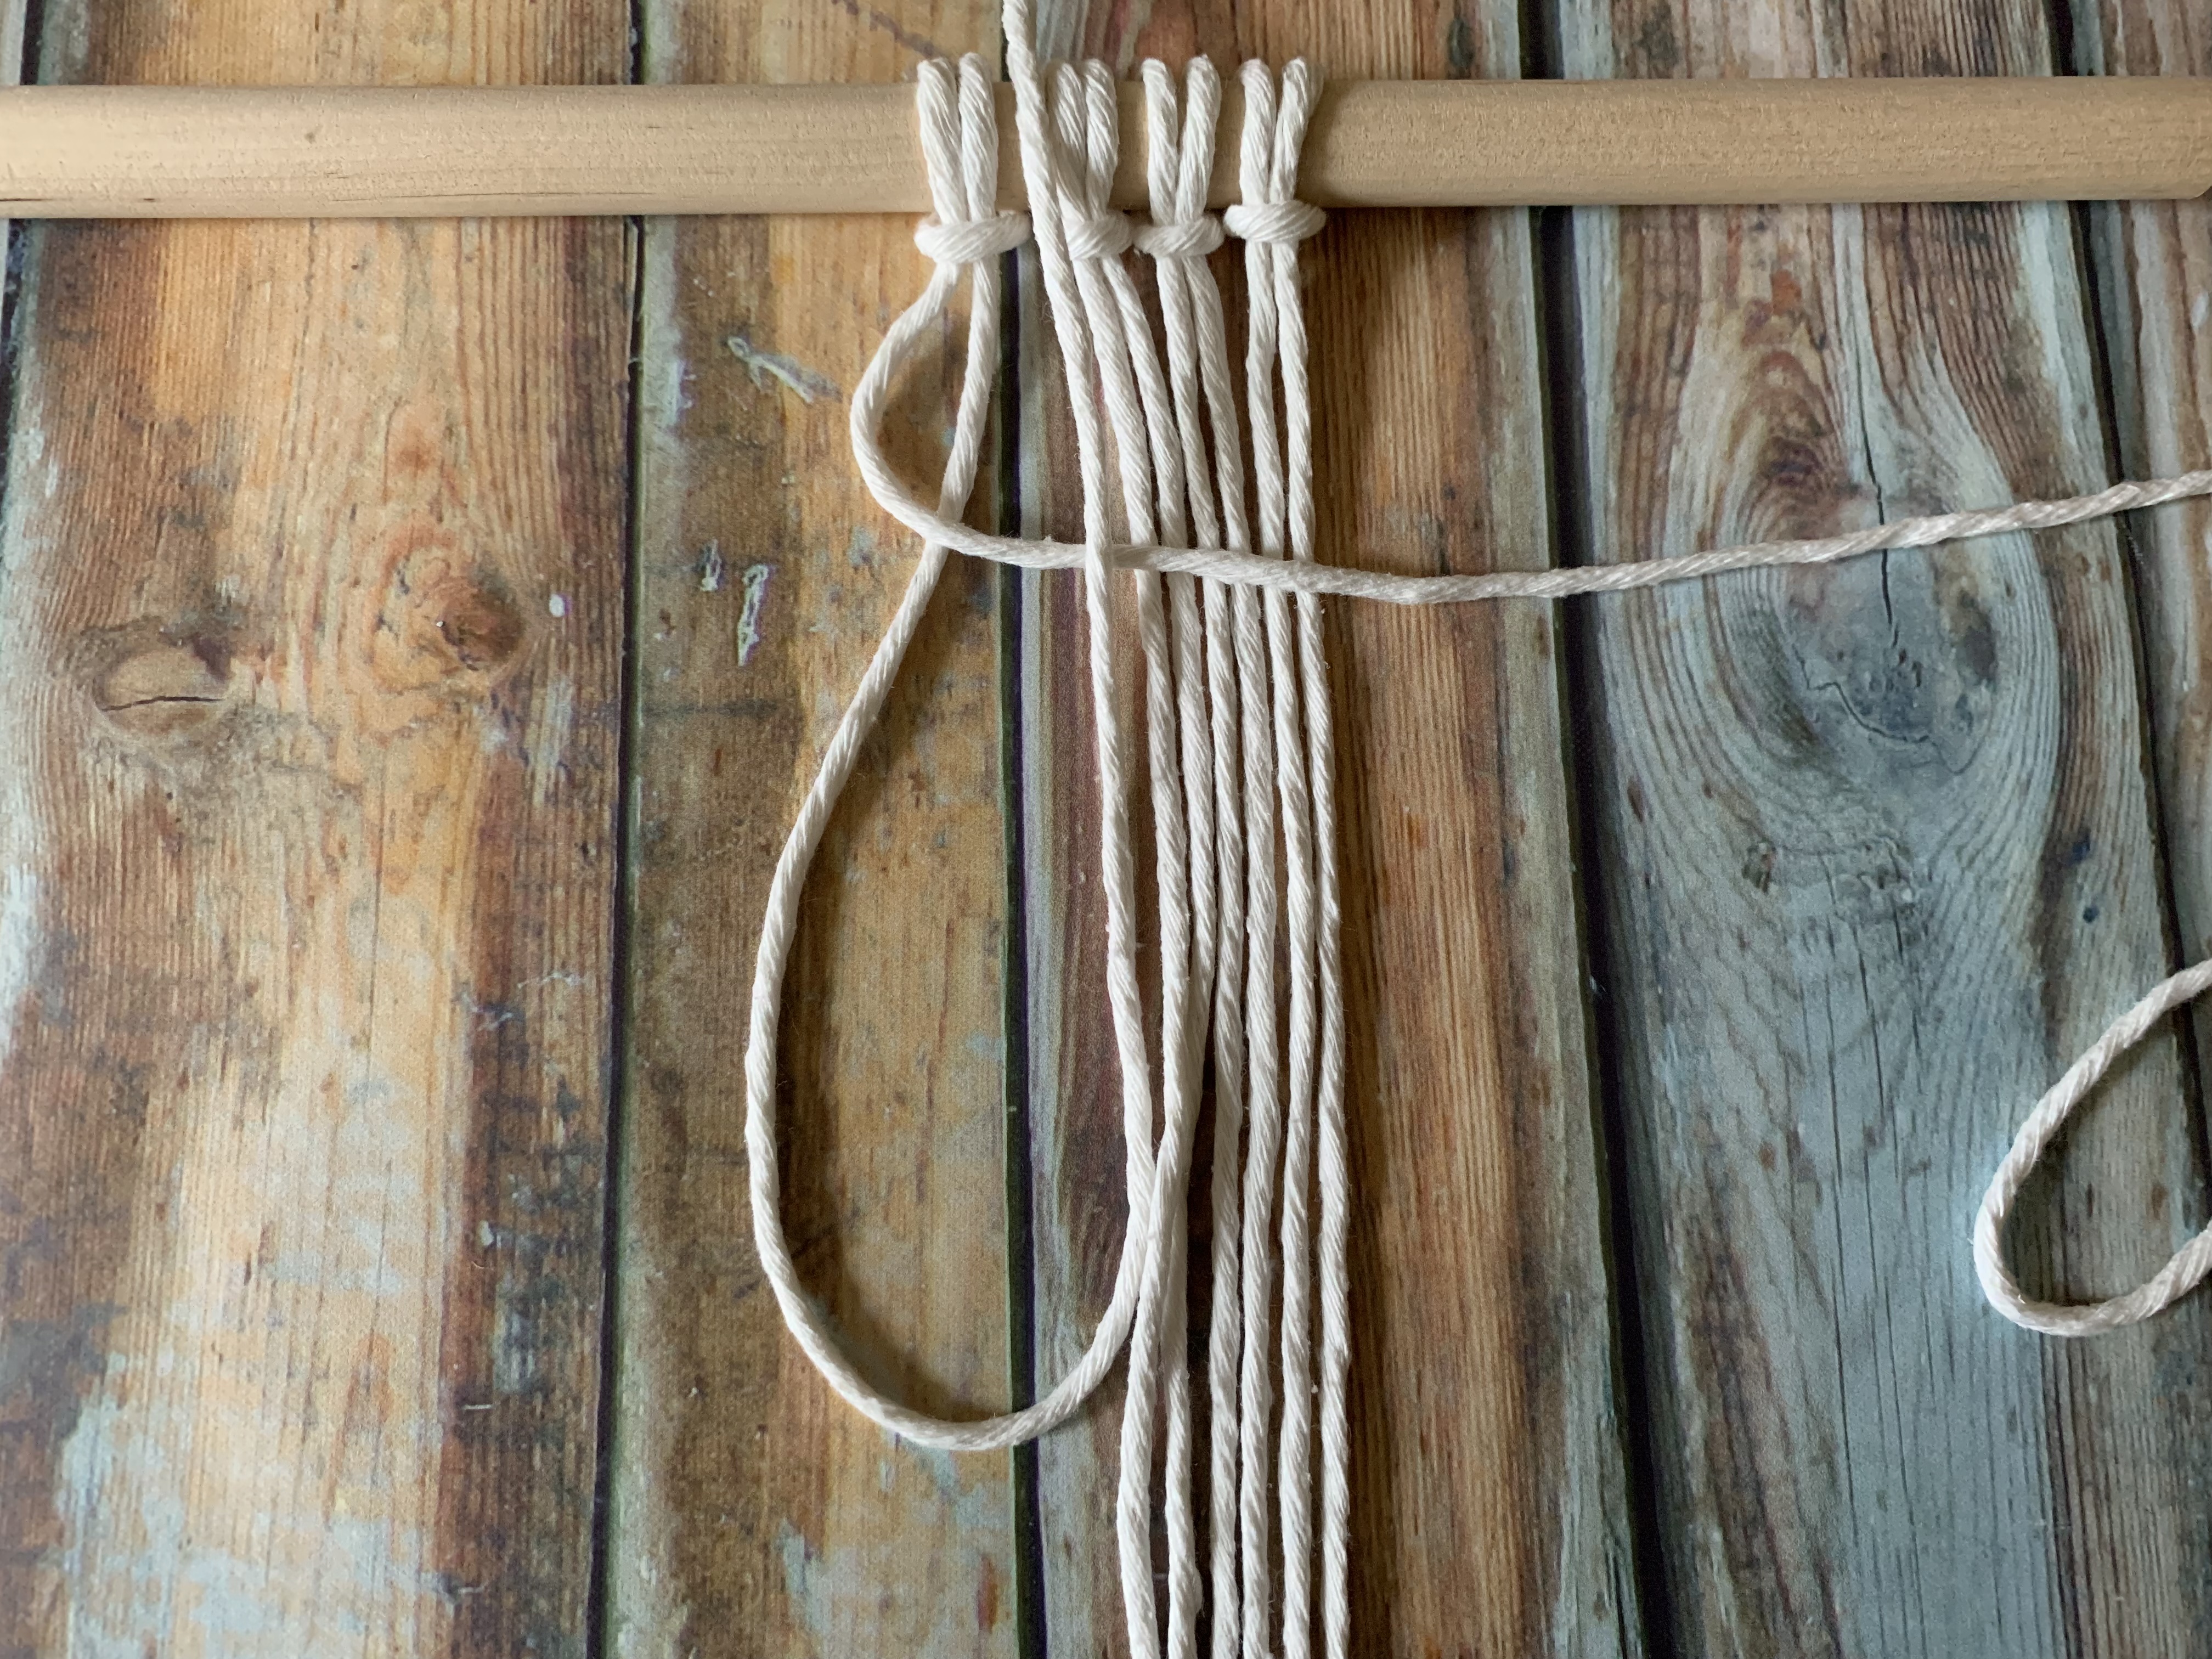
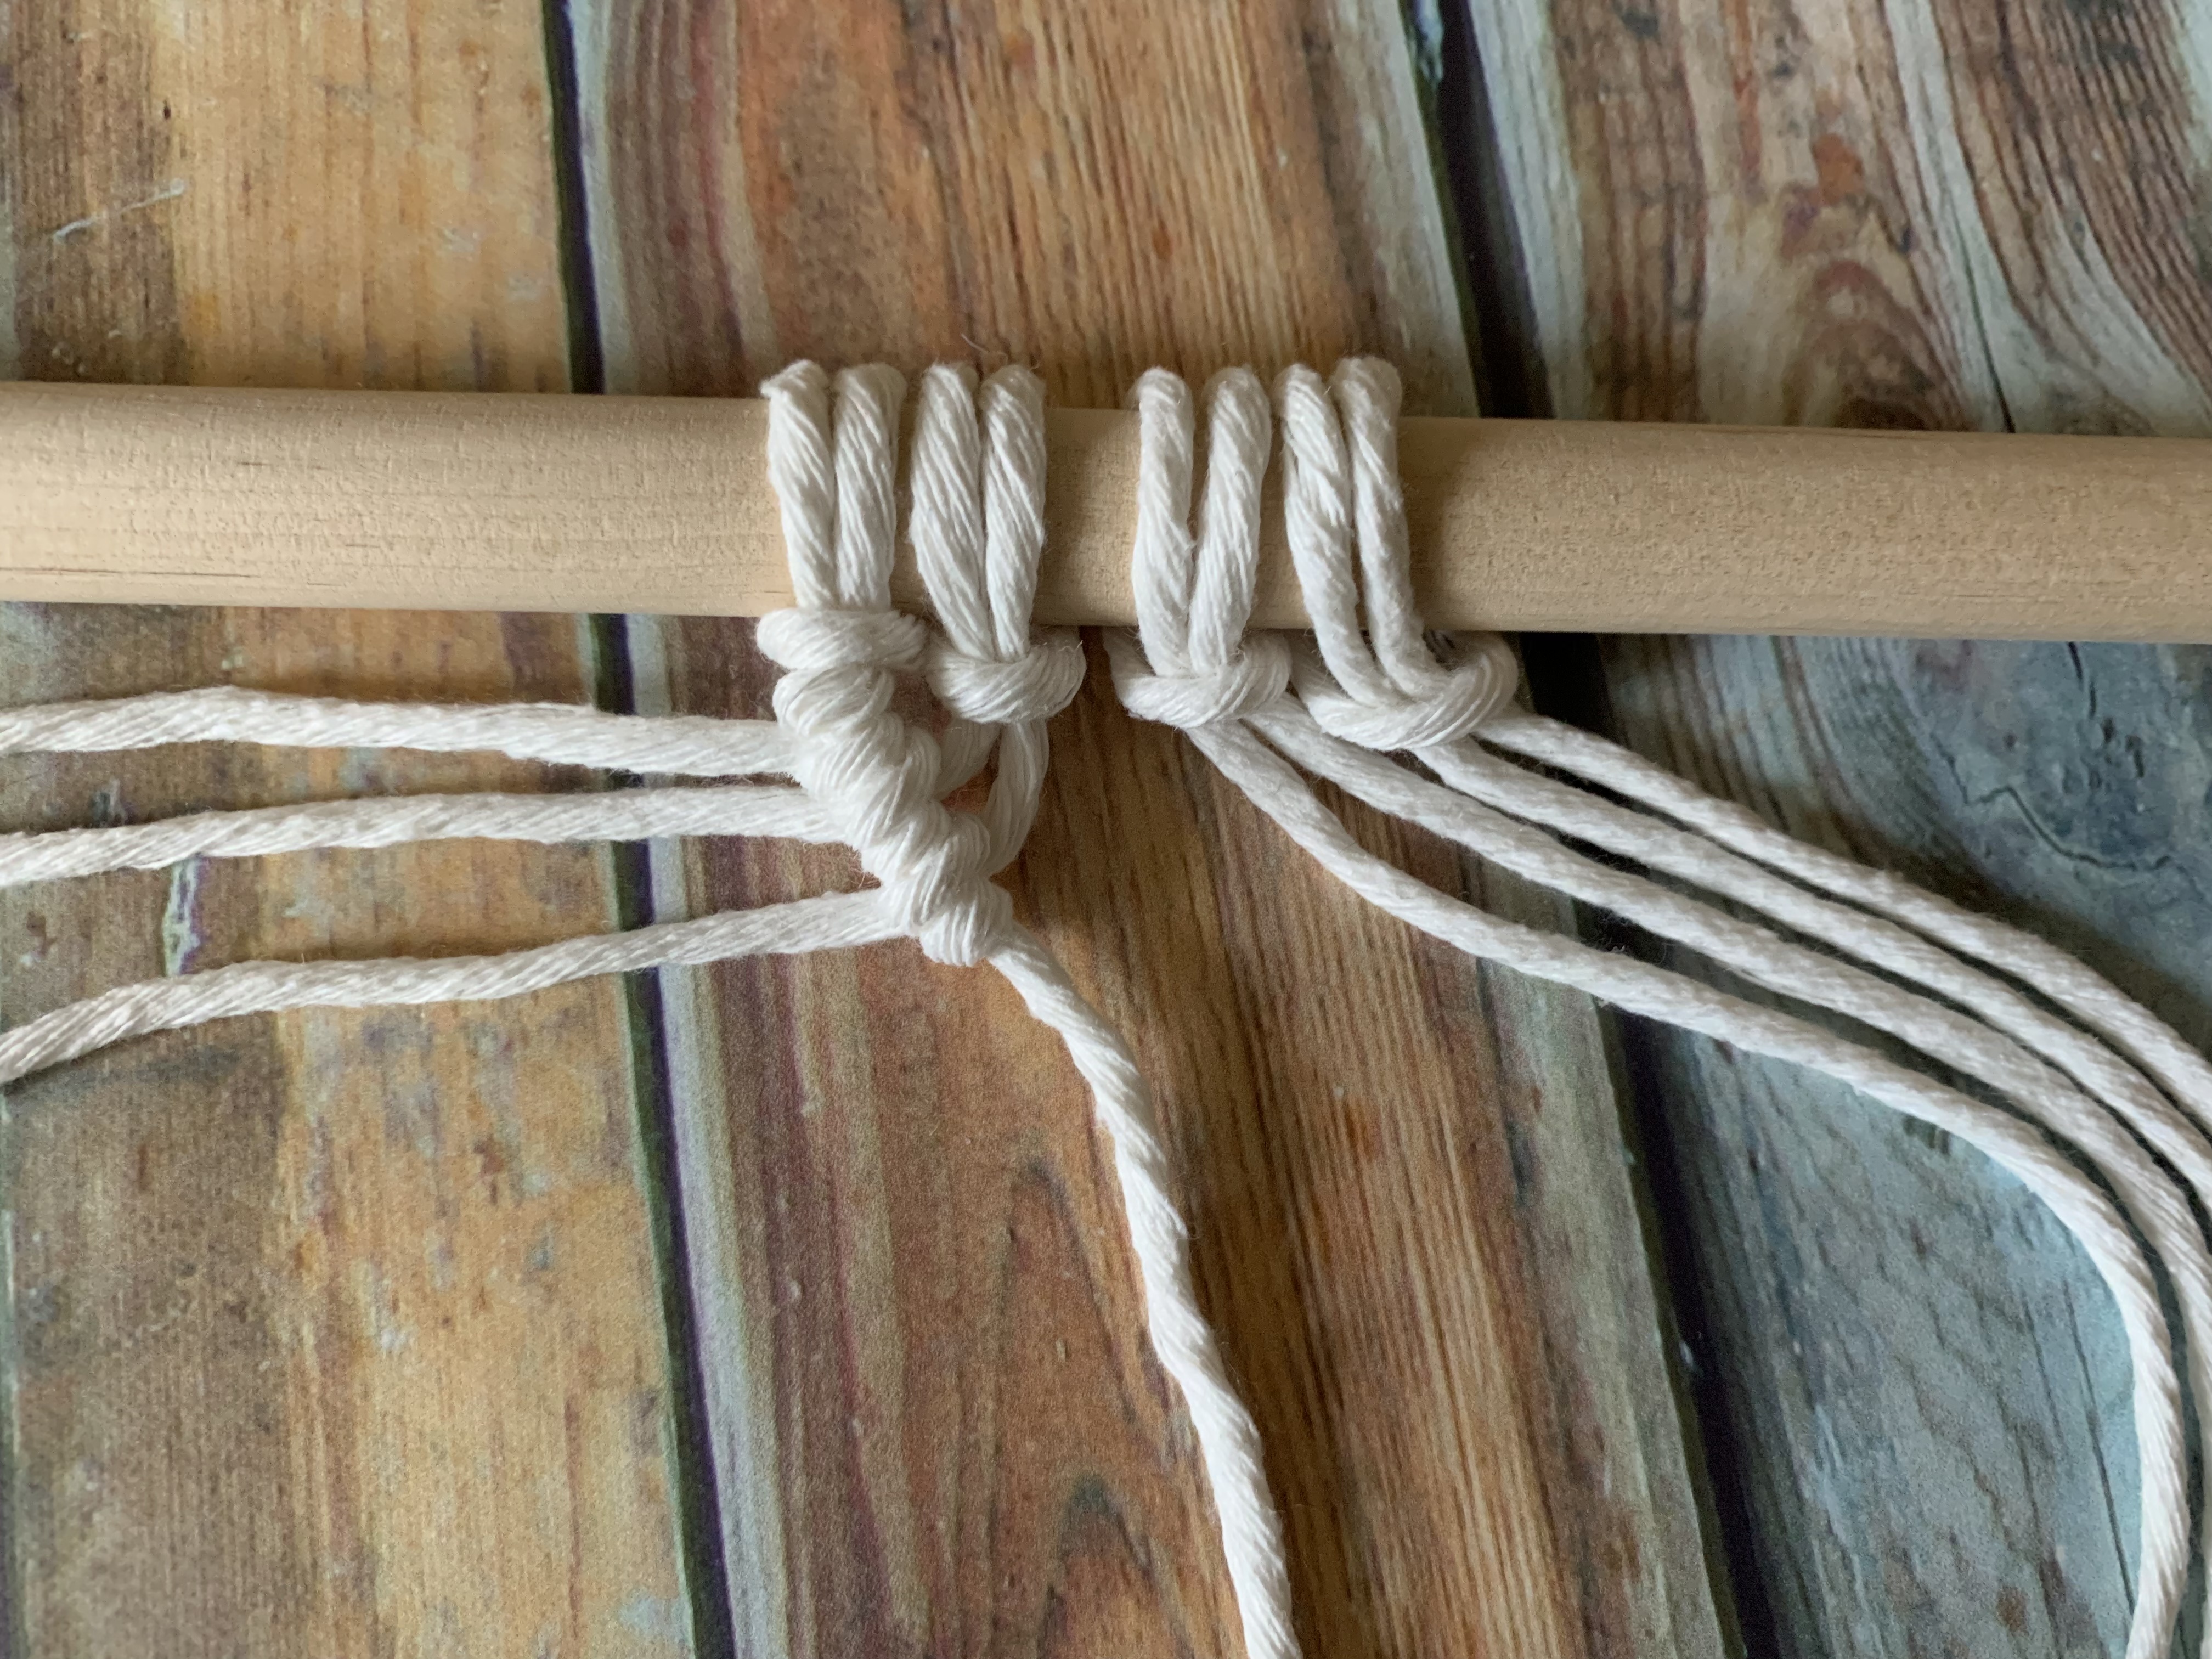
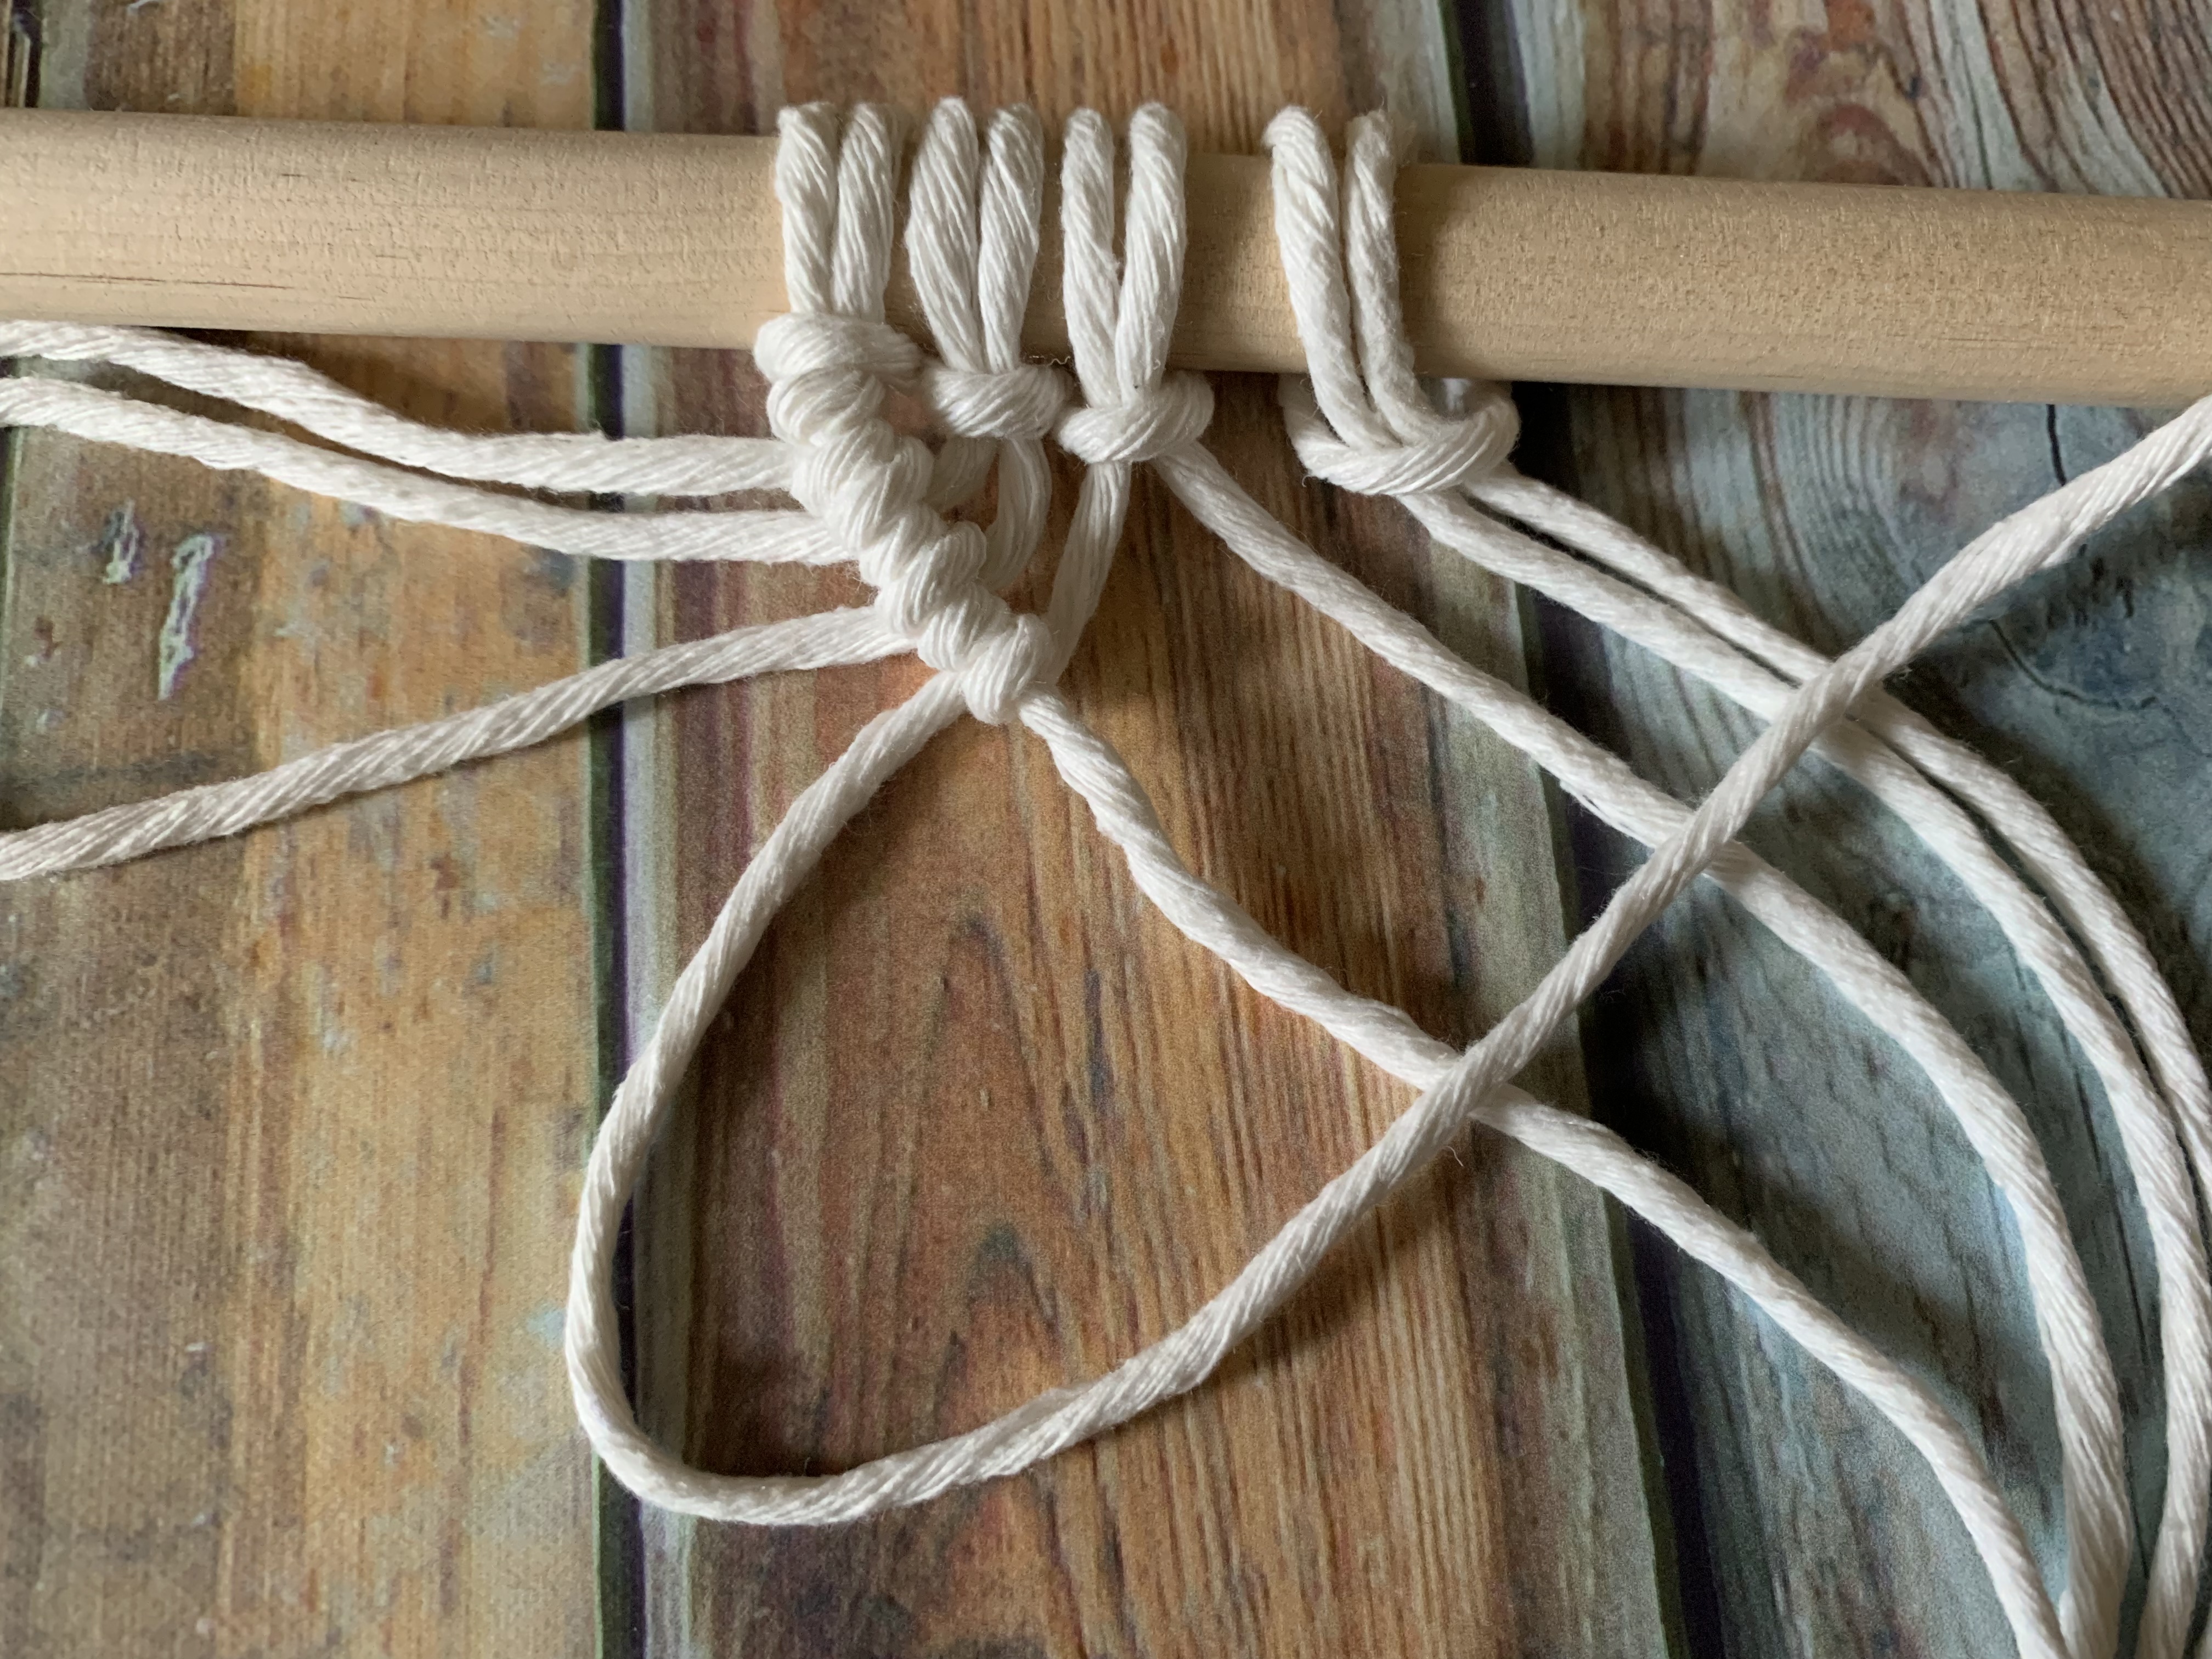
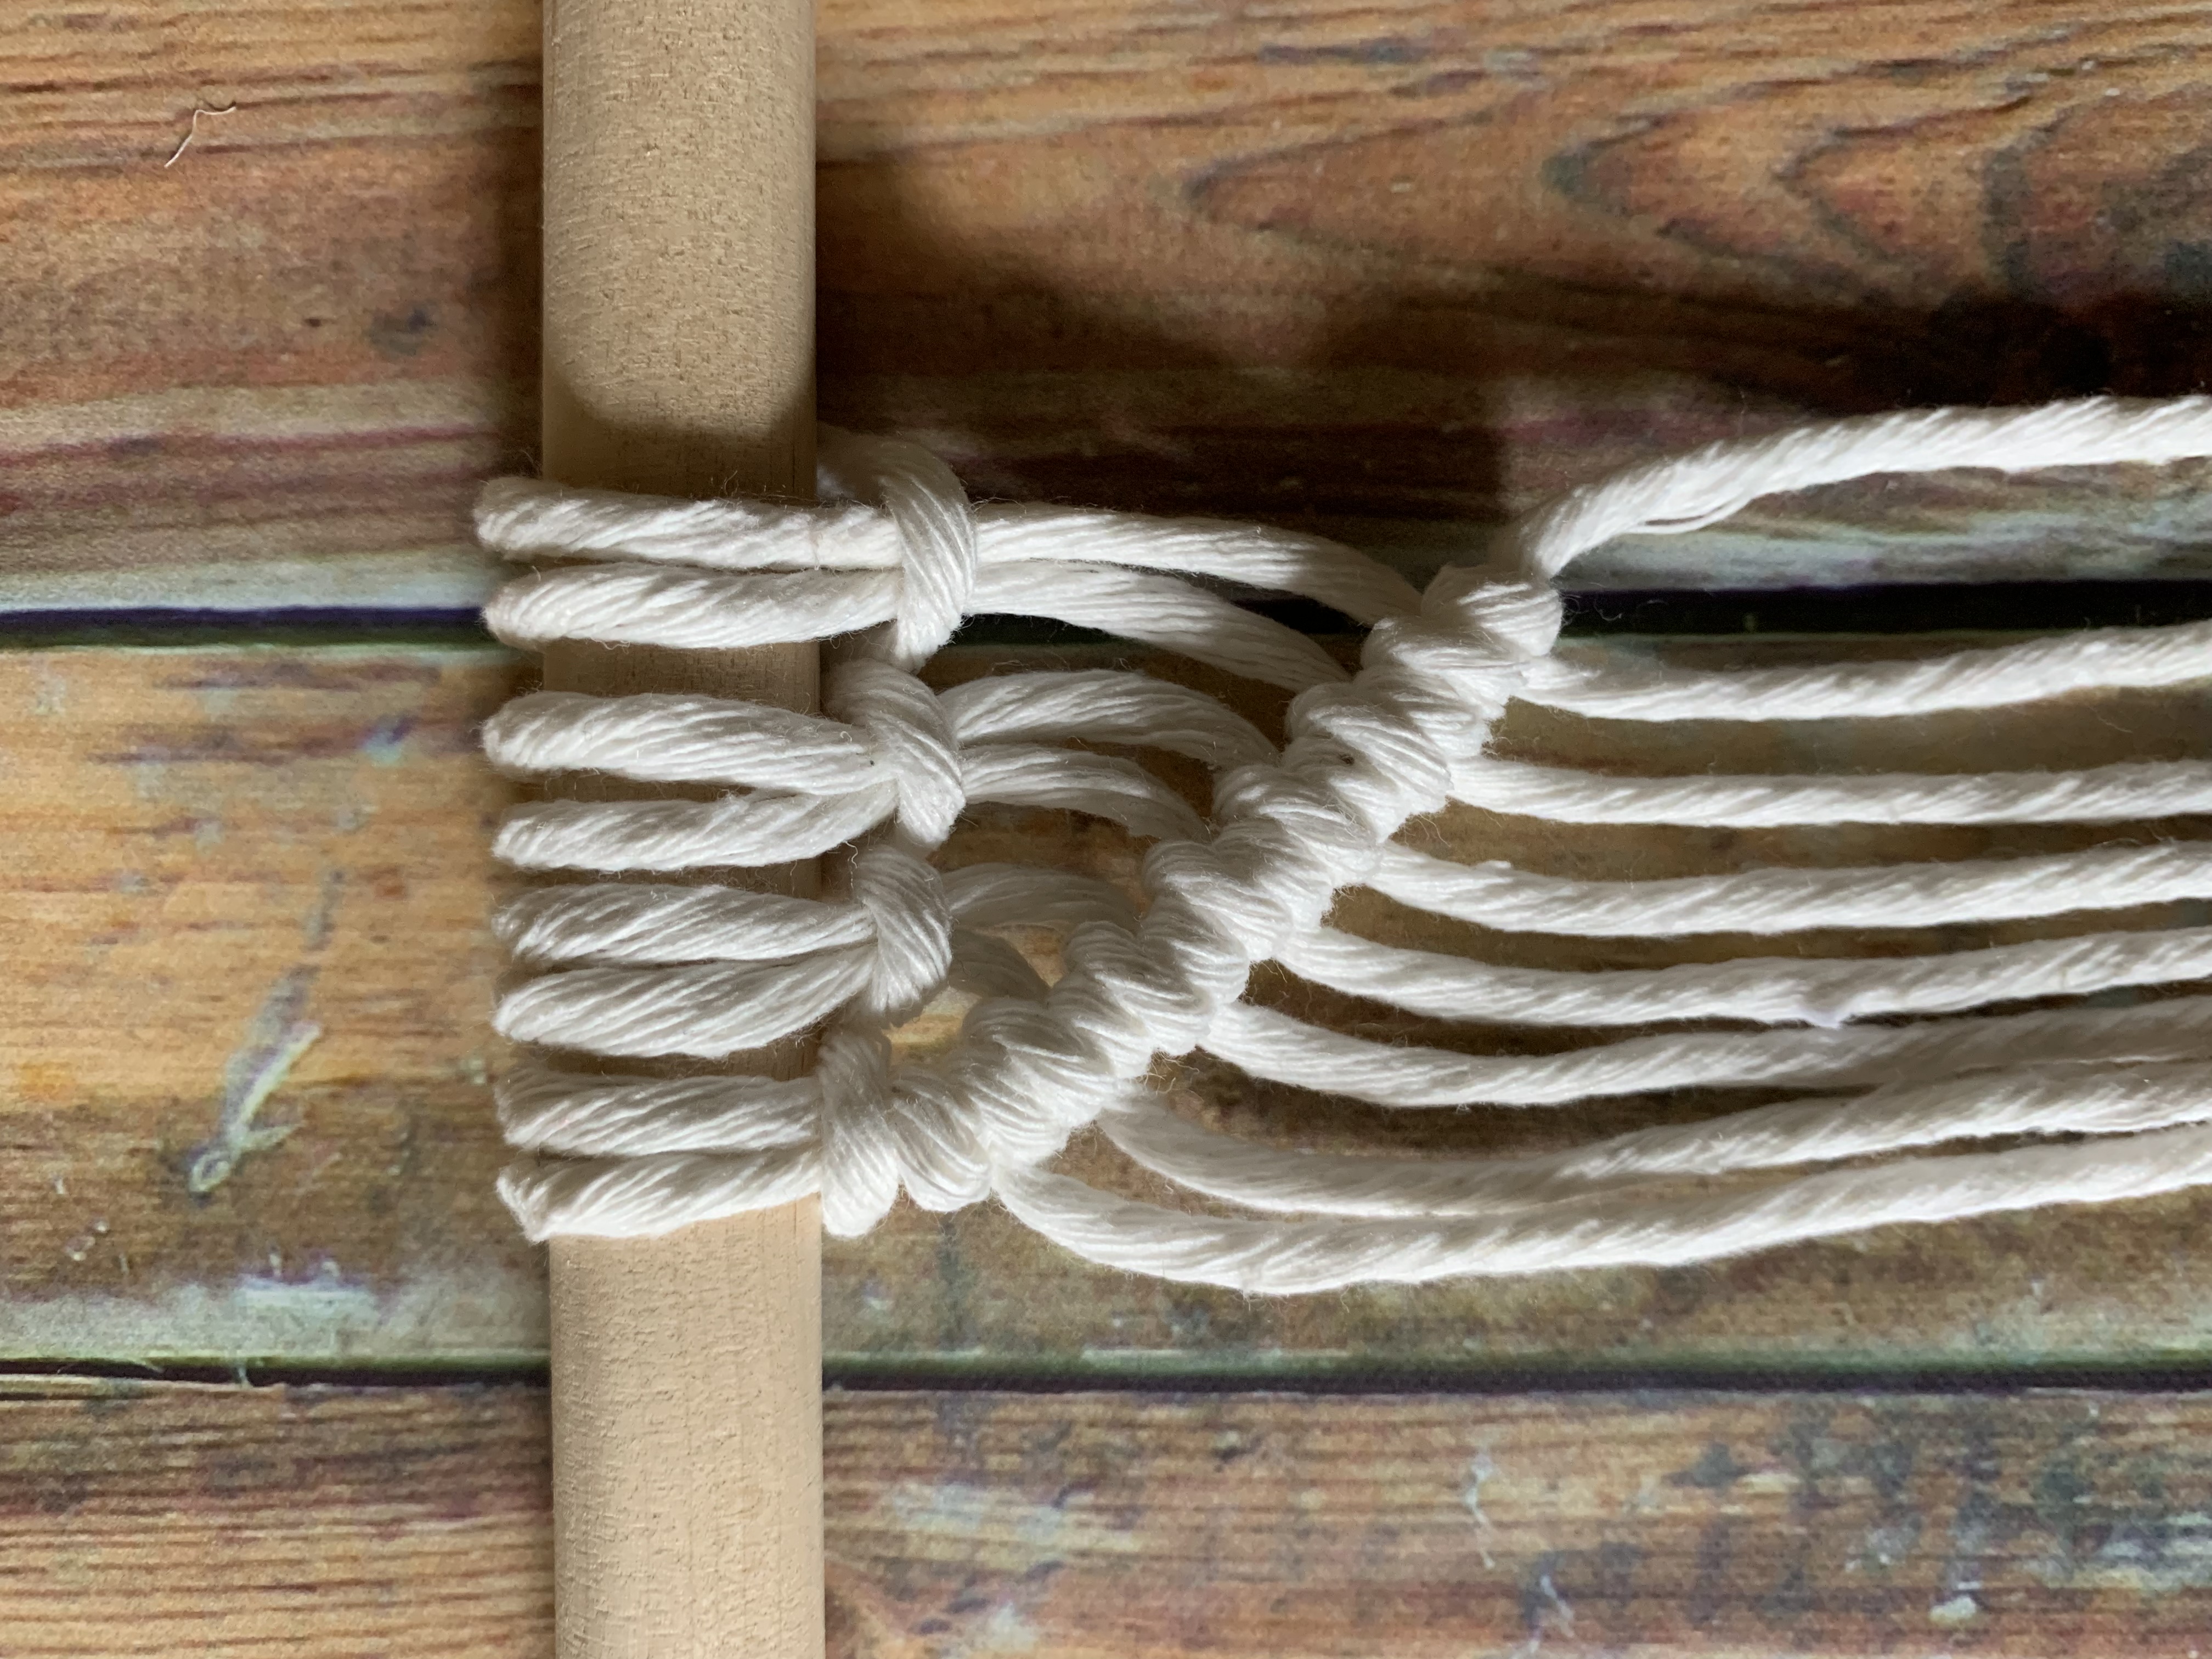
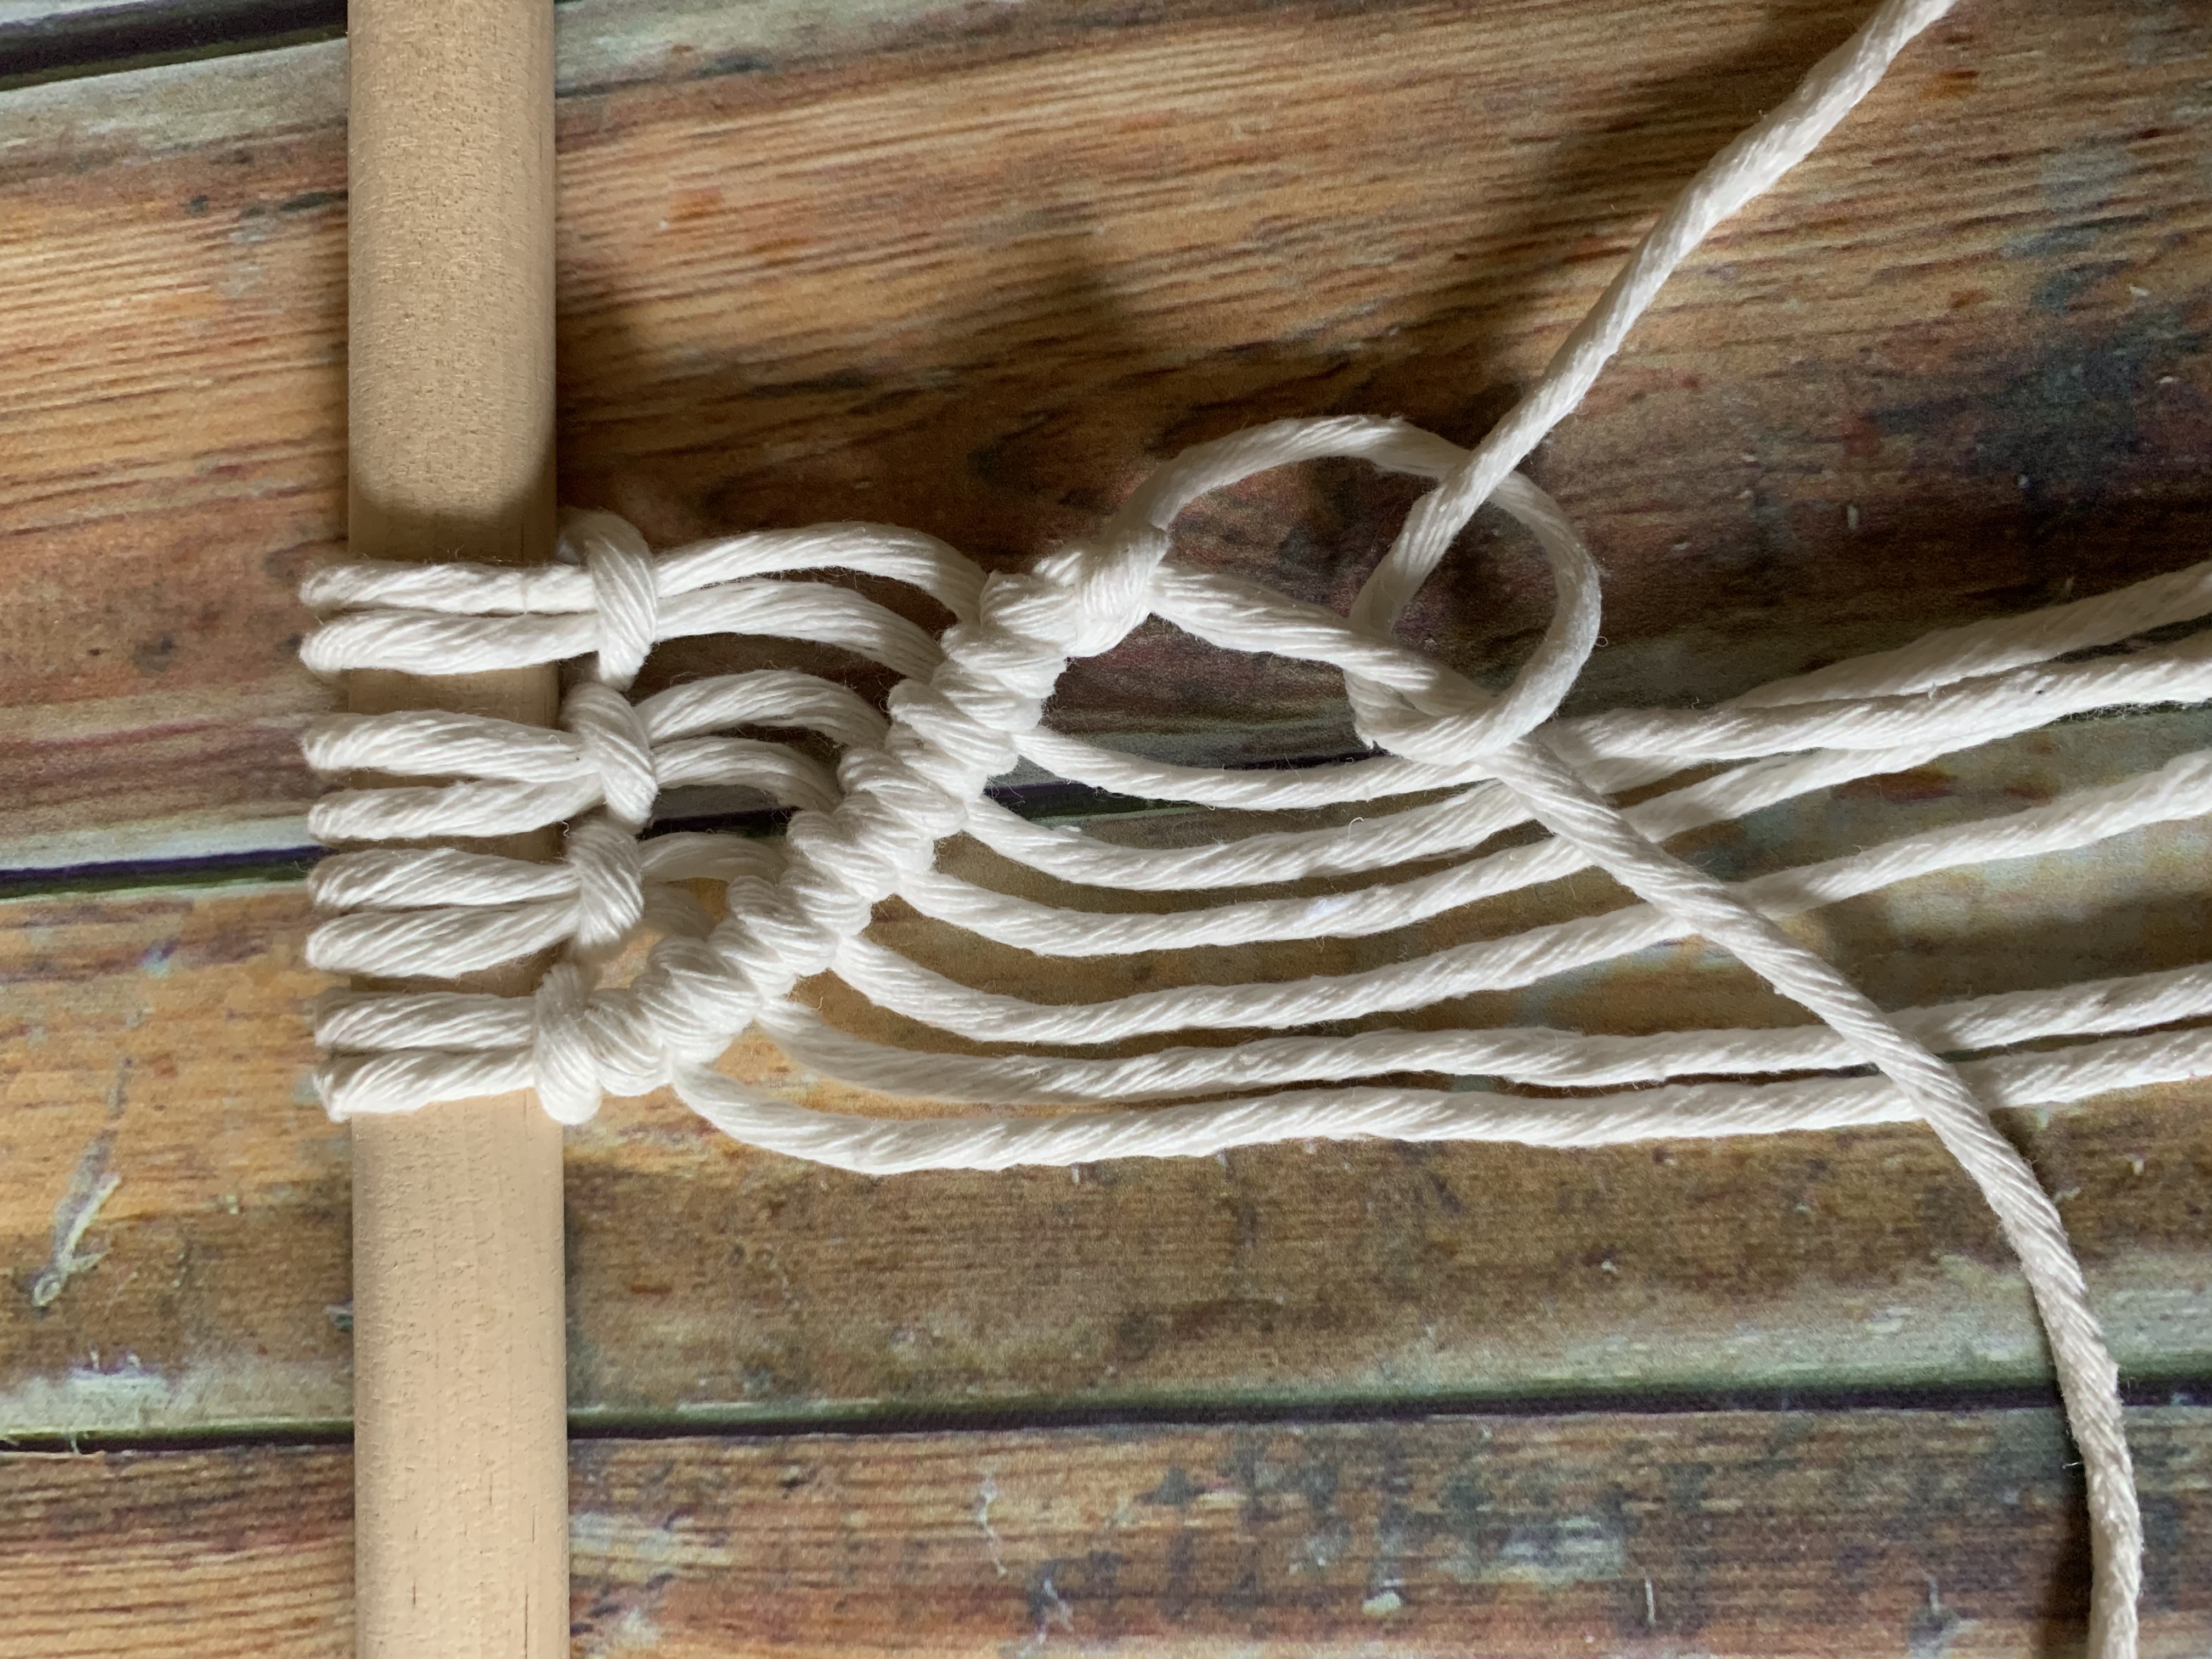
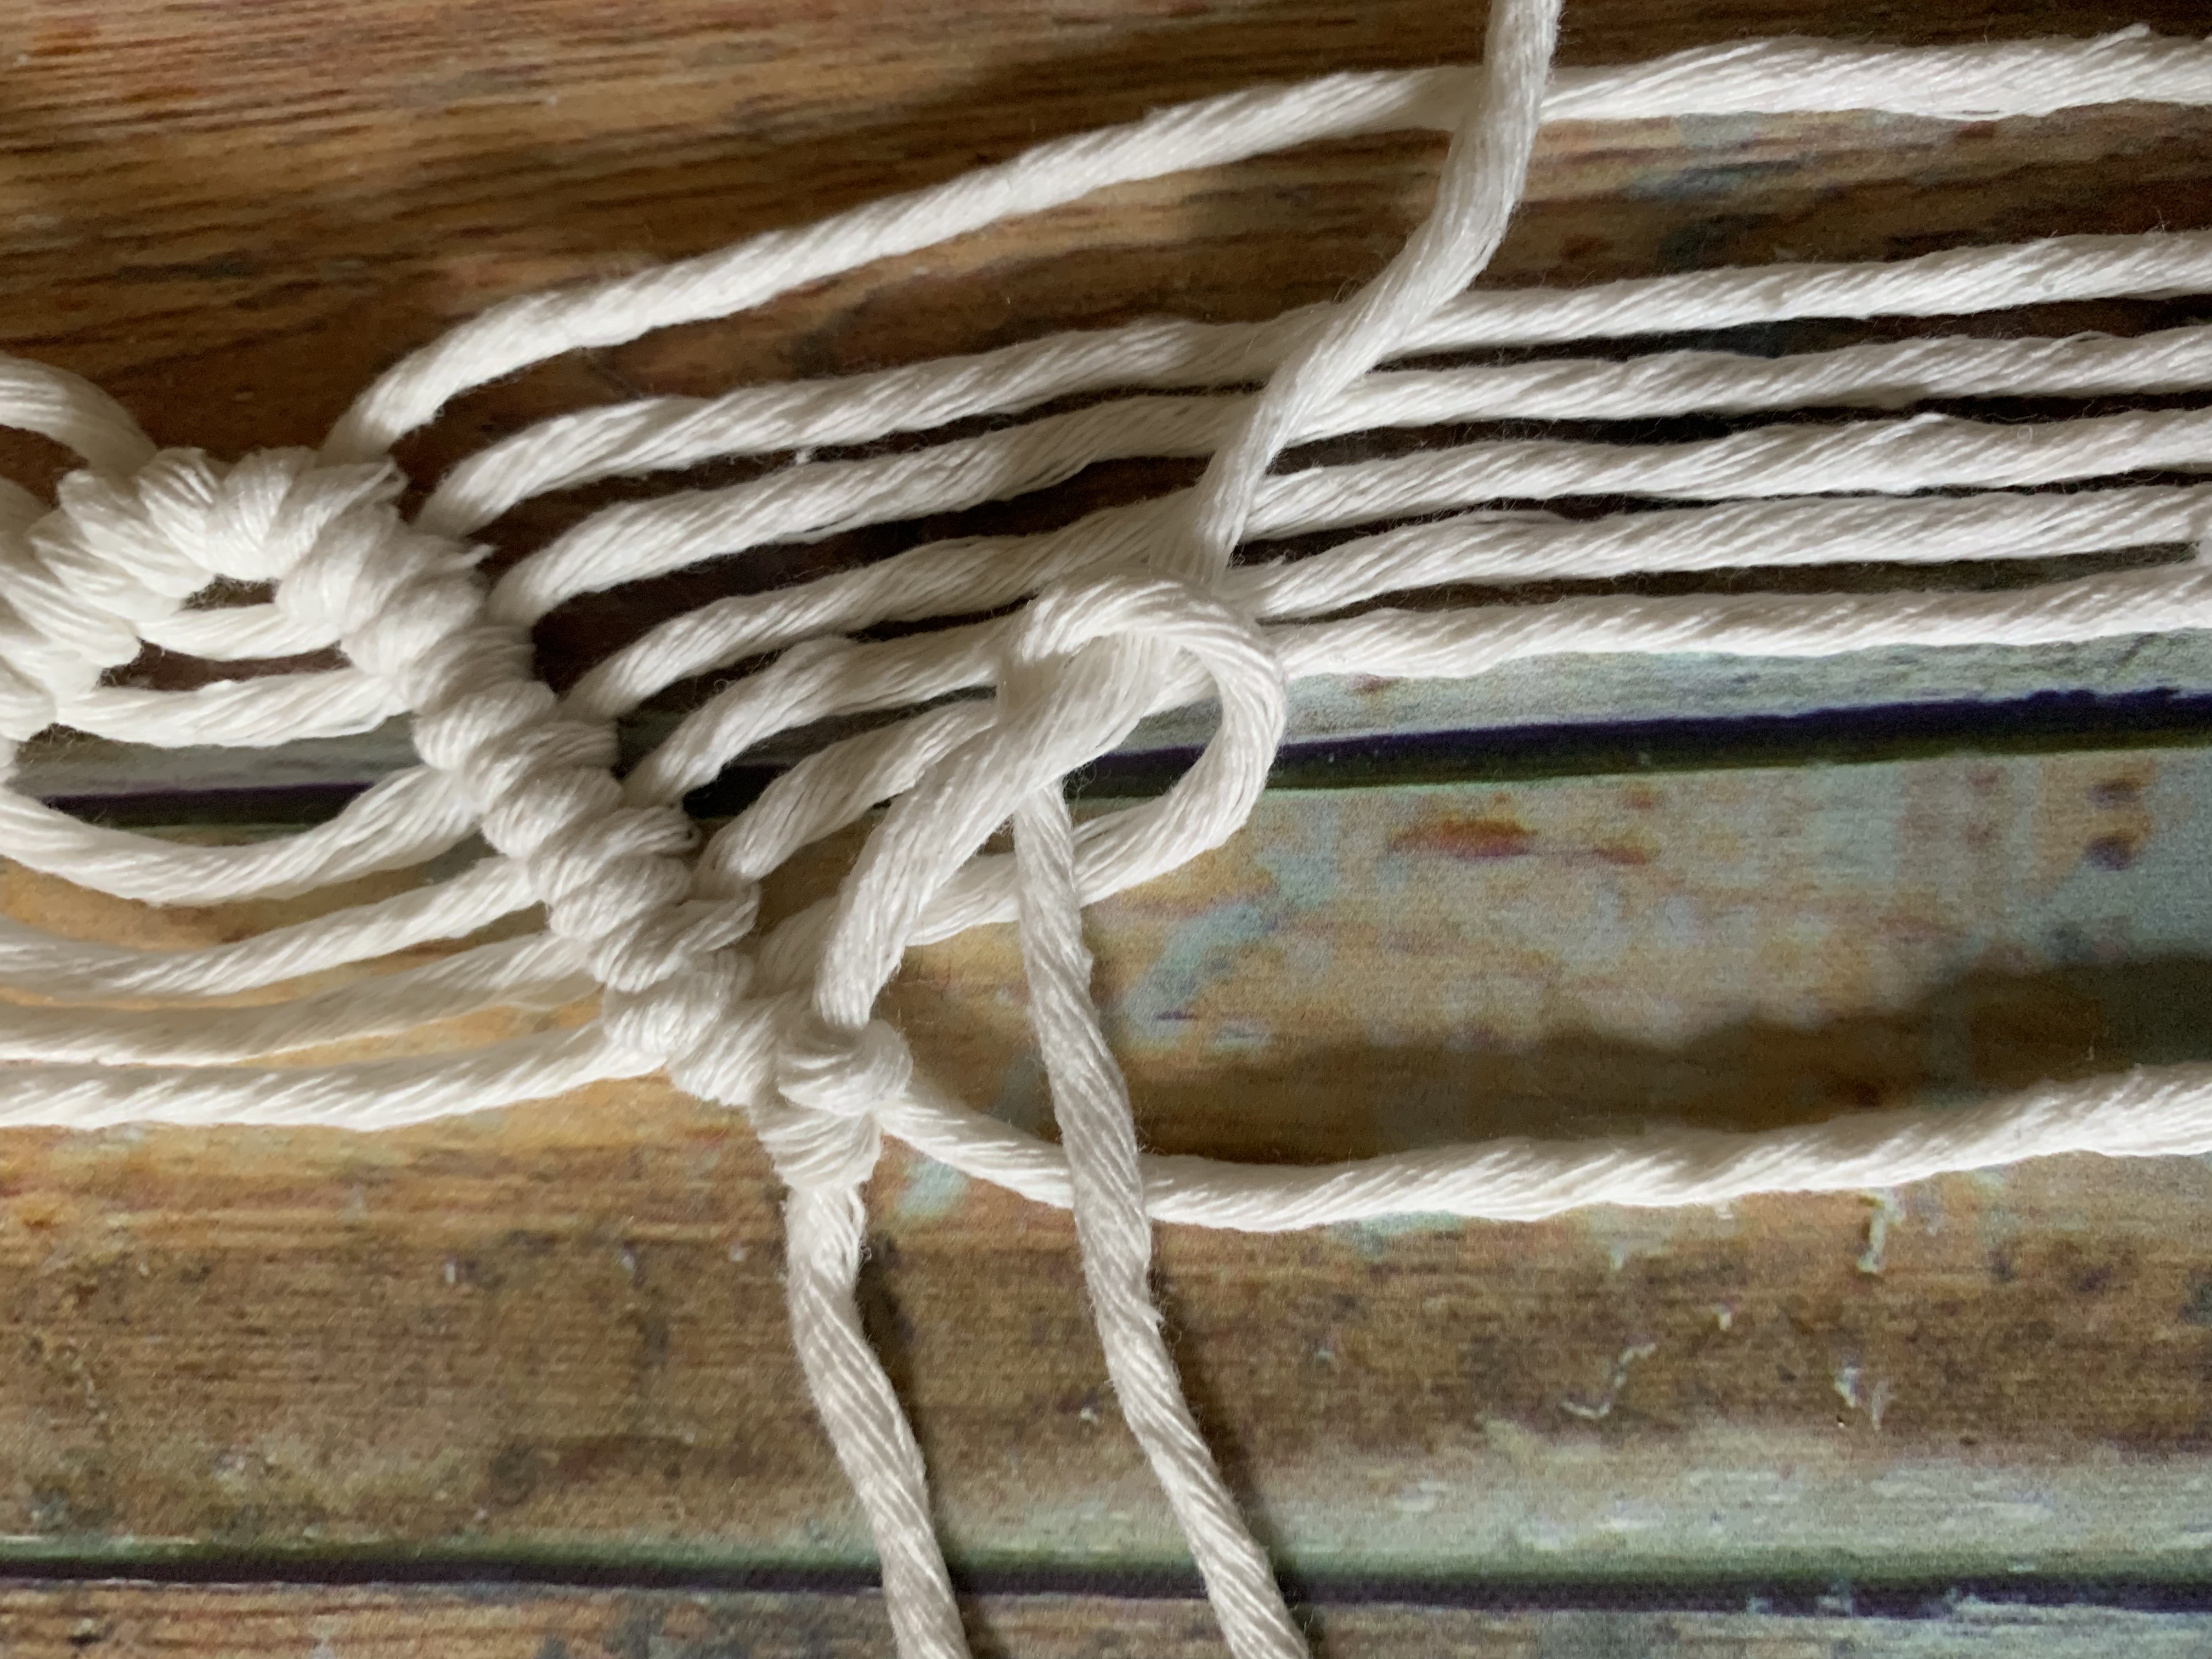
2. Take the first cord and pull it across the other cords. This becomes the “core” of the knot.
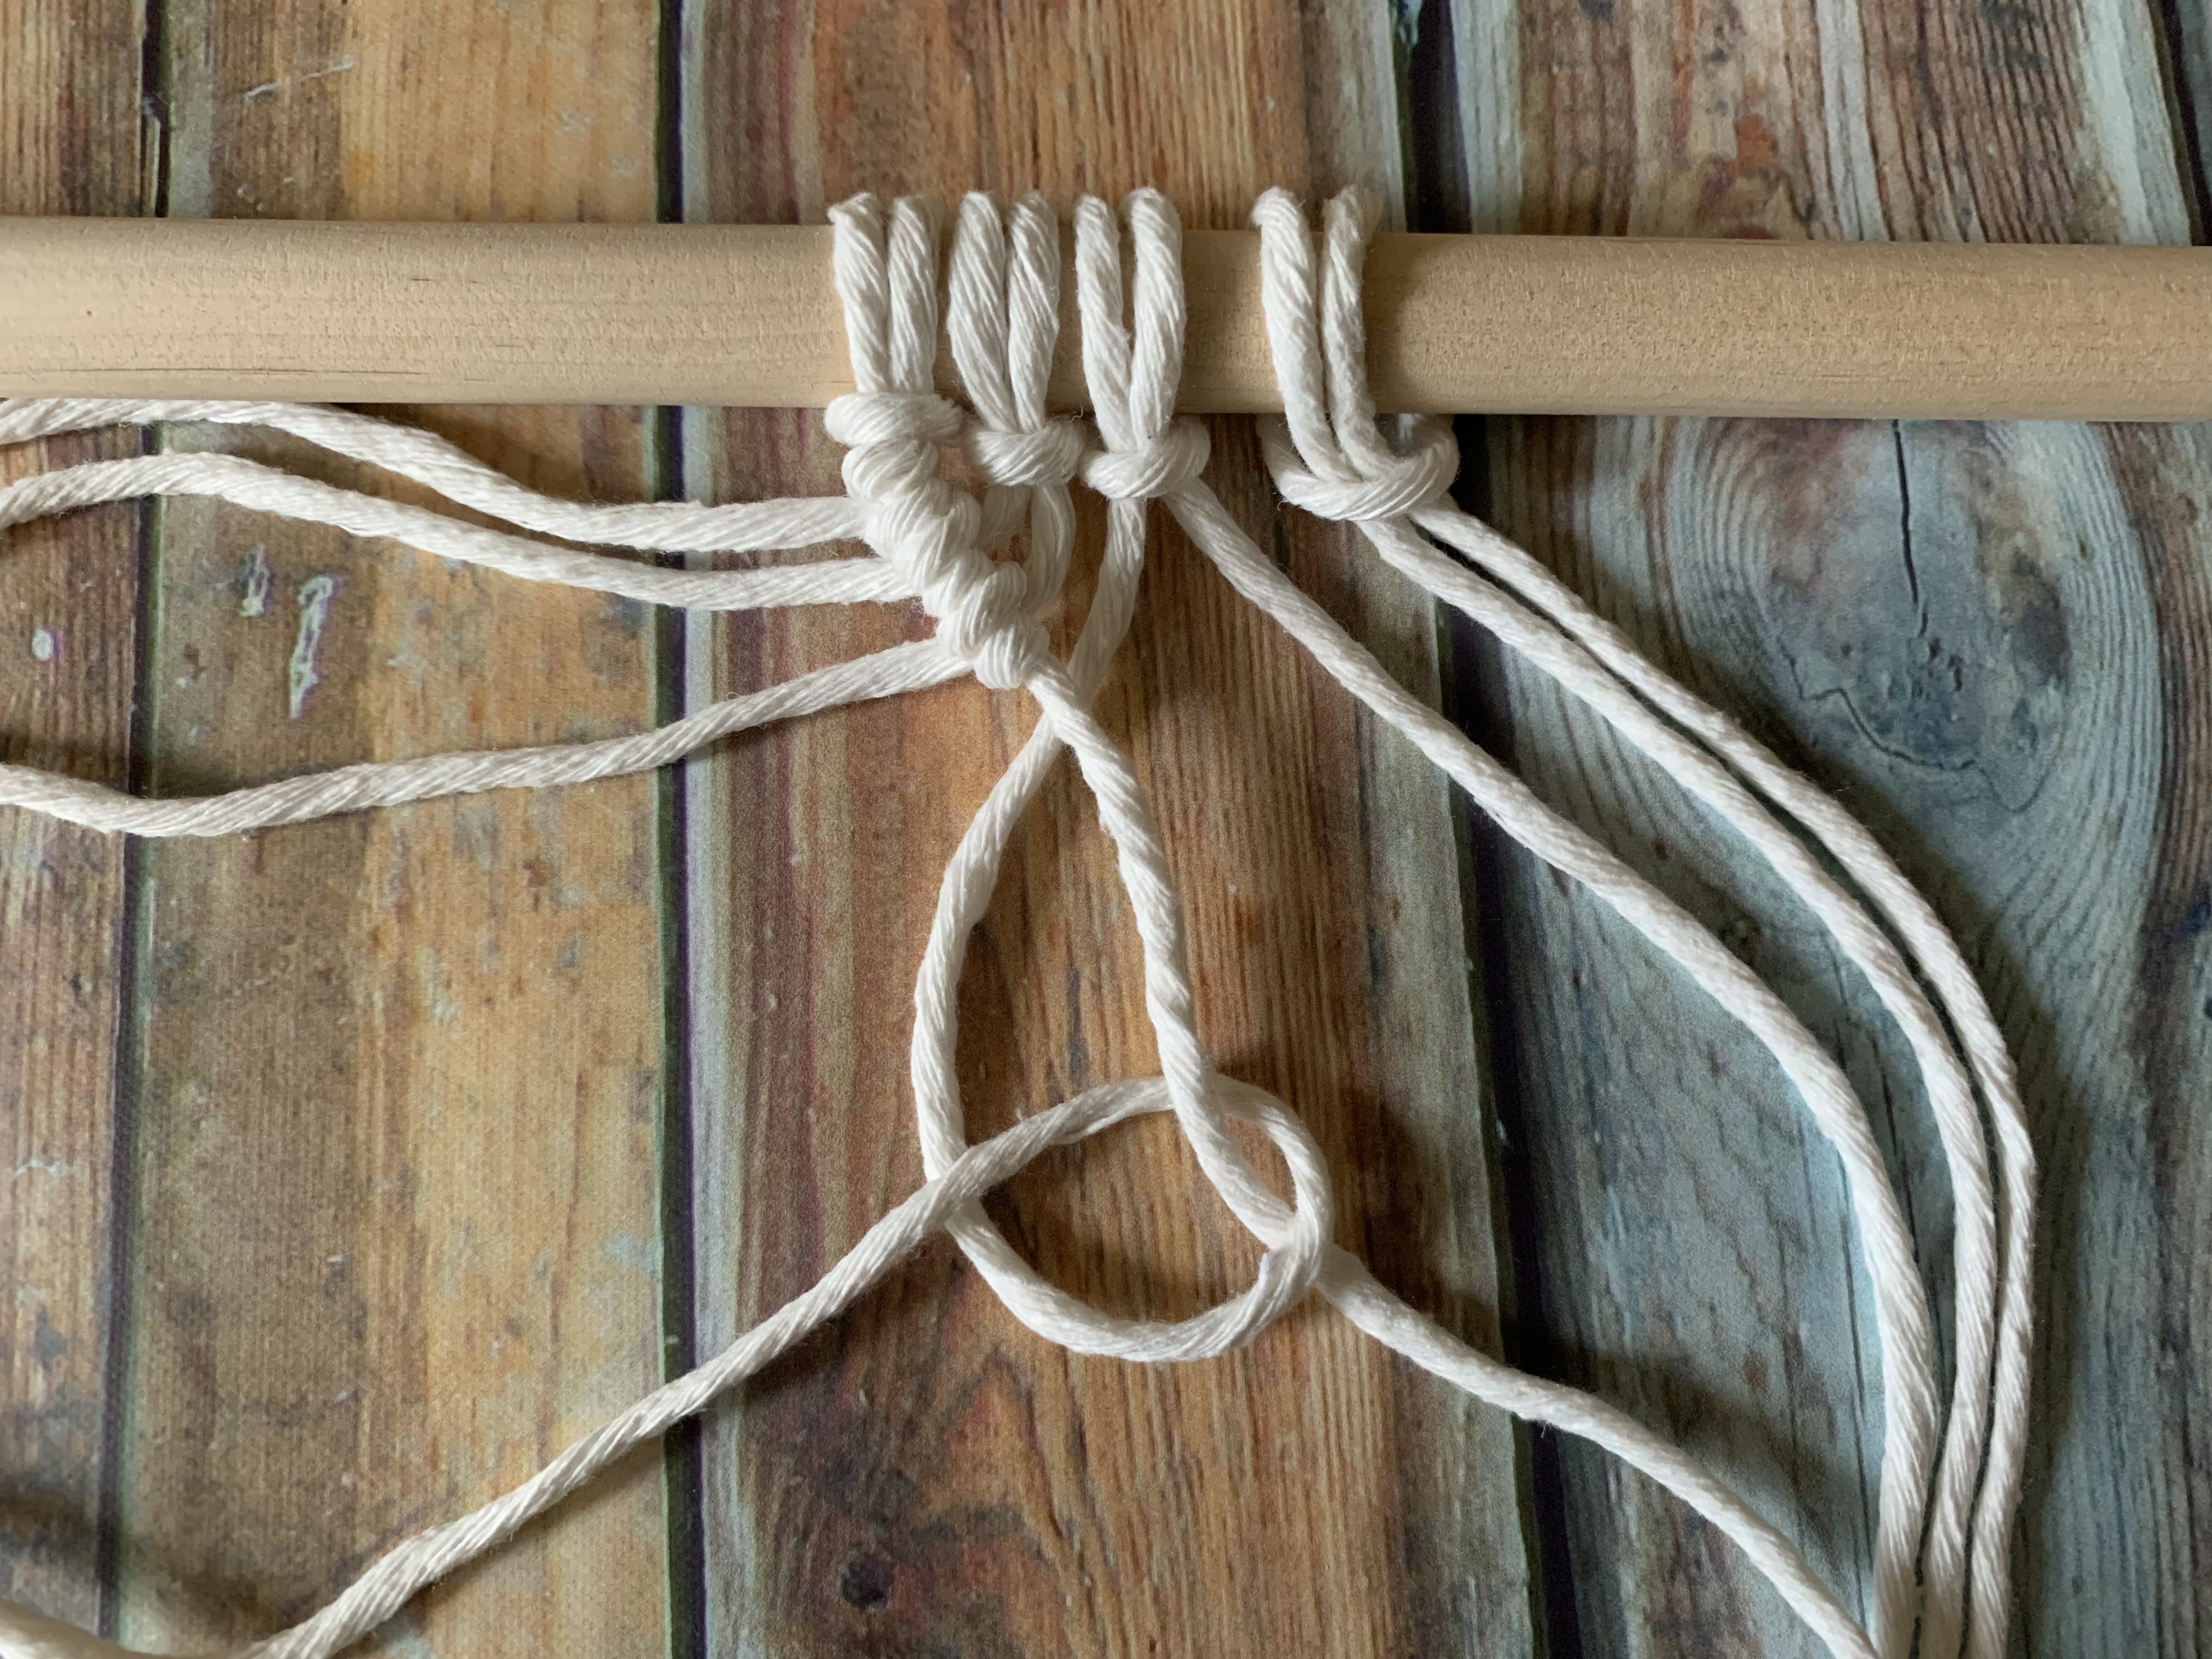
3. Take the second cord, pull up over the front of the core piece, then pull down through the loop that was created, and pull tight
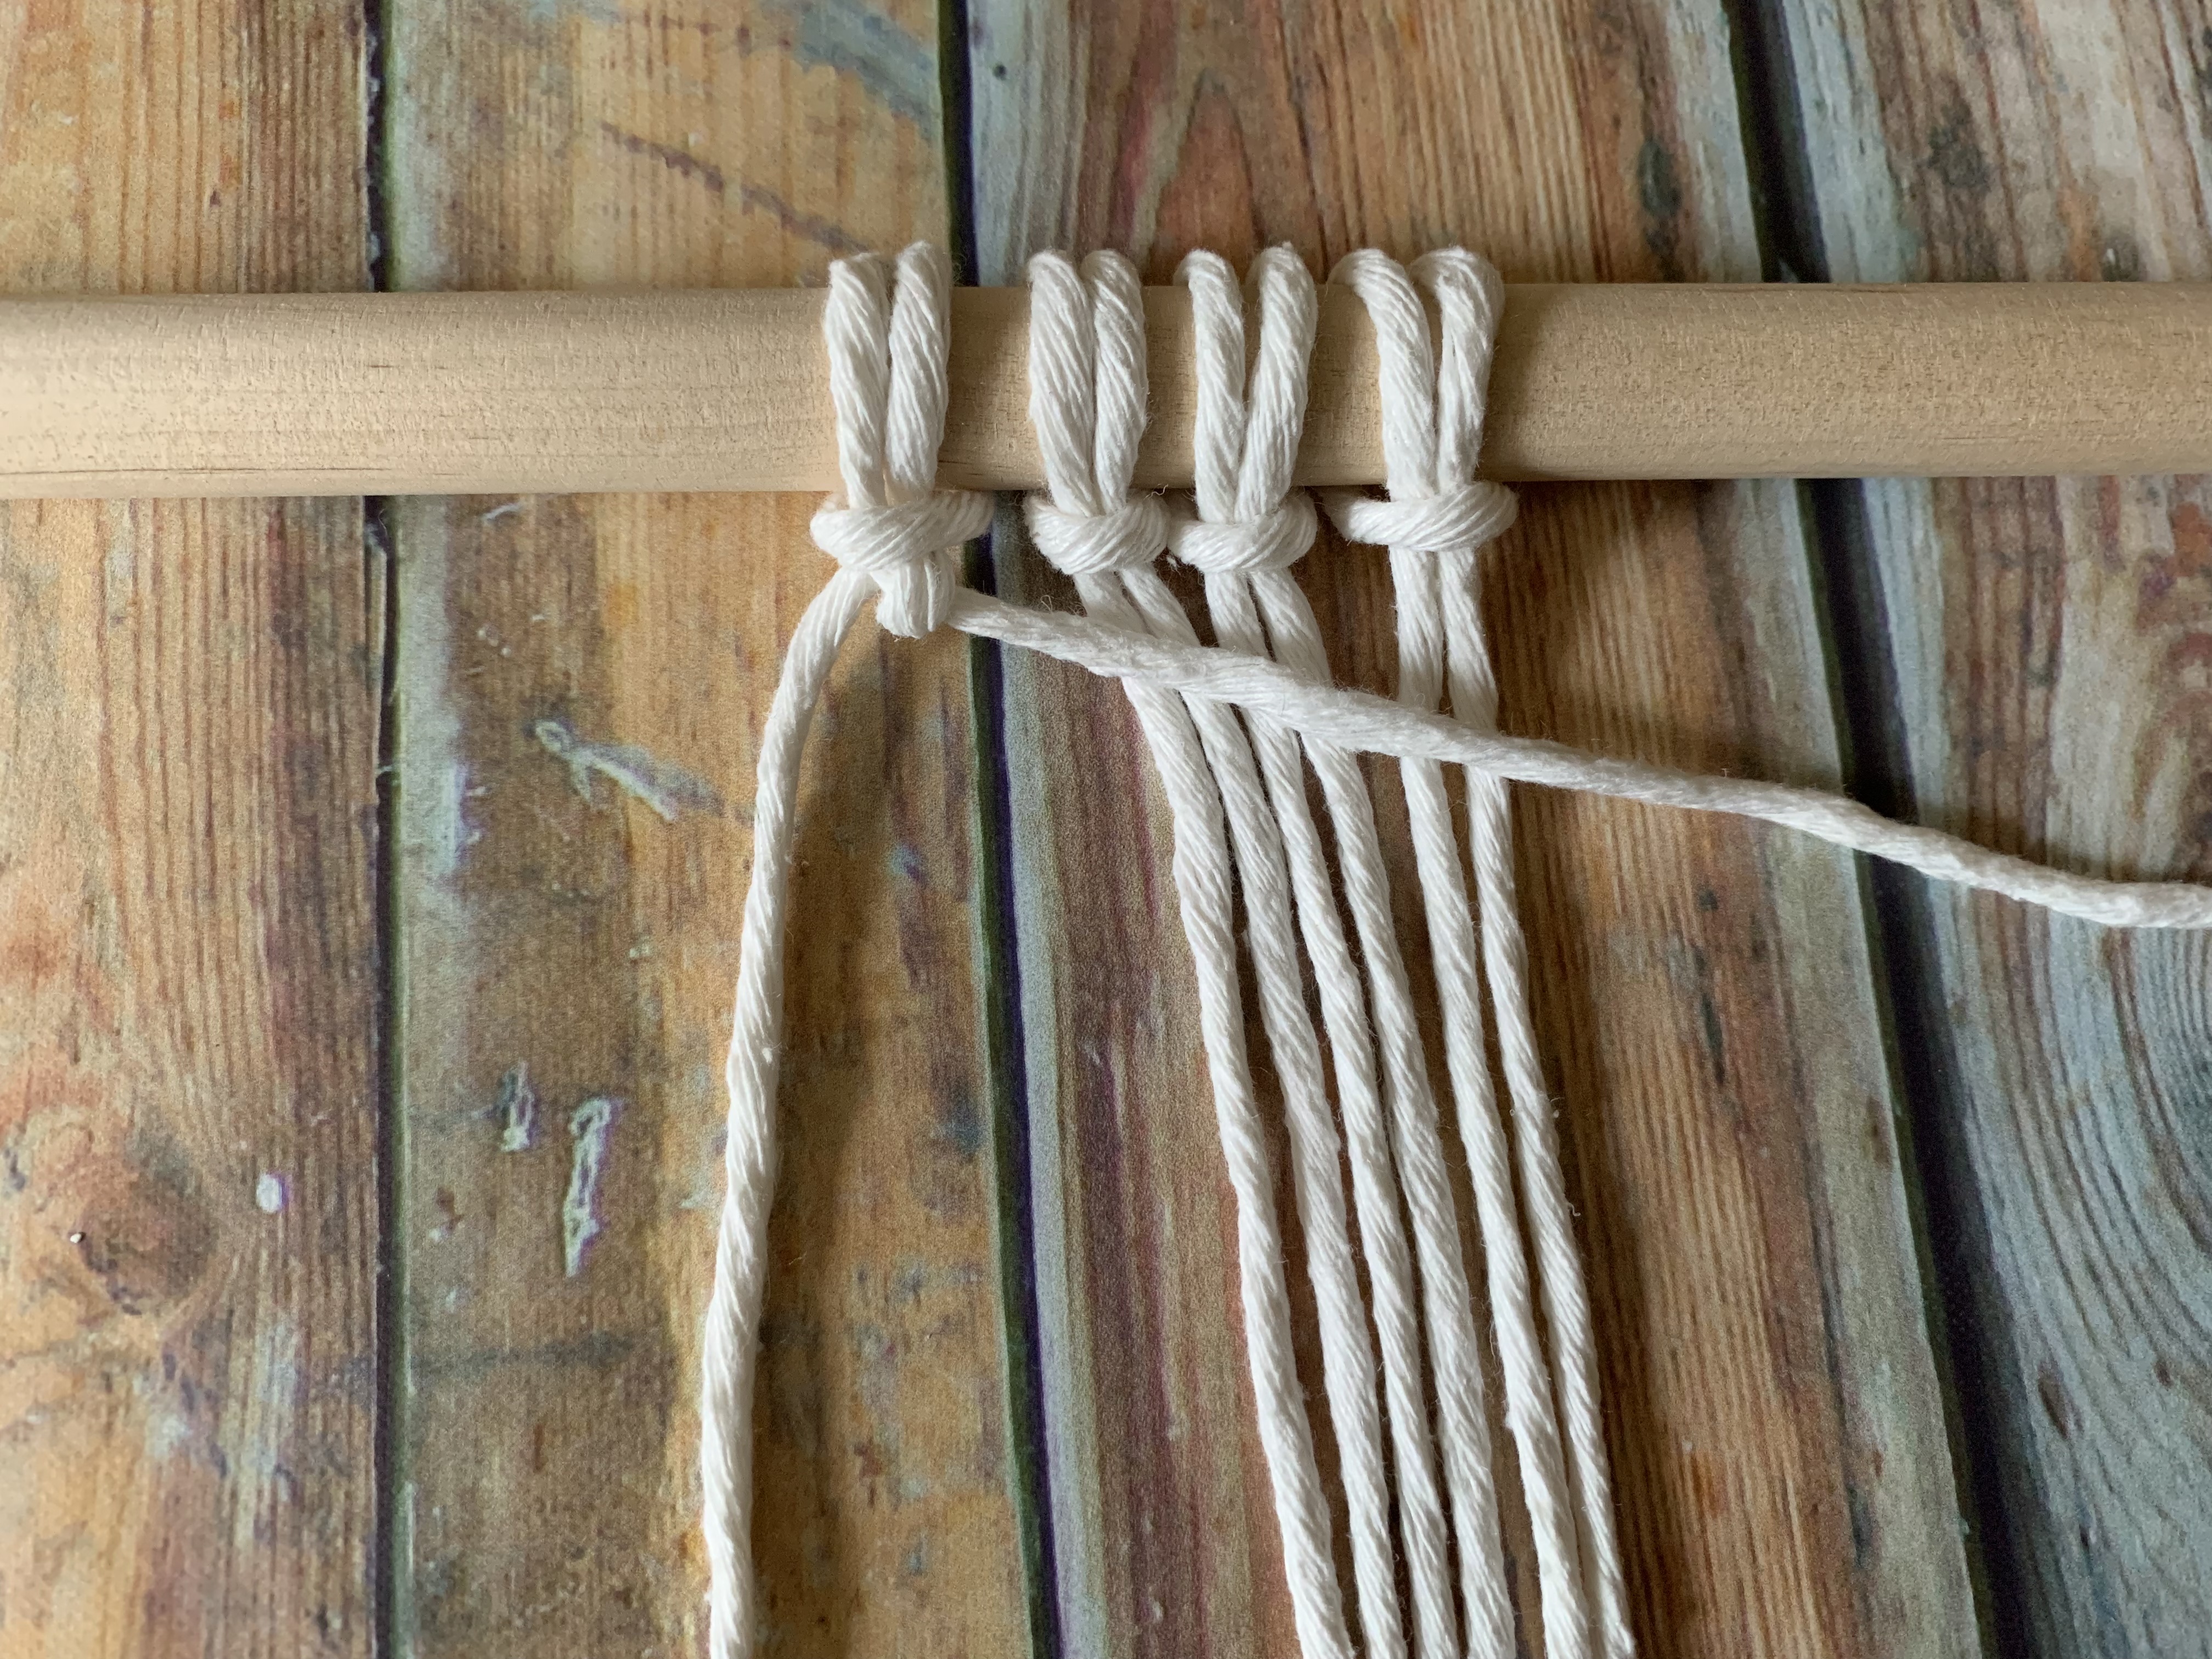
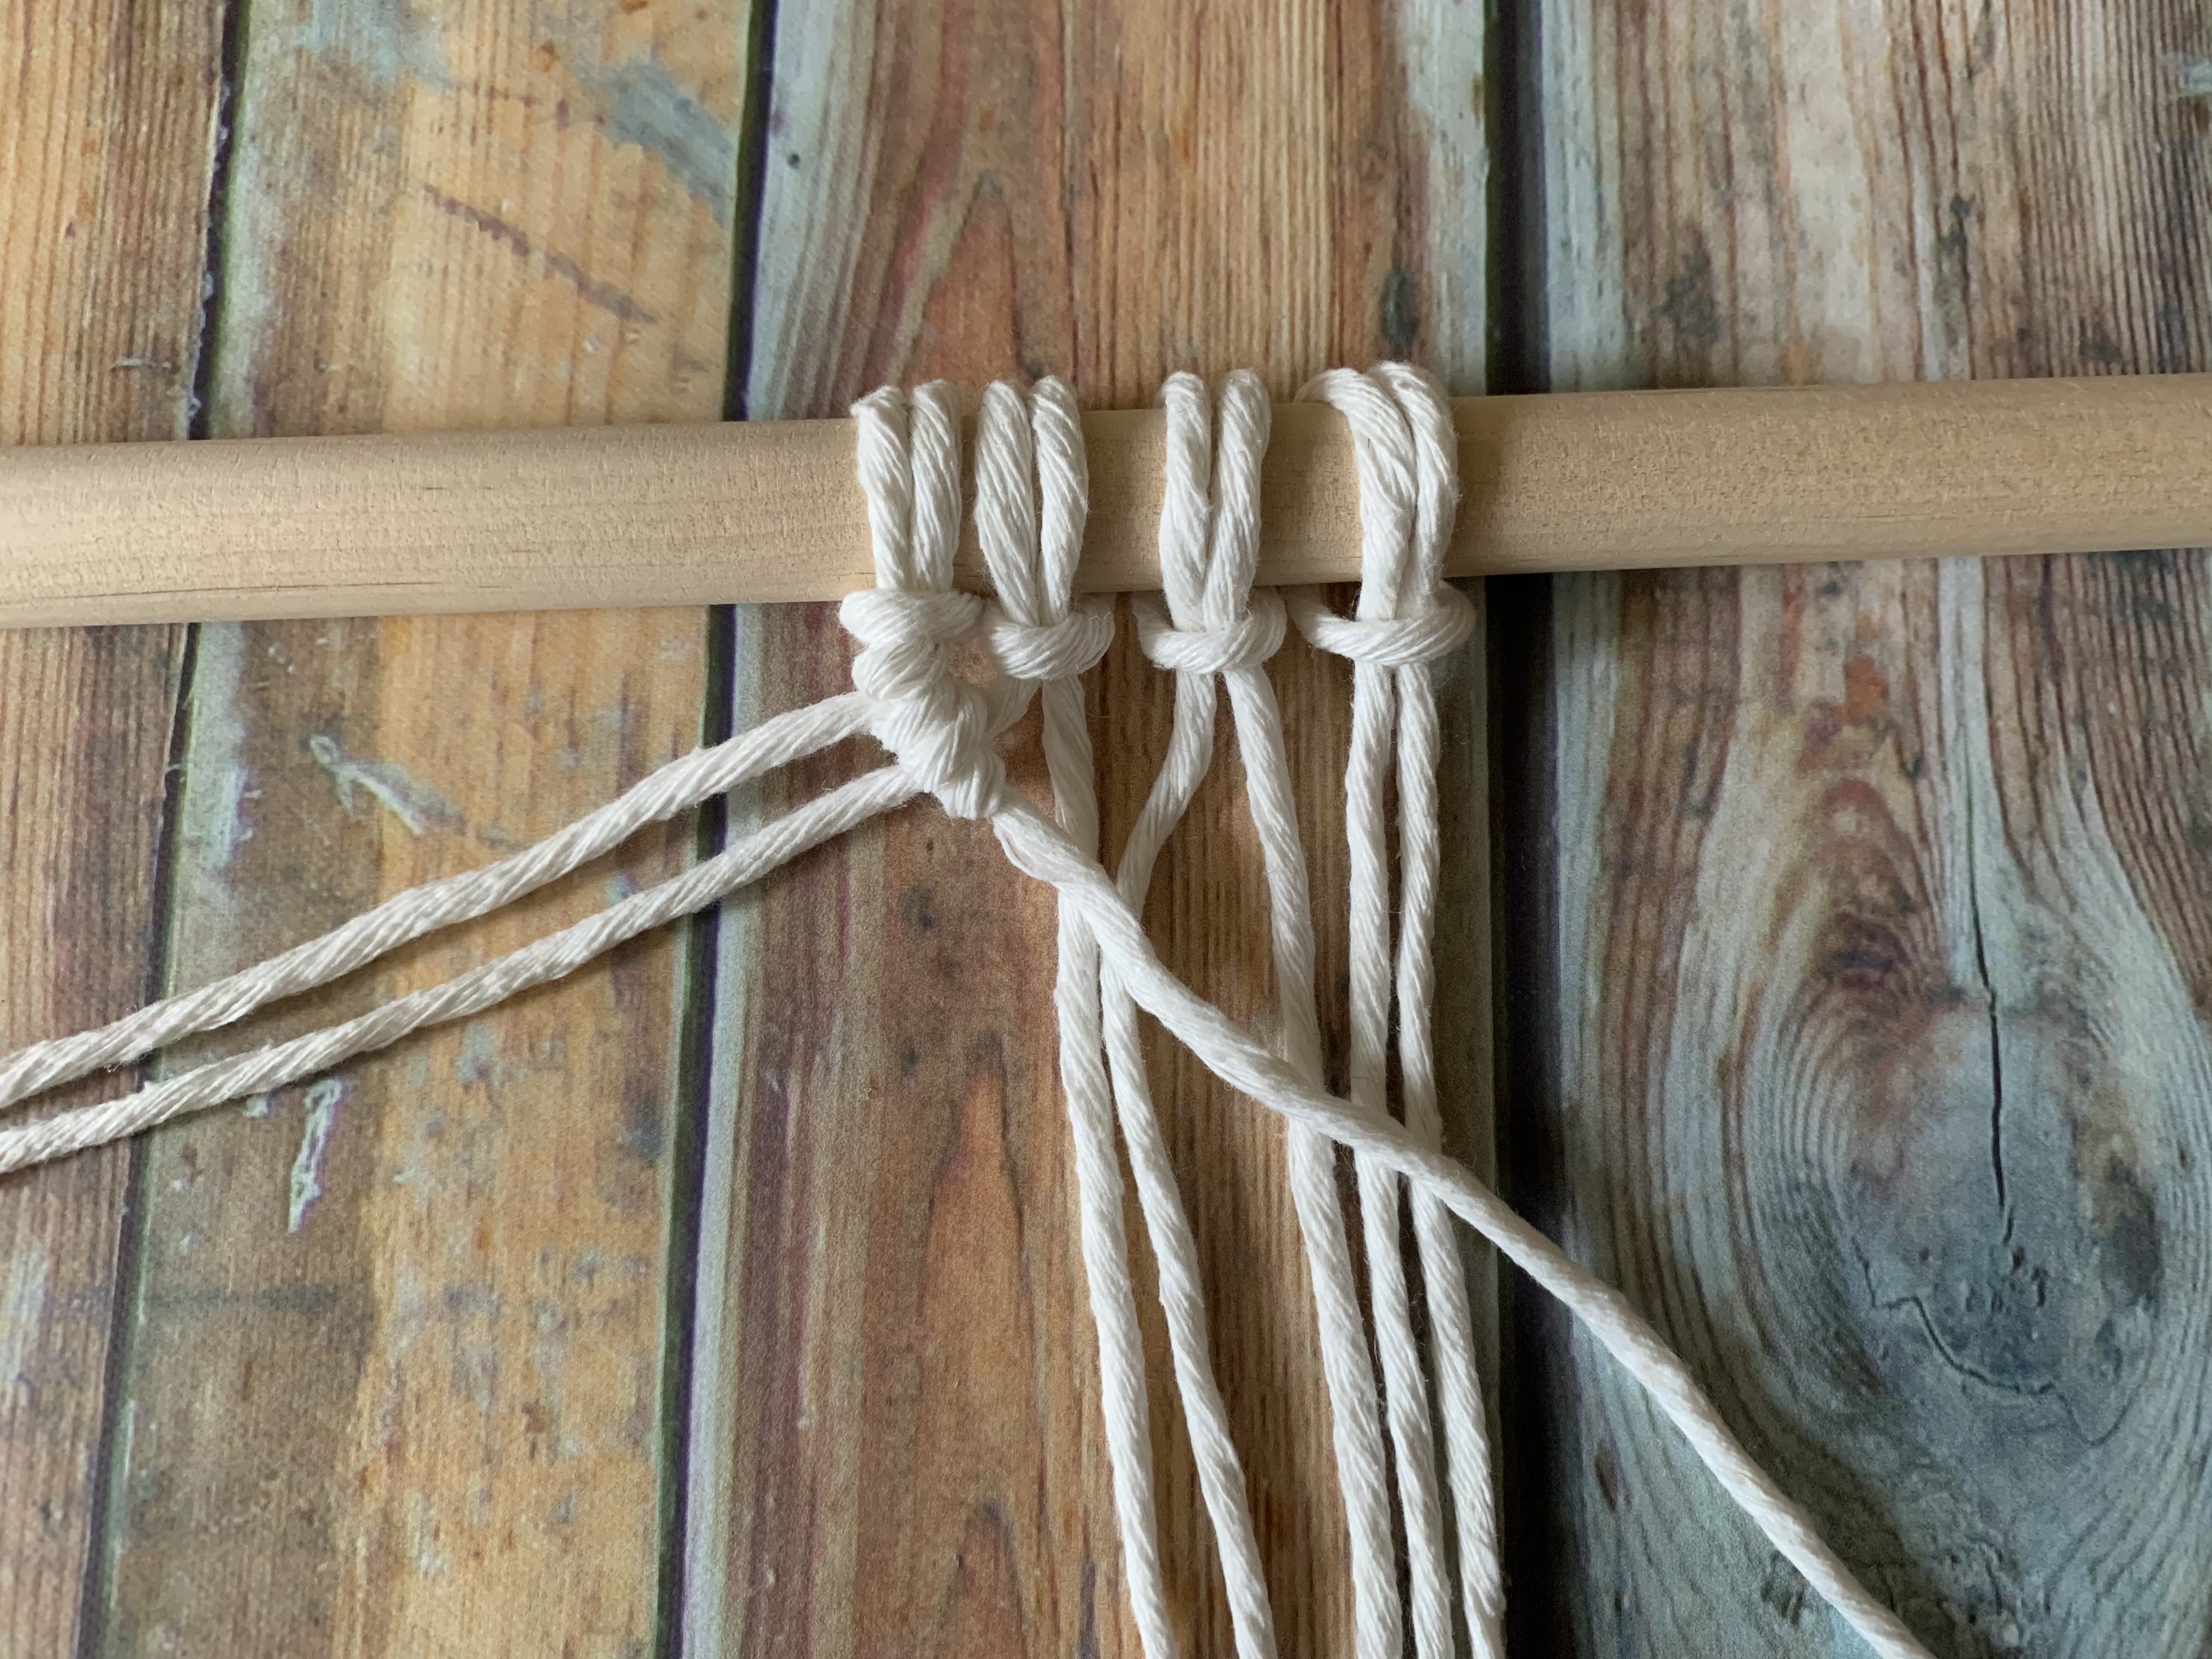
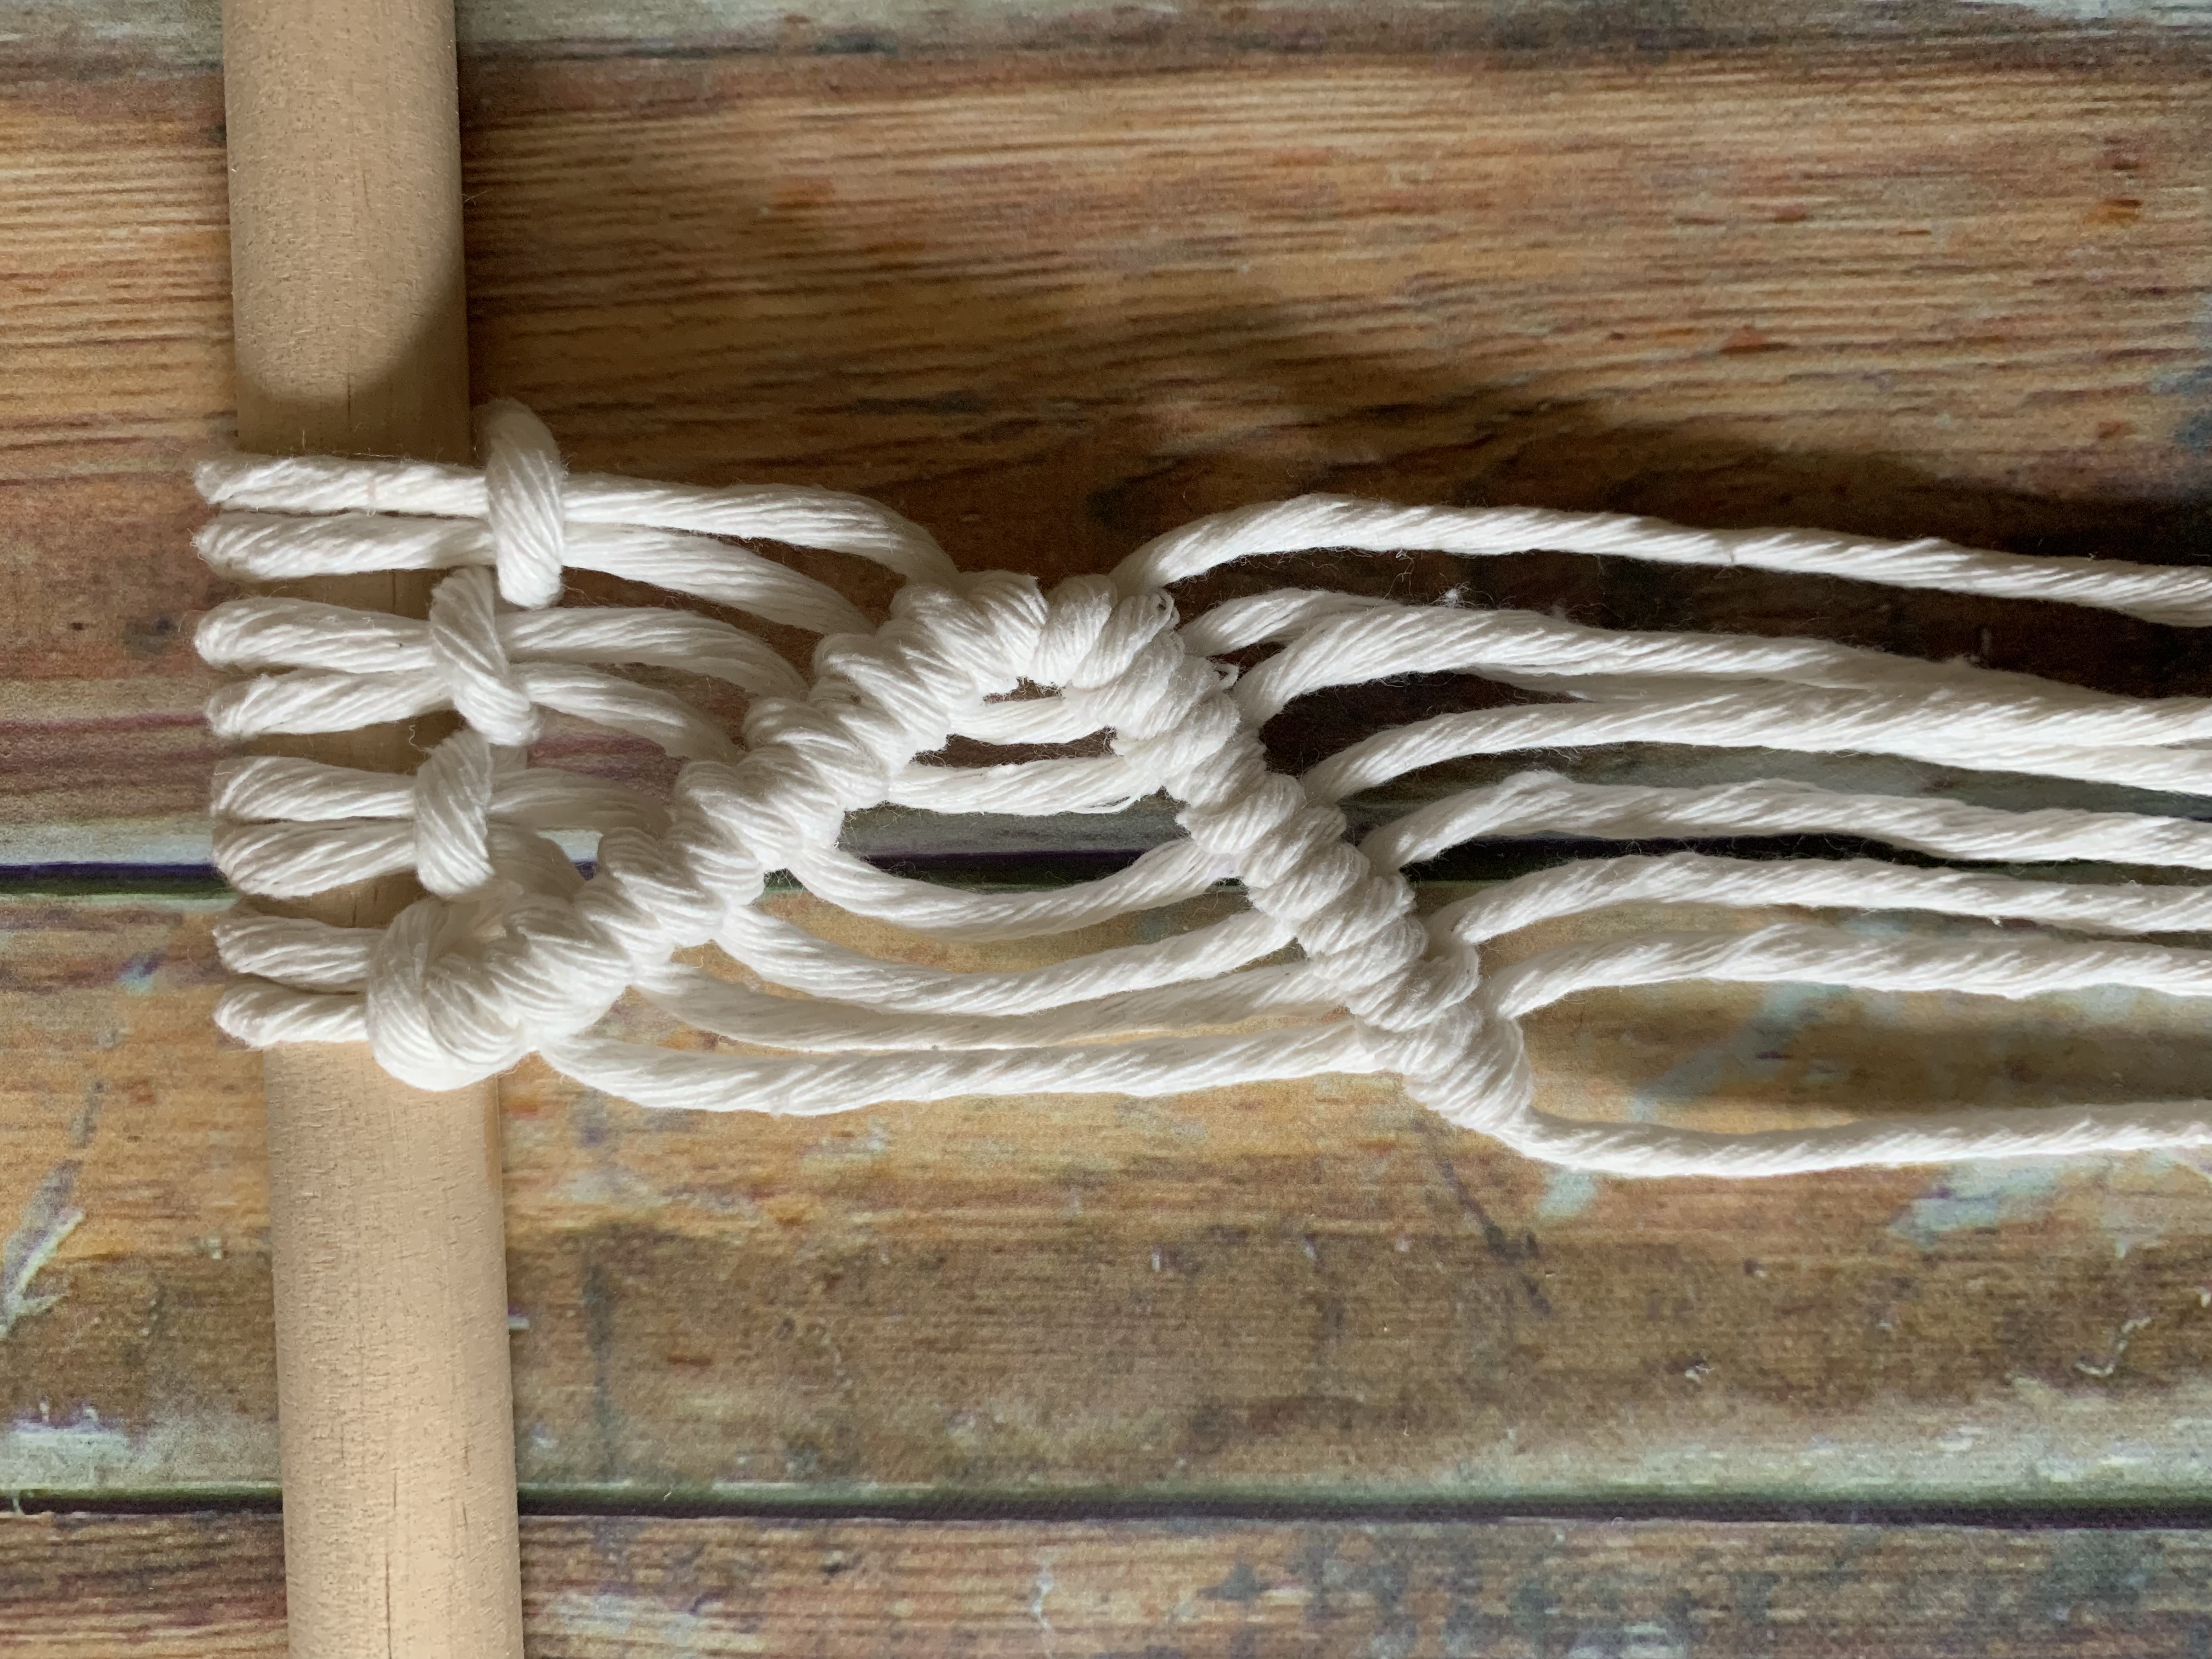
4. Repeat this a second time; now you have a completed double half hitch knot

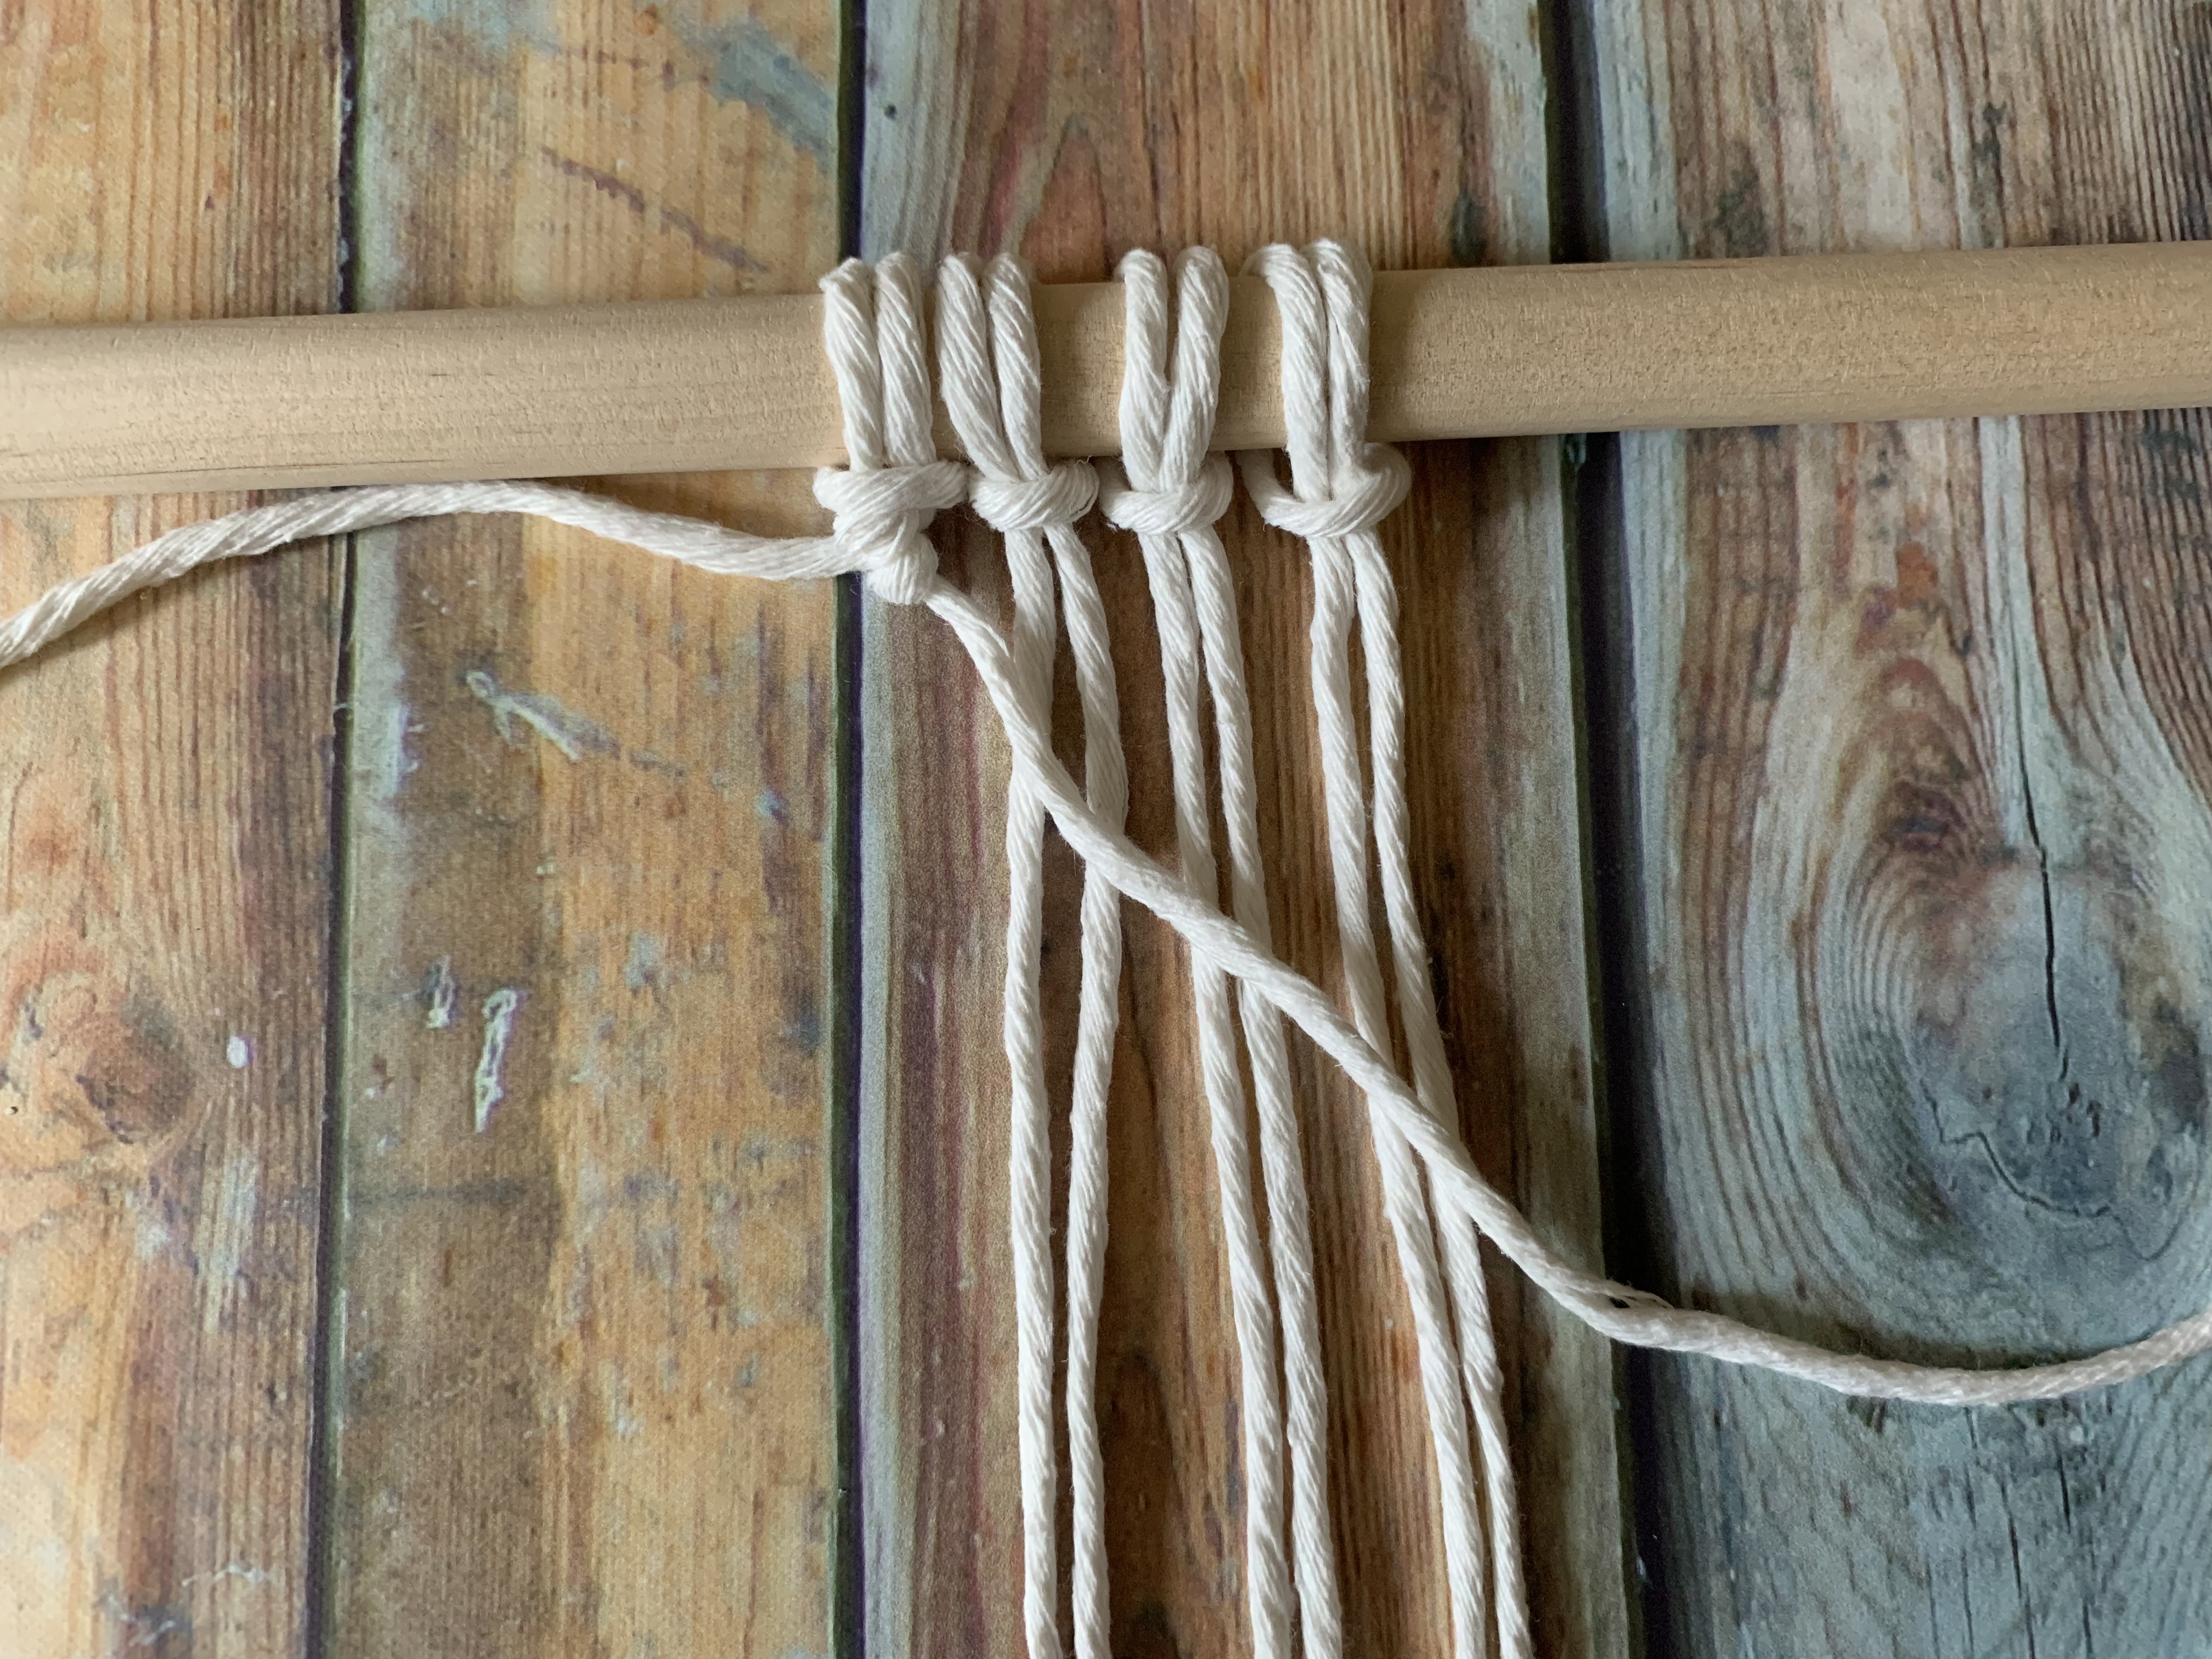
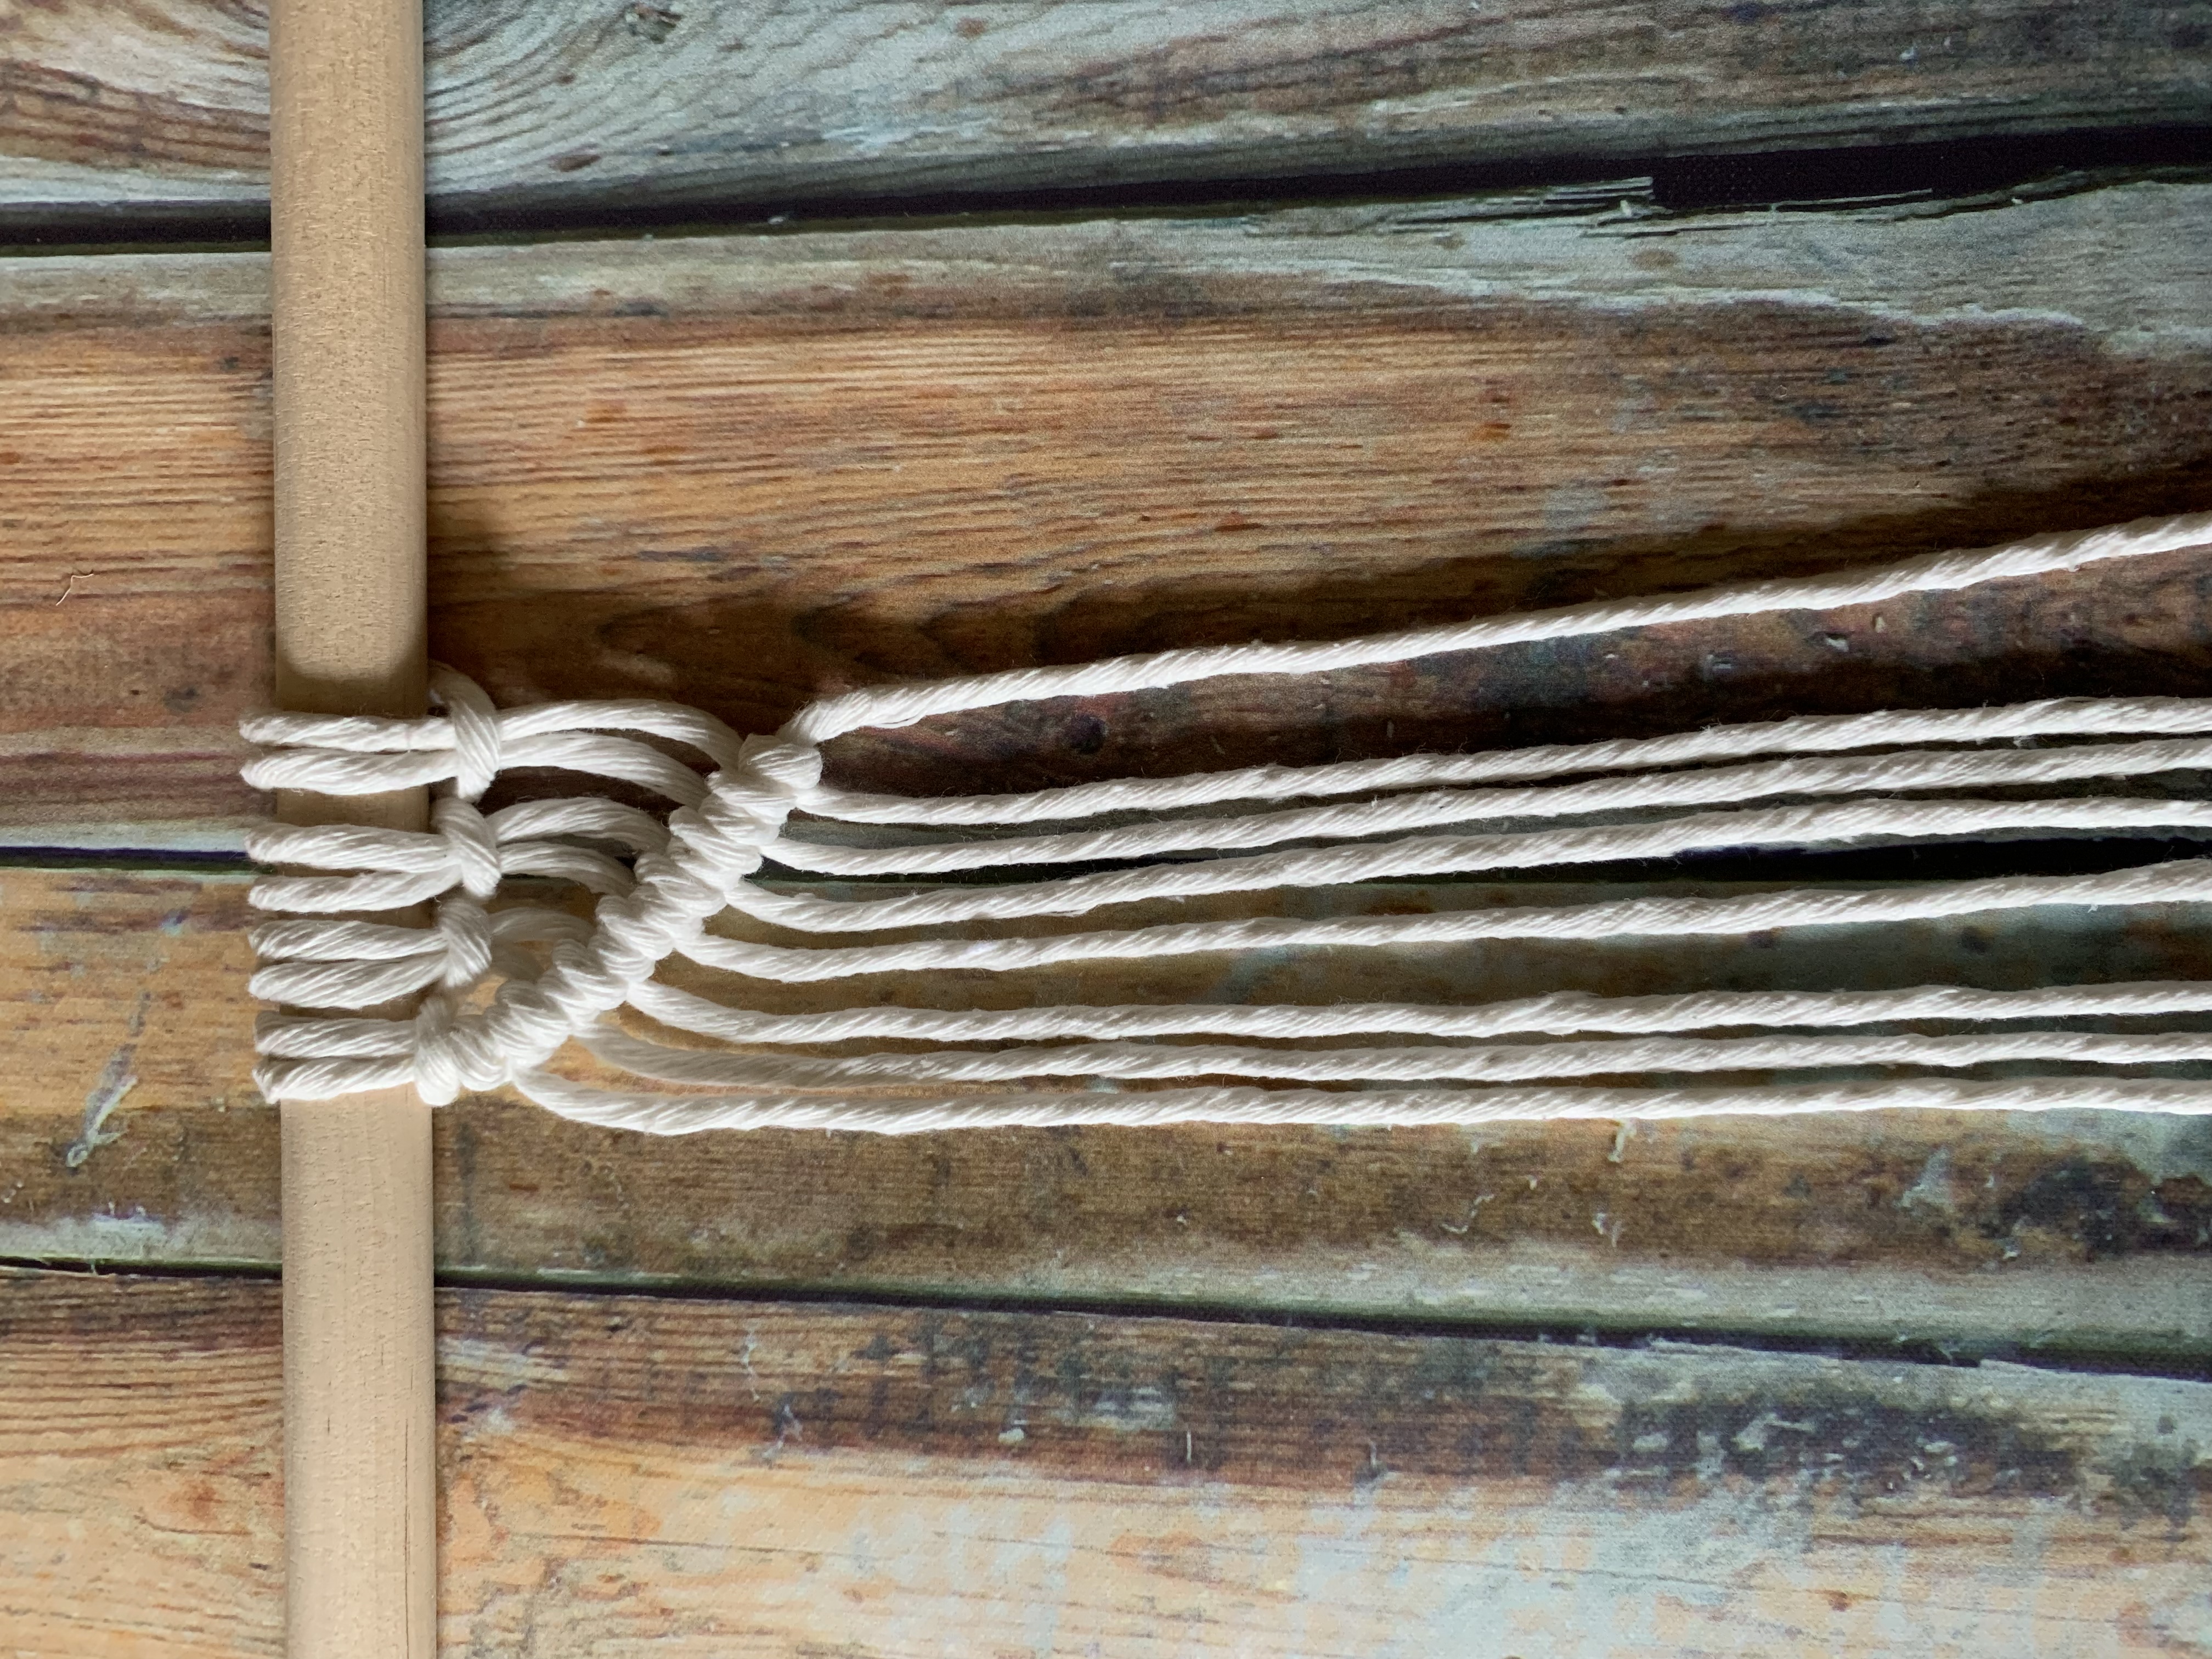
5. Repeat going across as many cords as desired
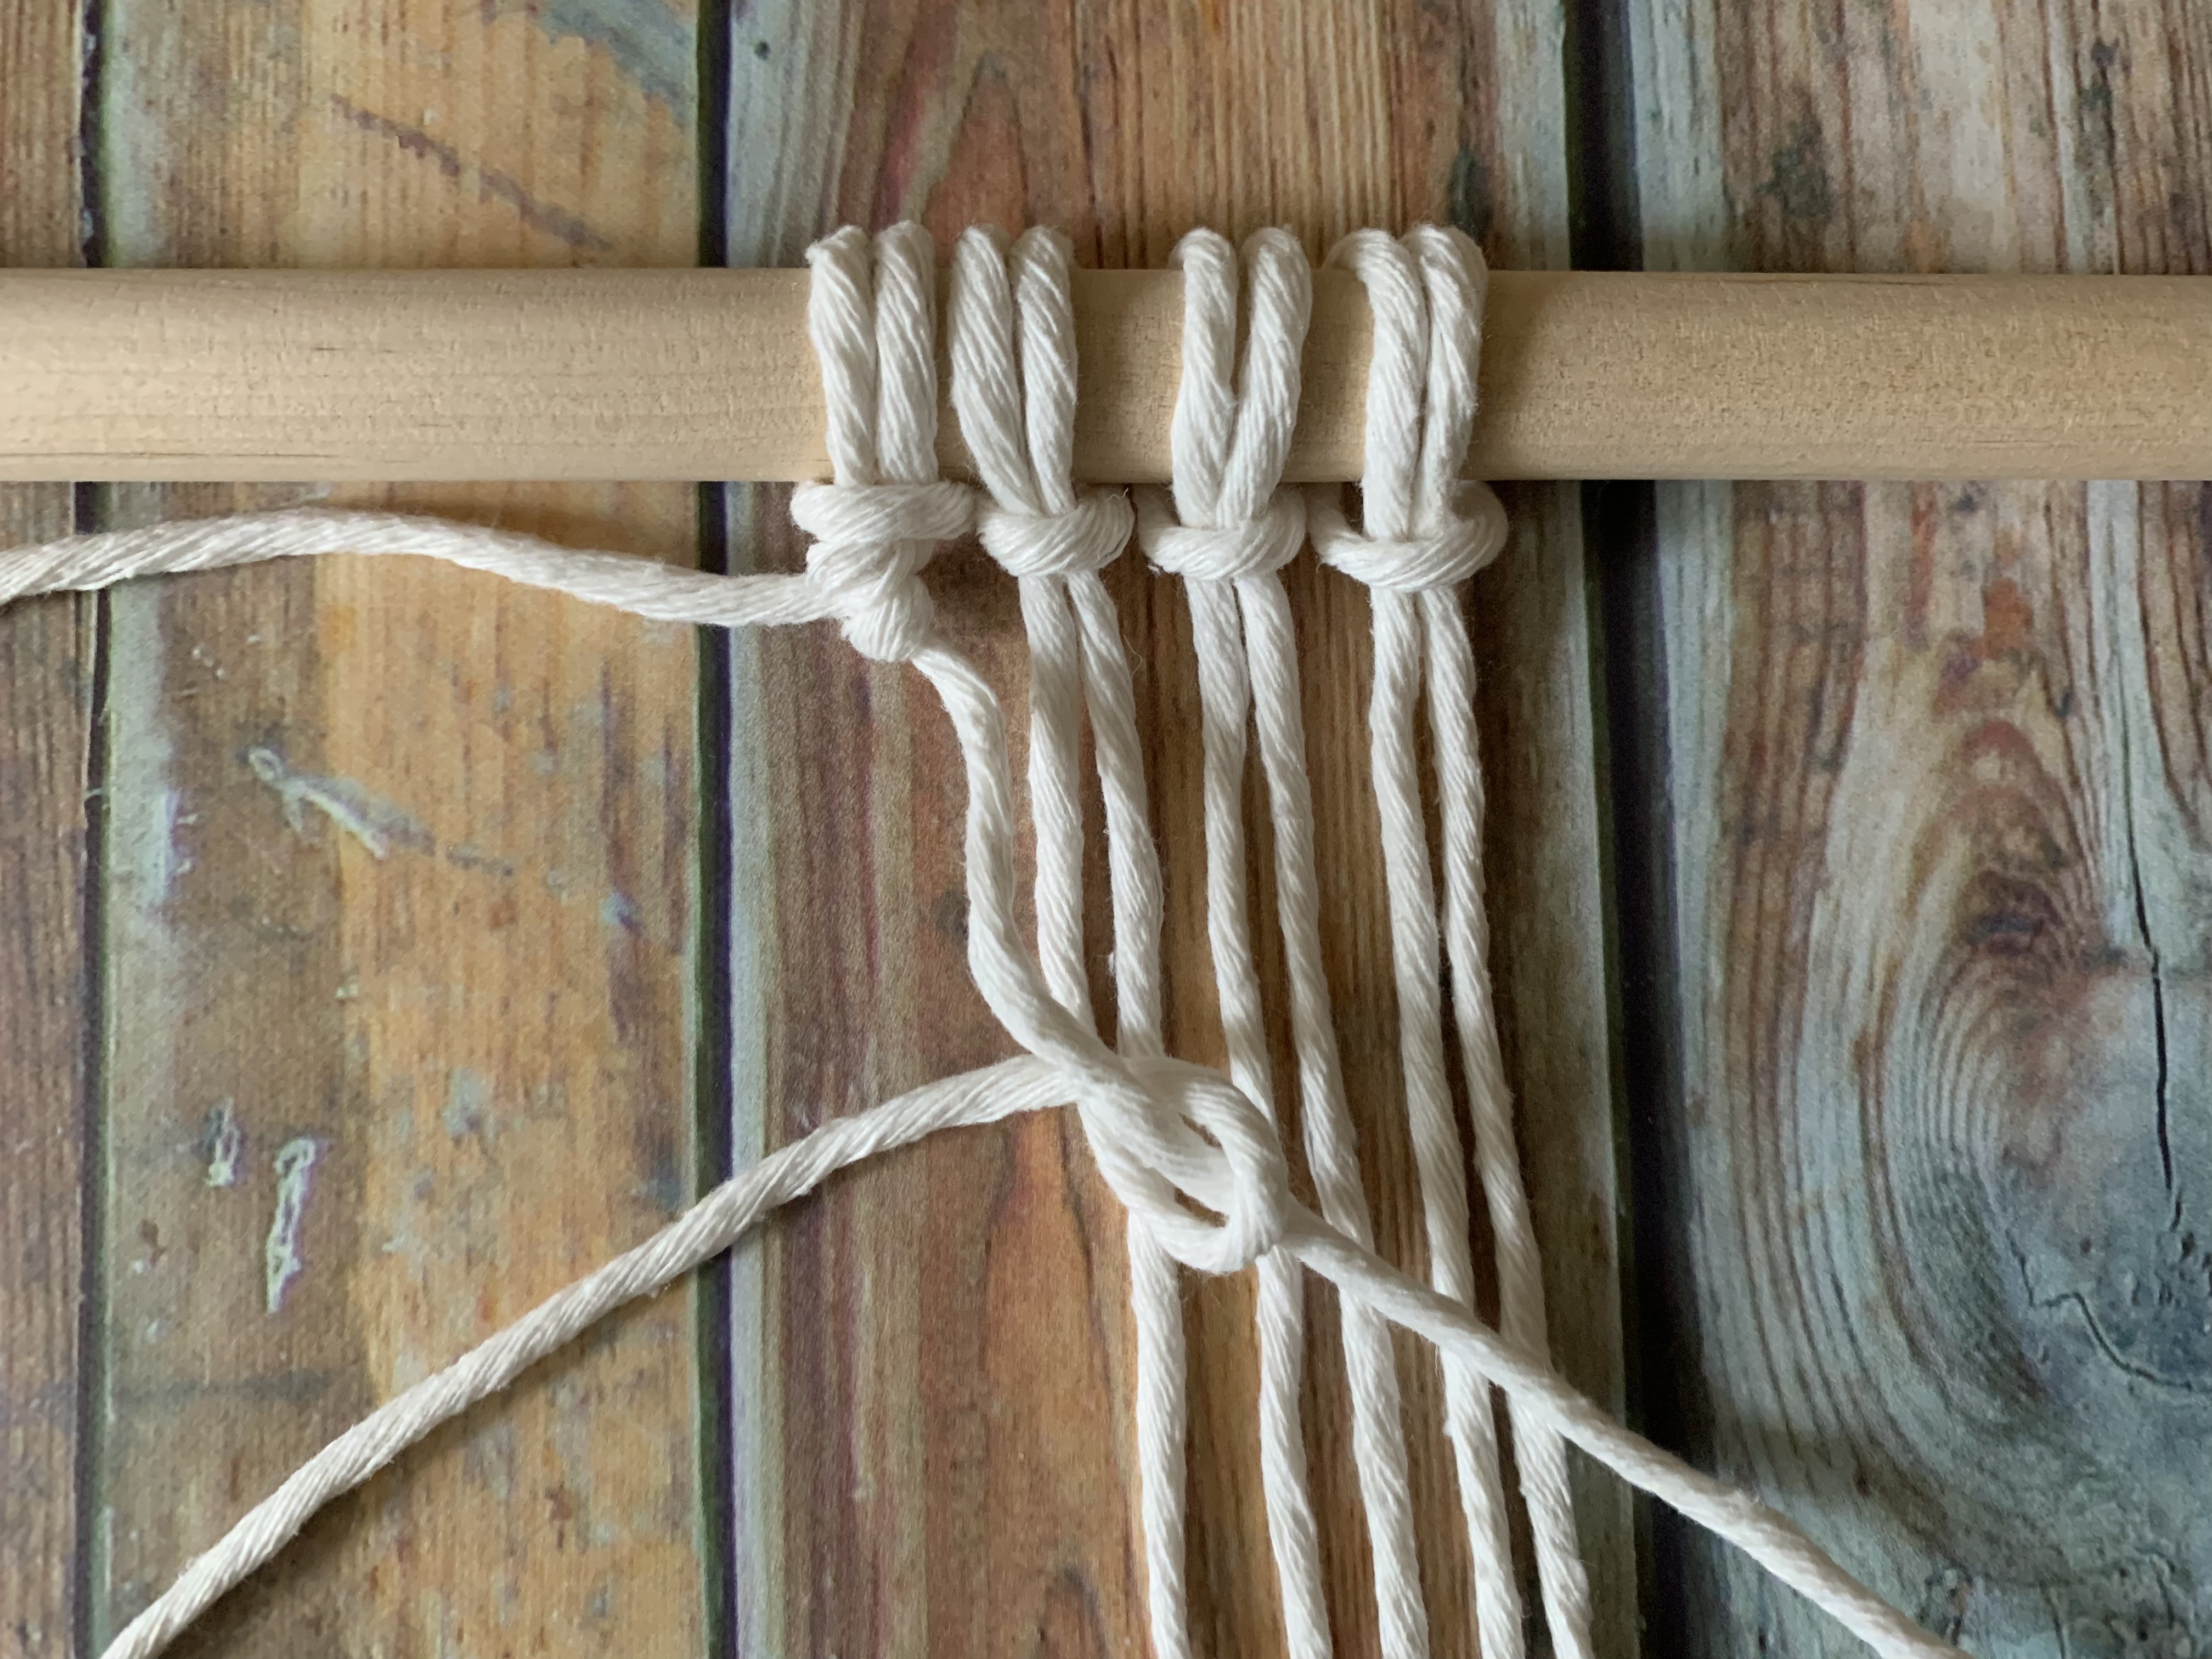
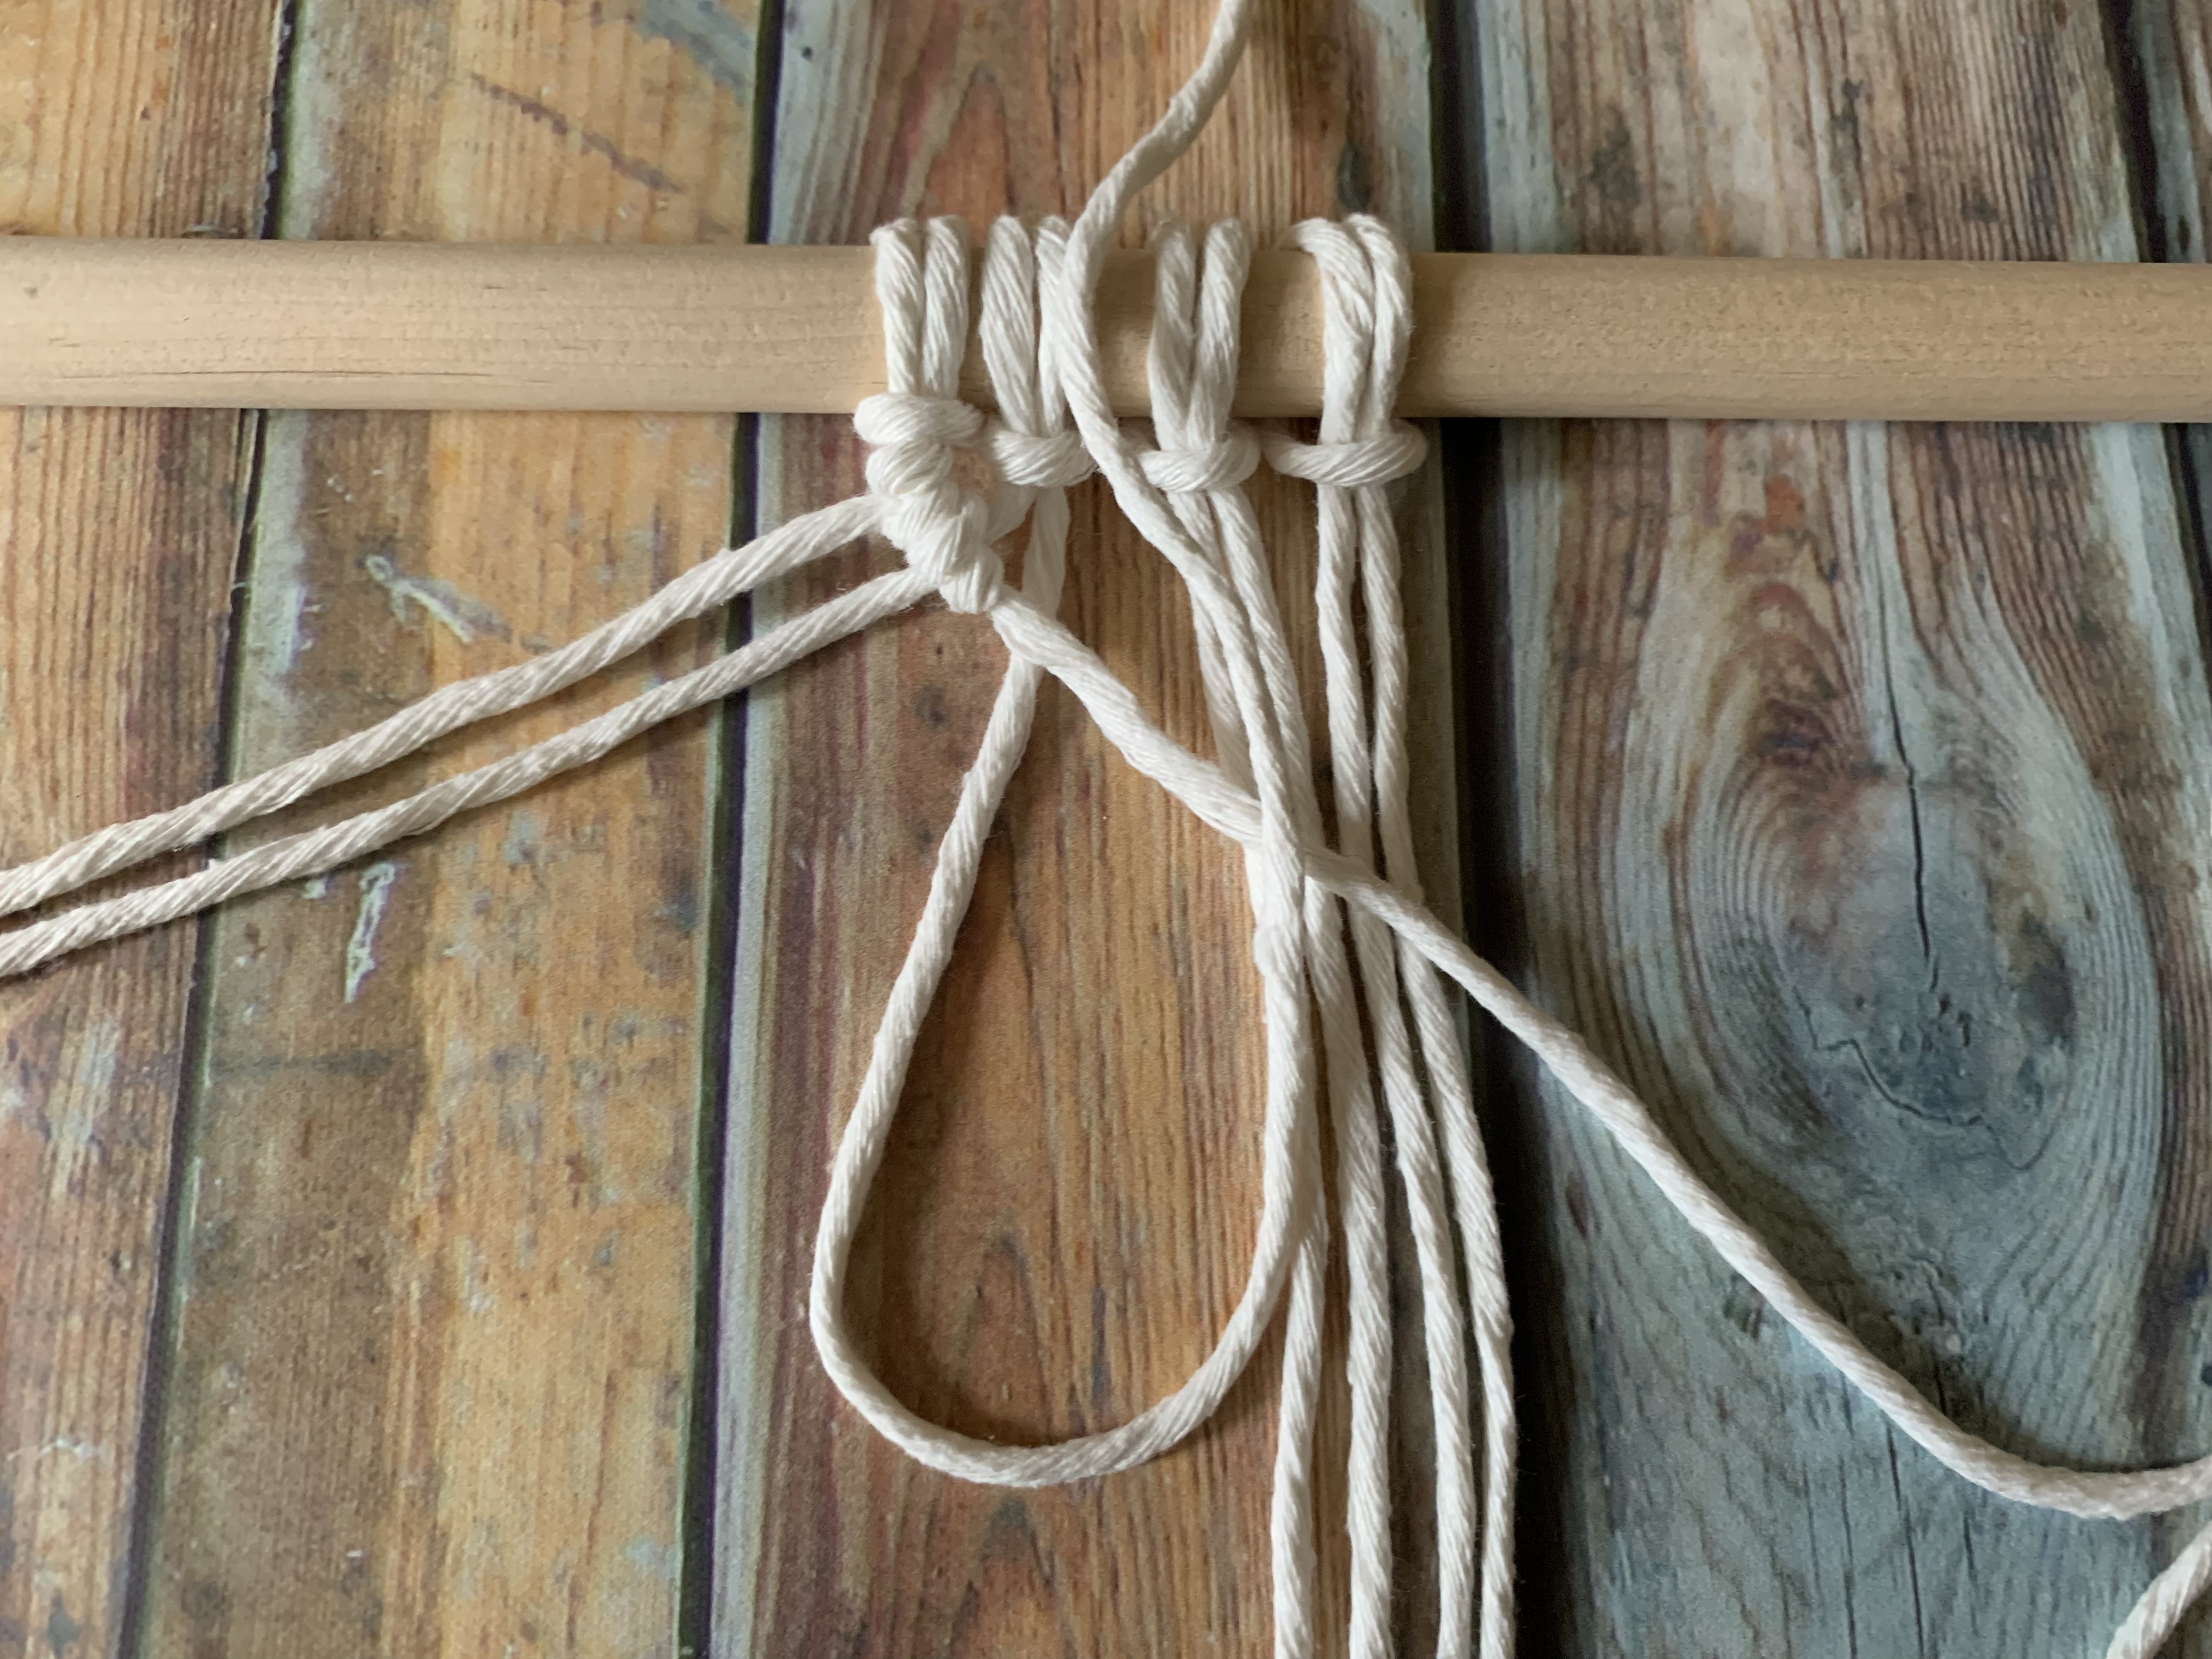

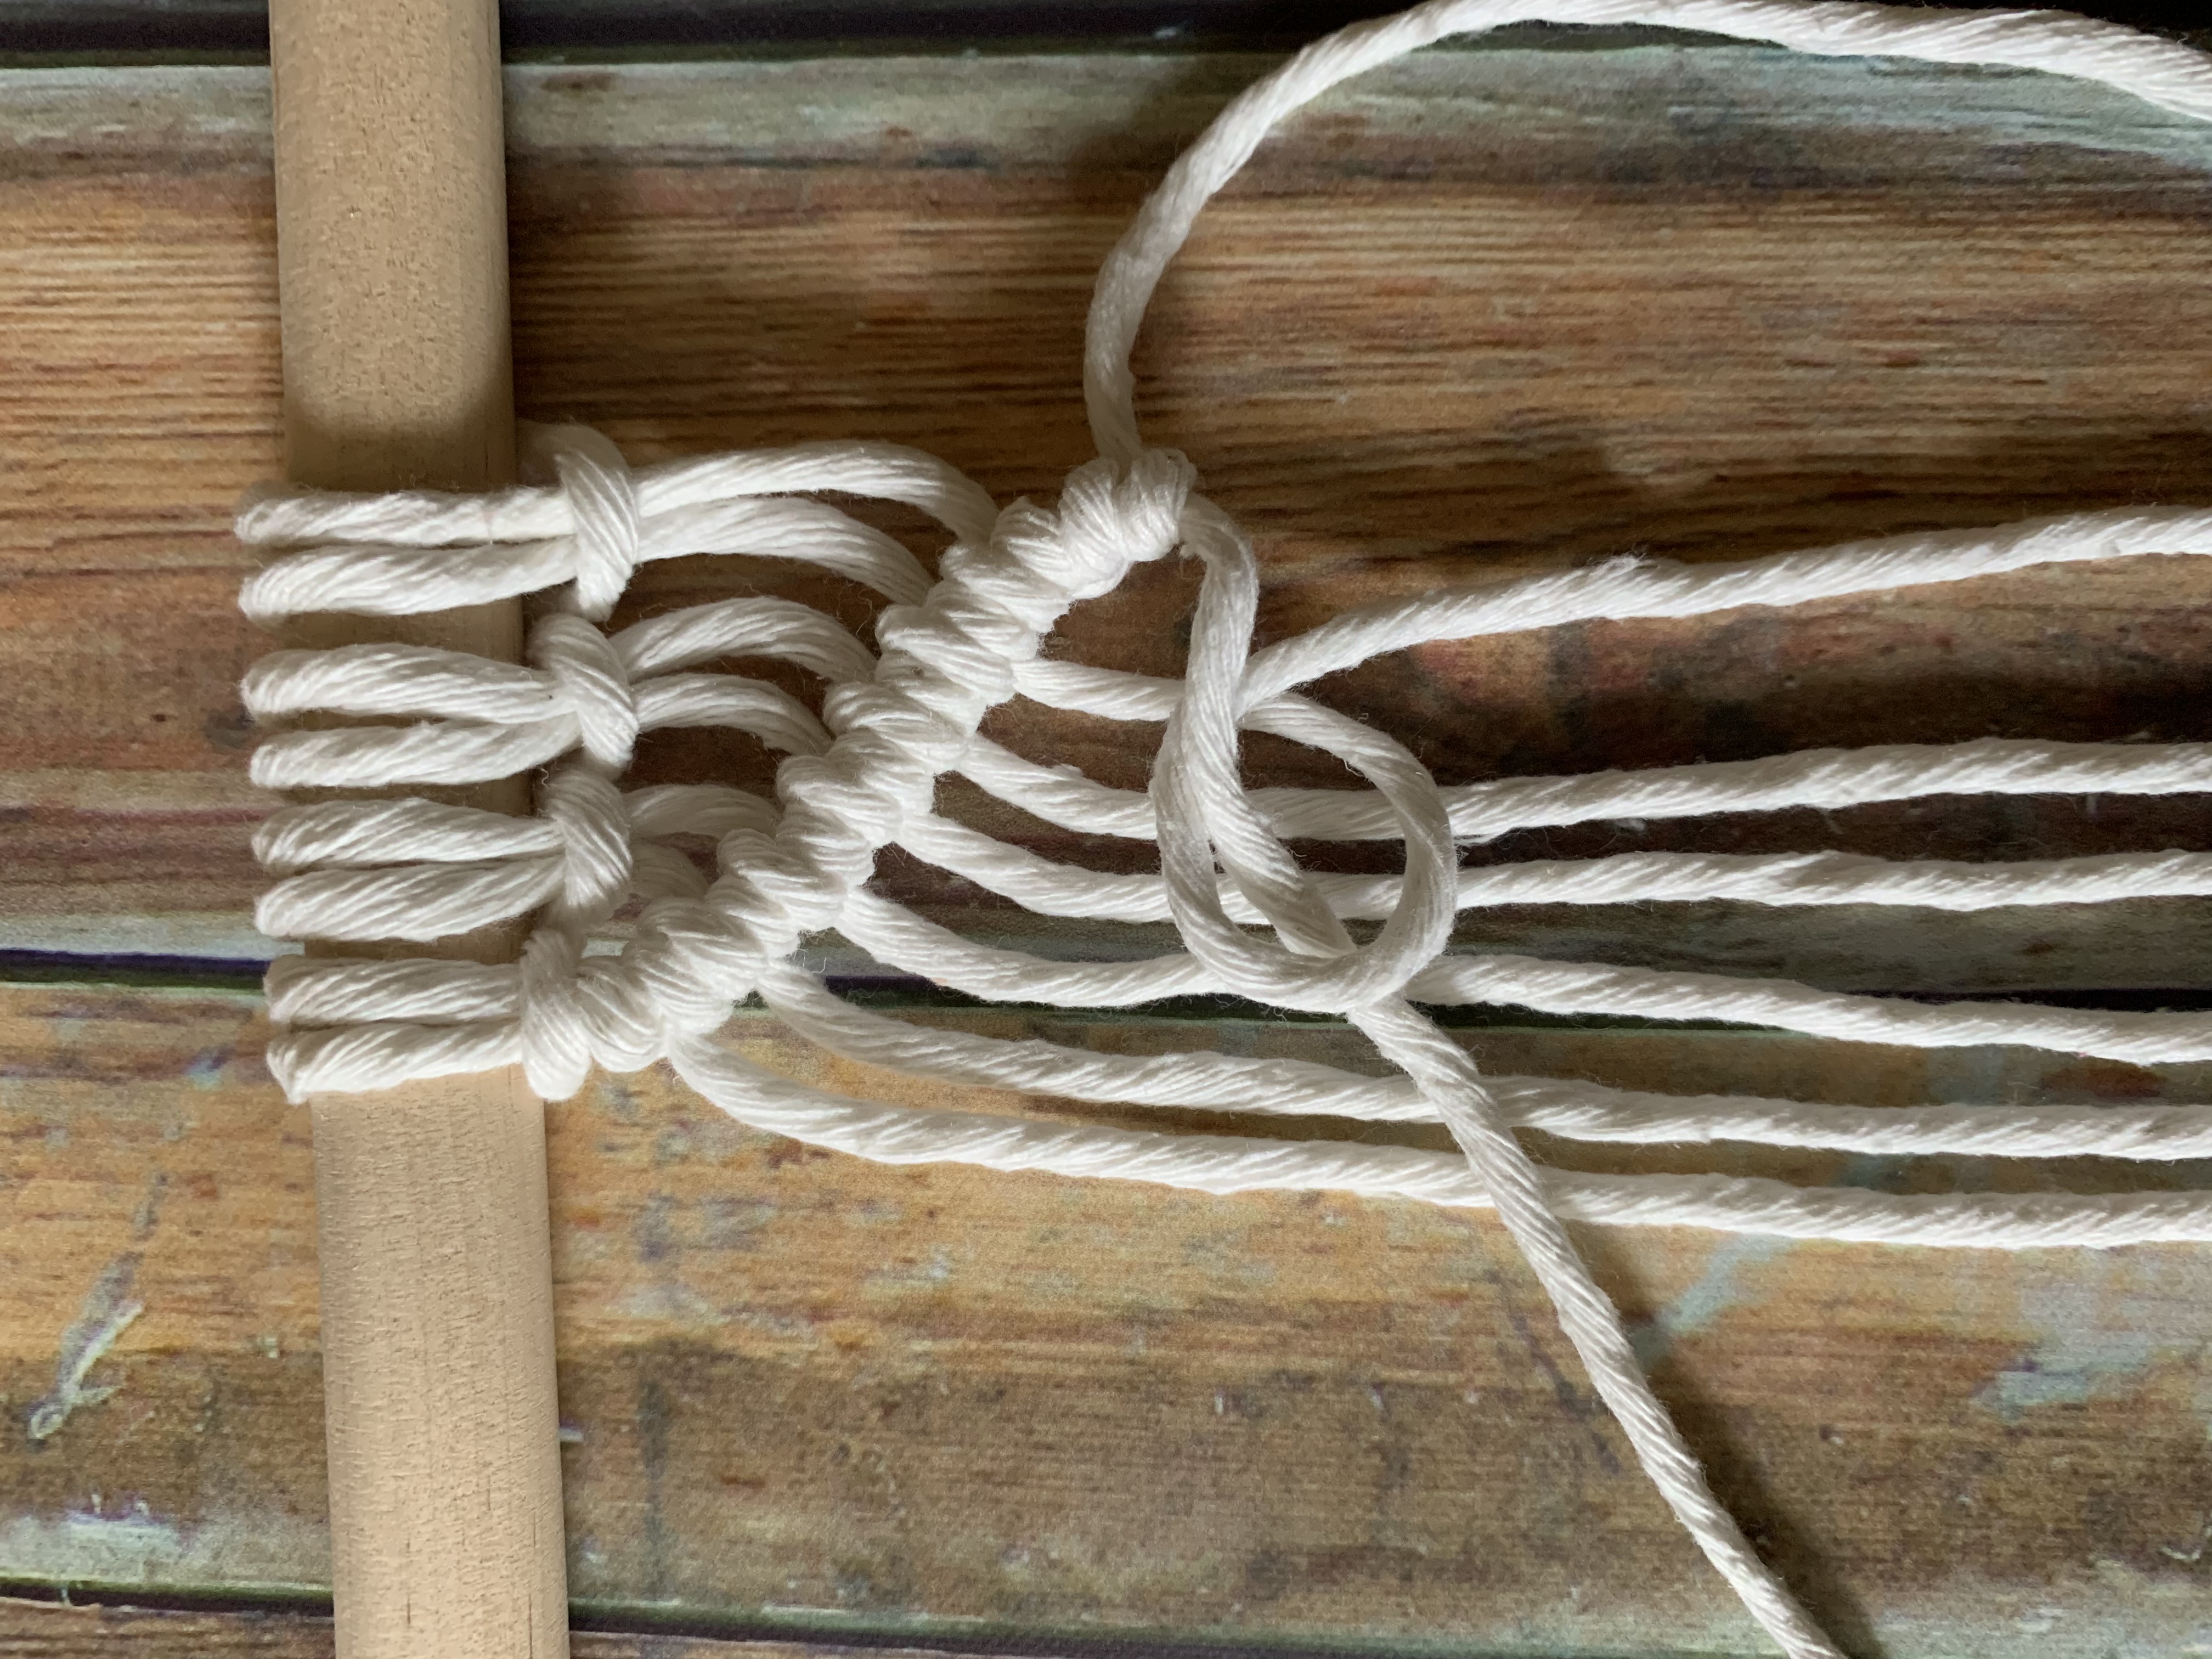
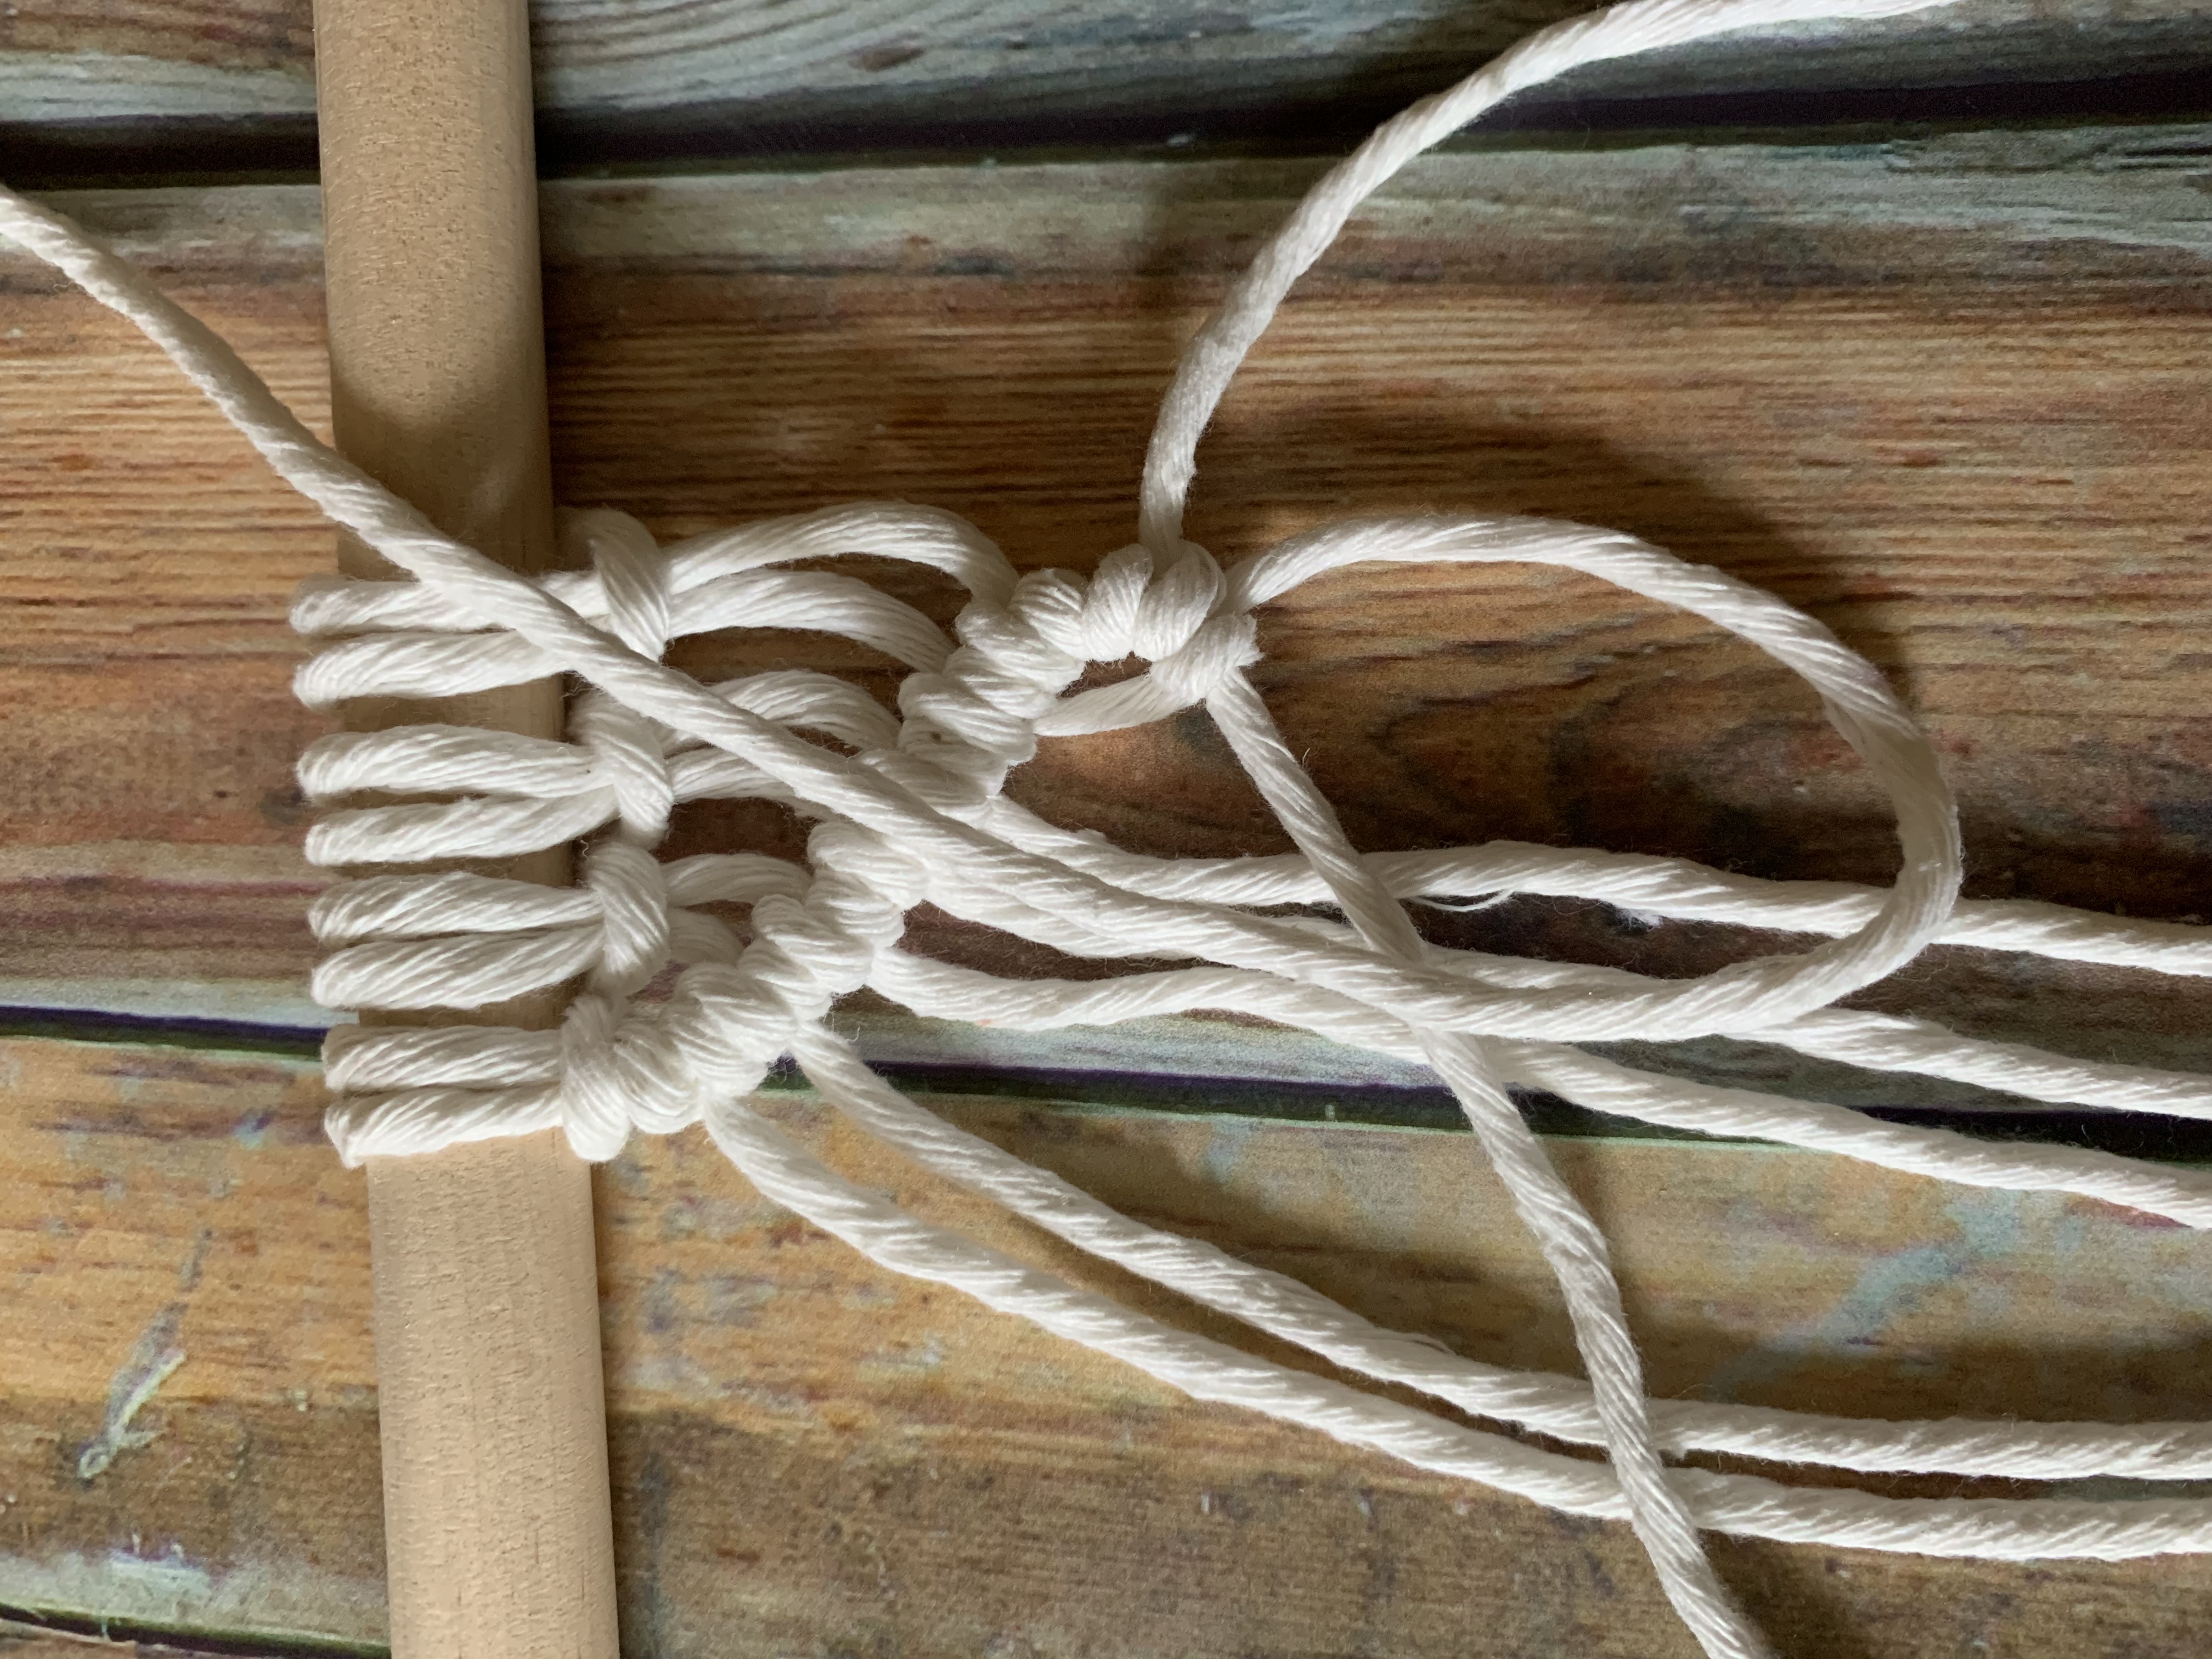
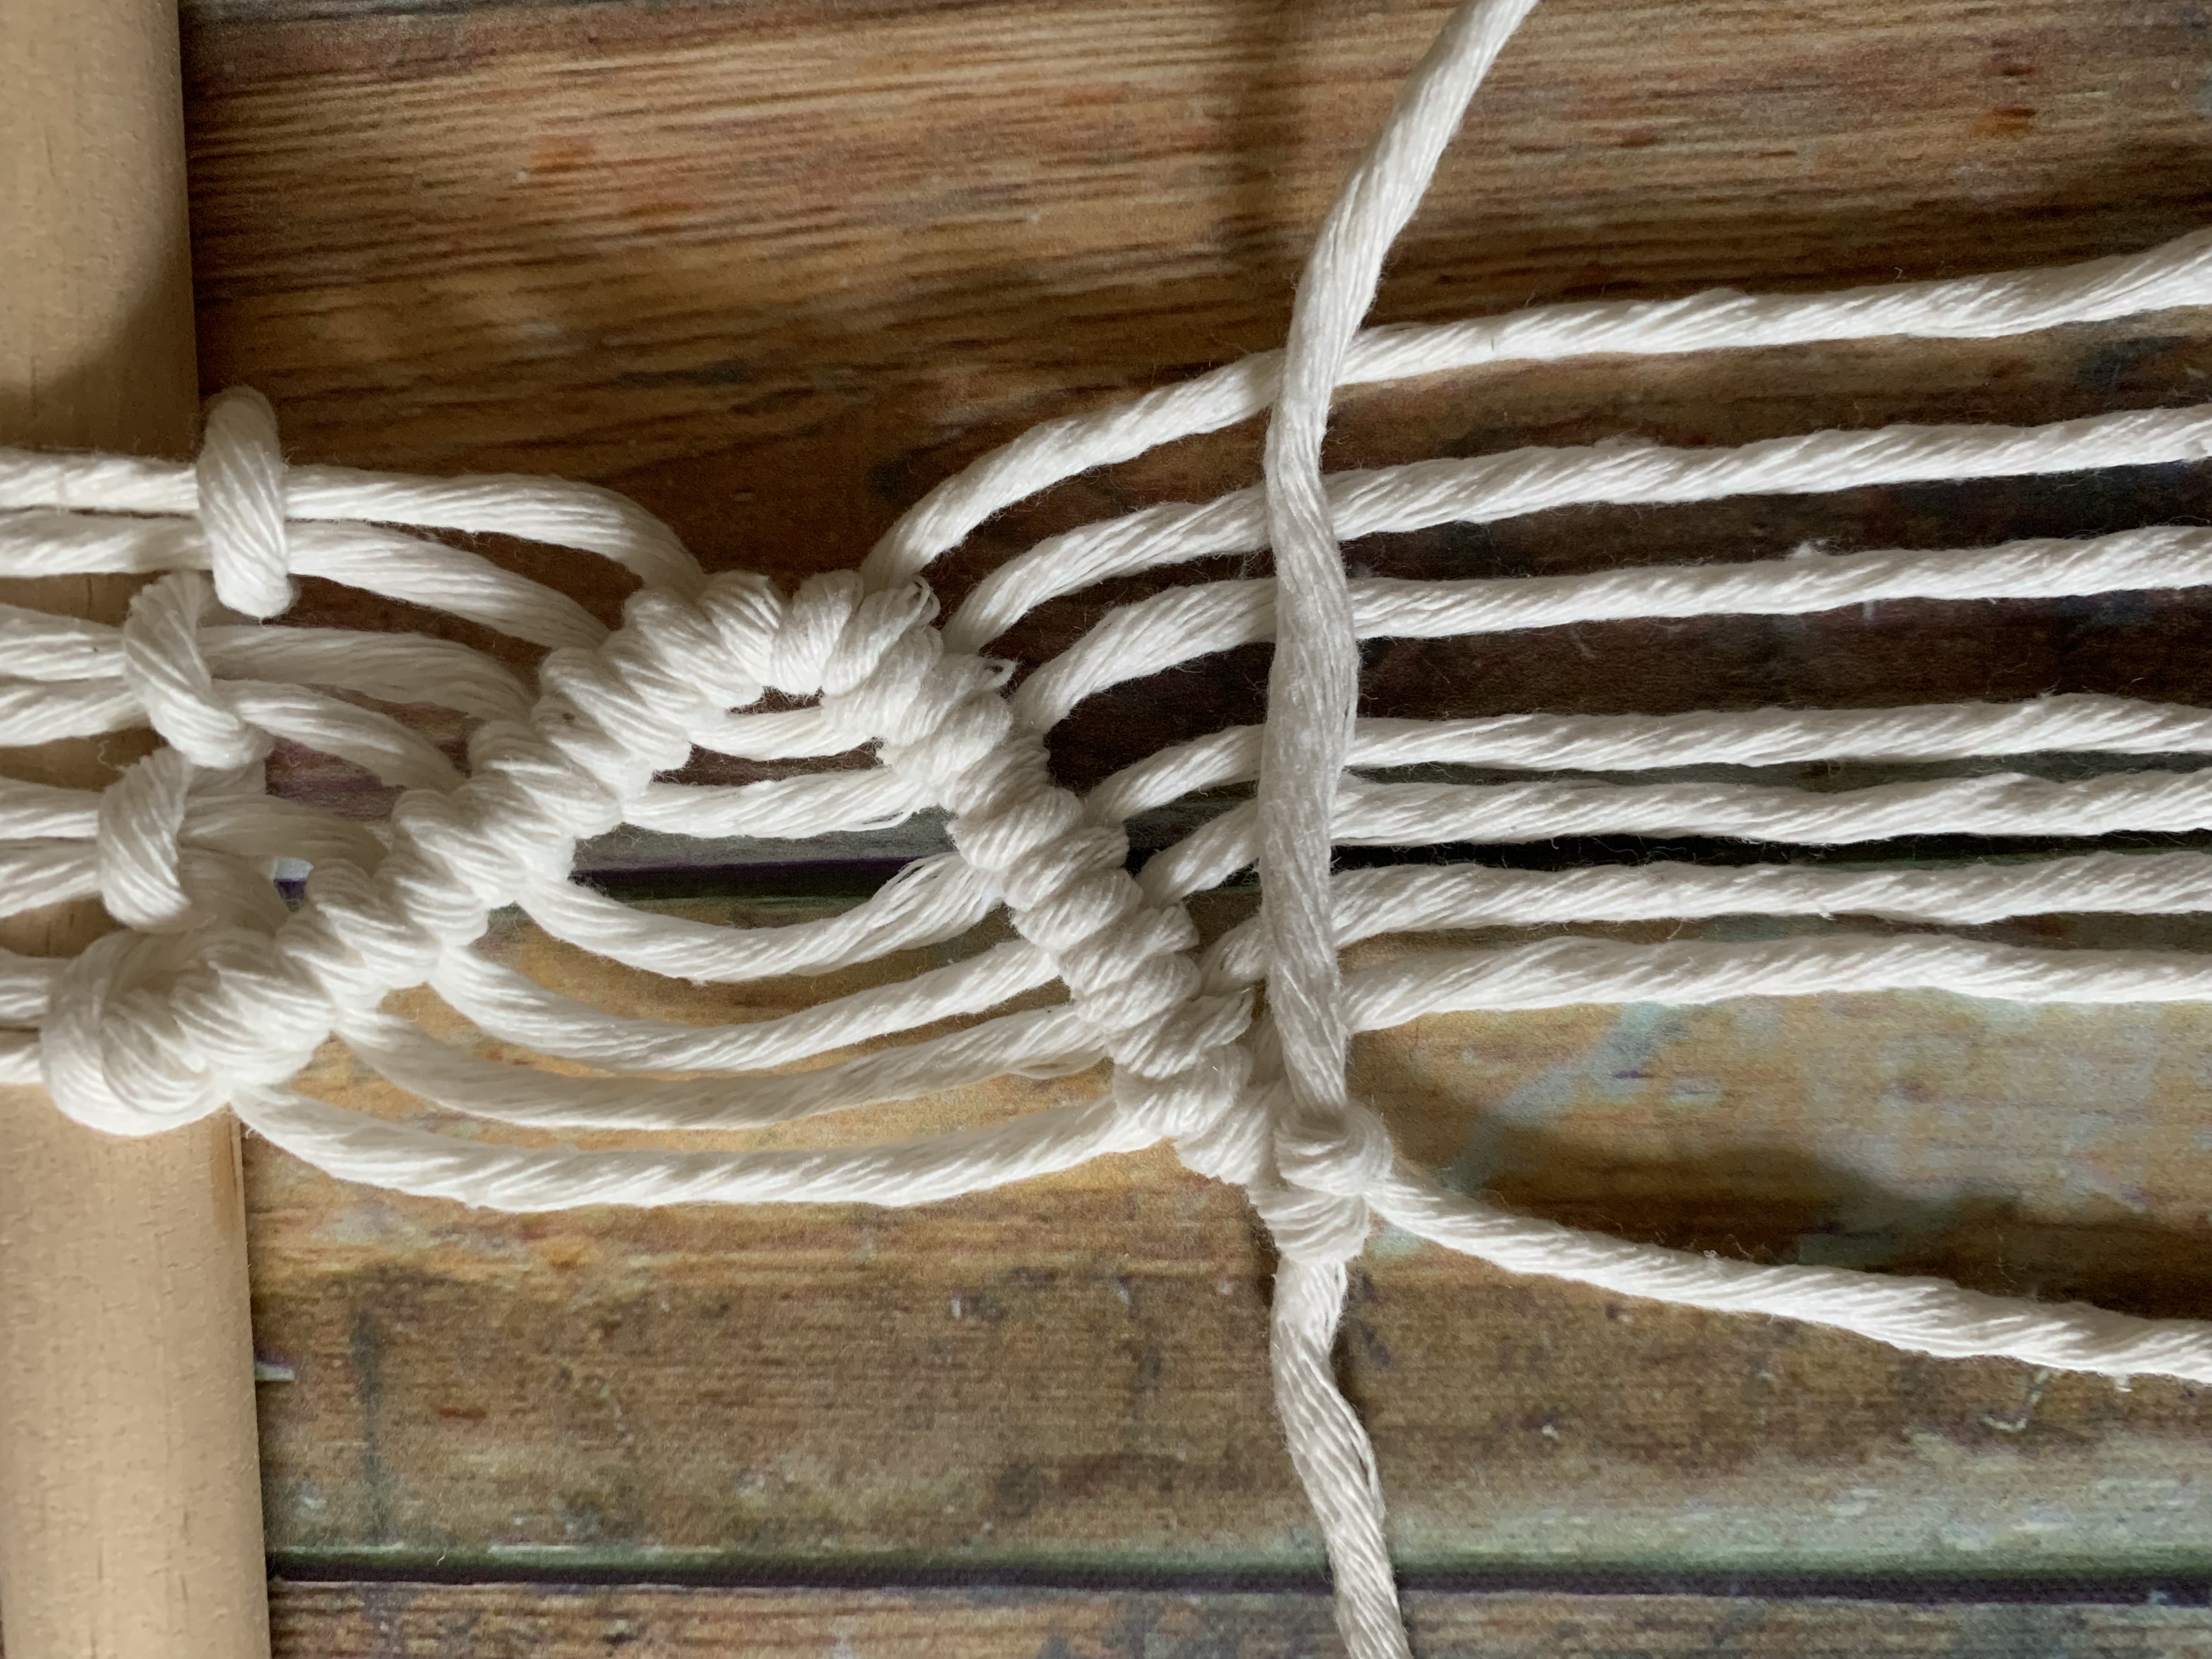
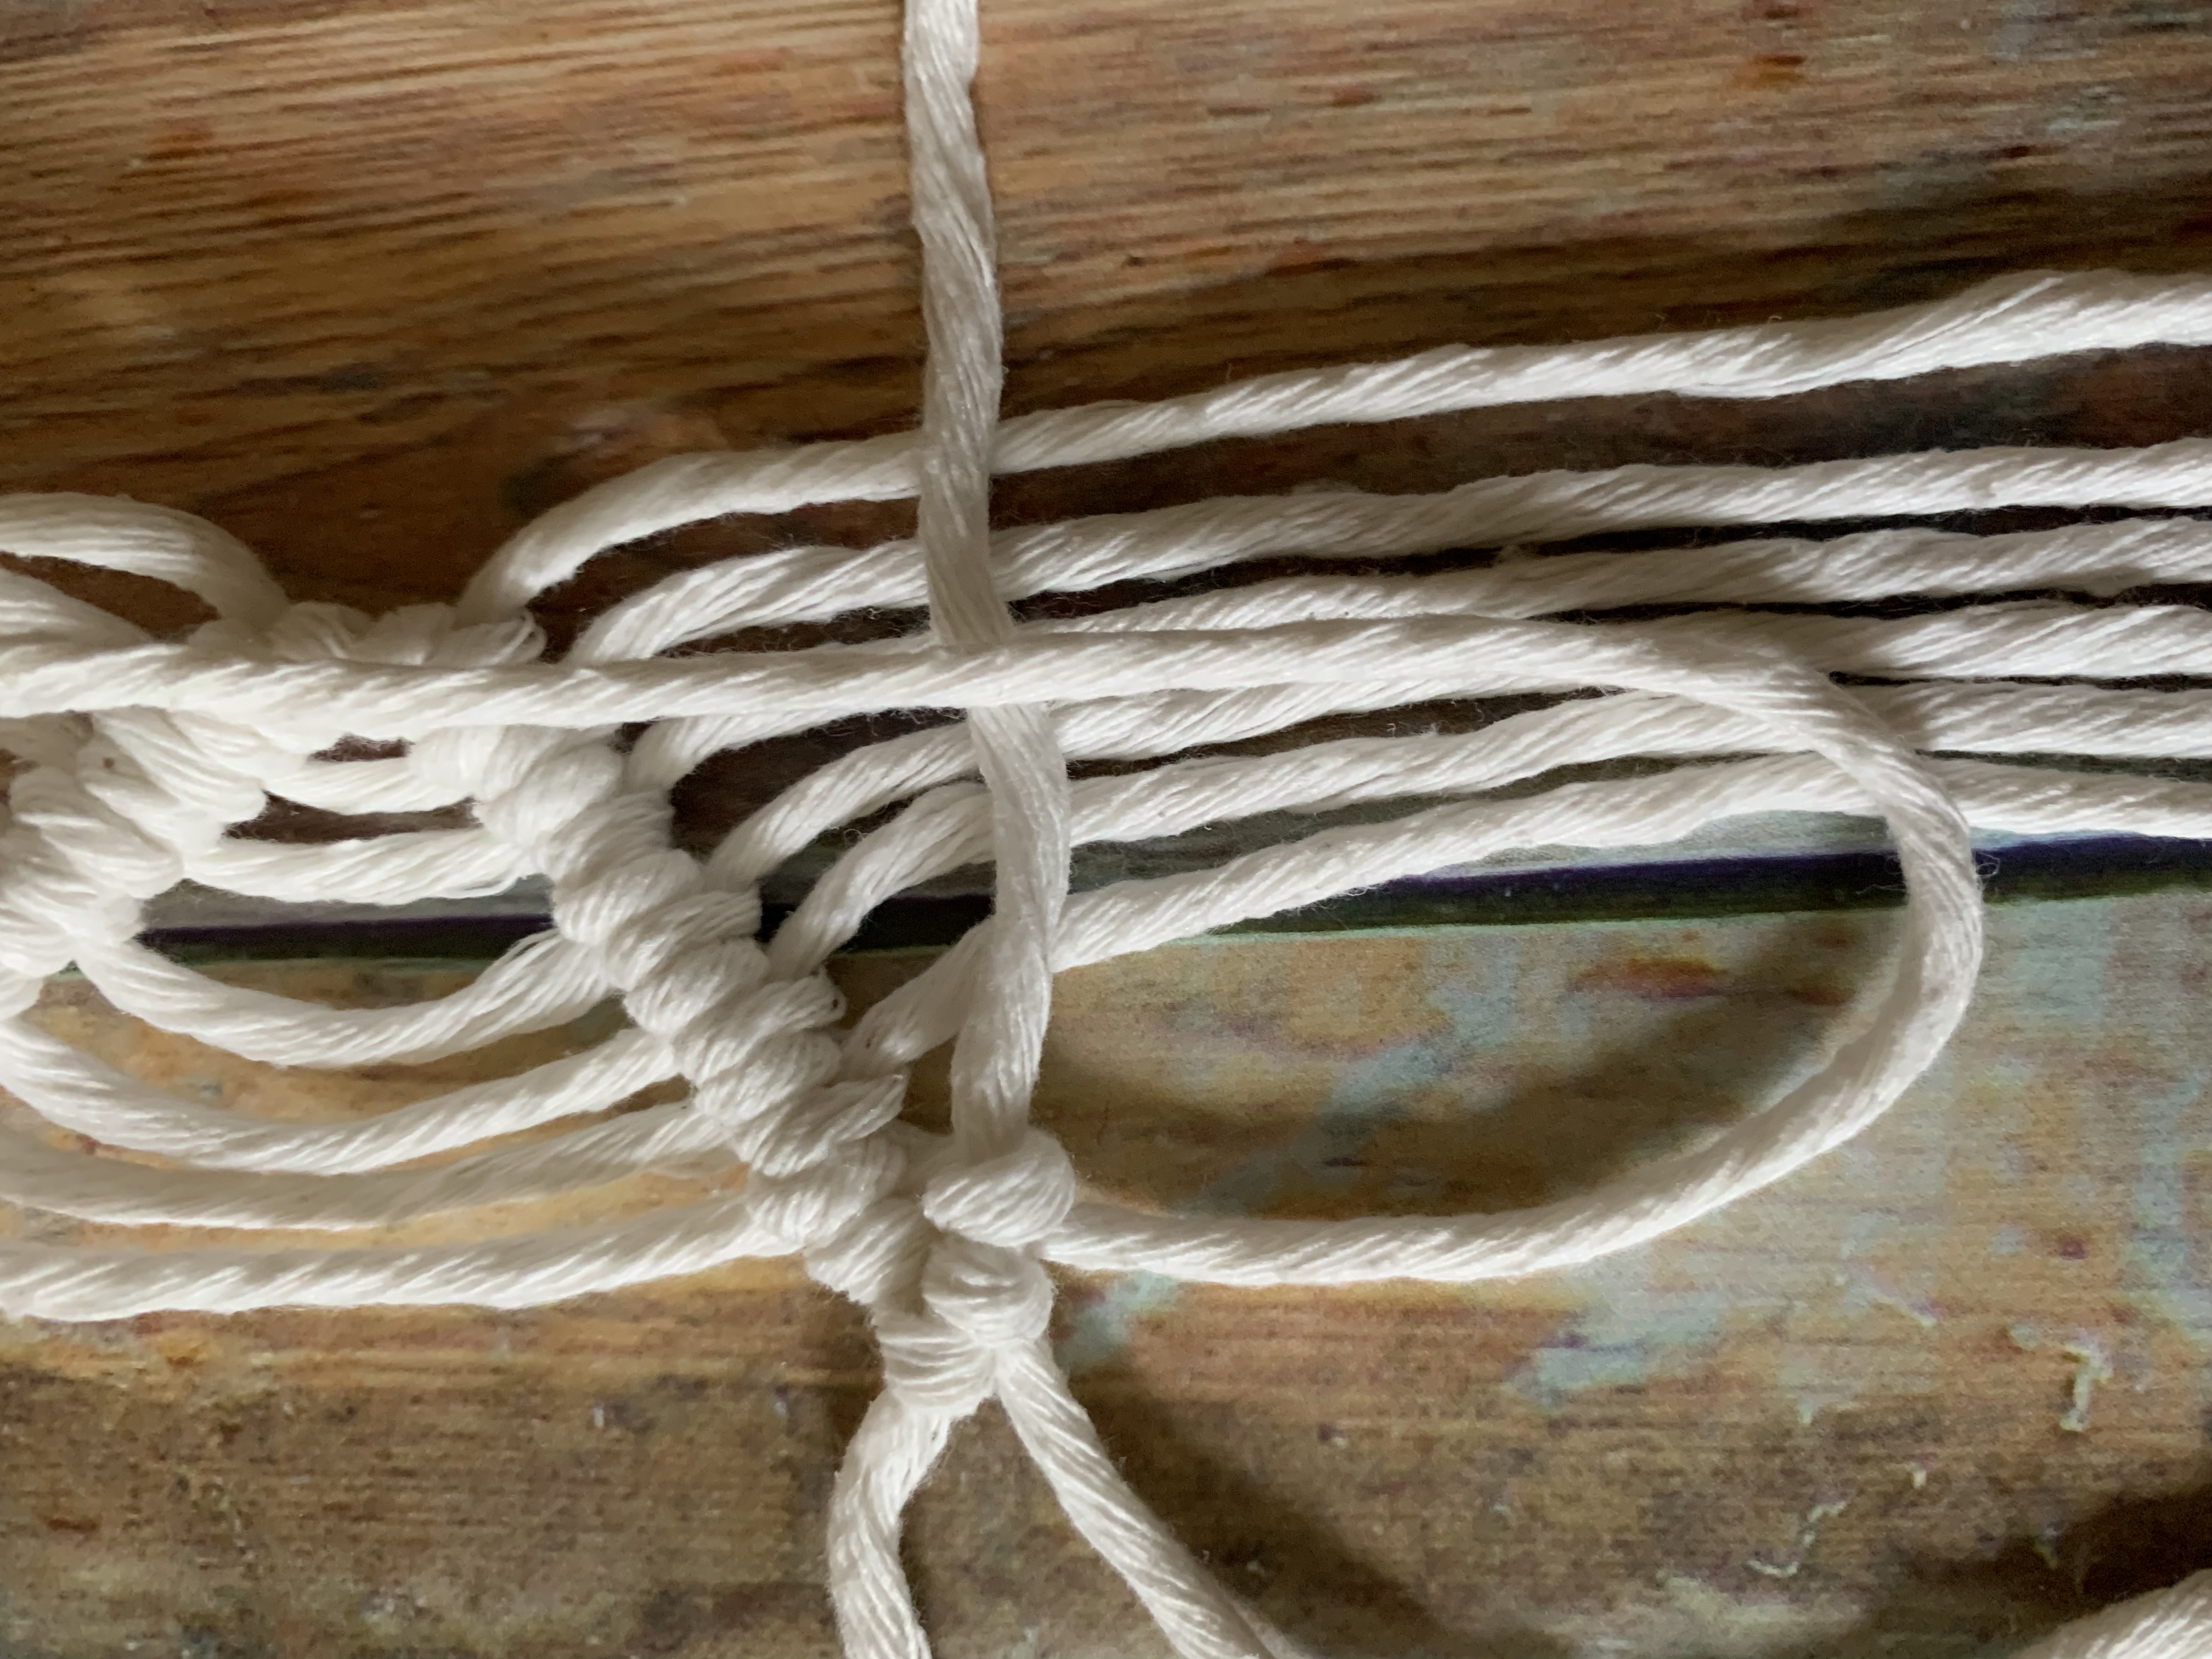
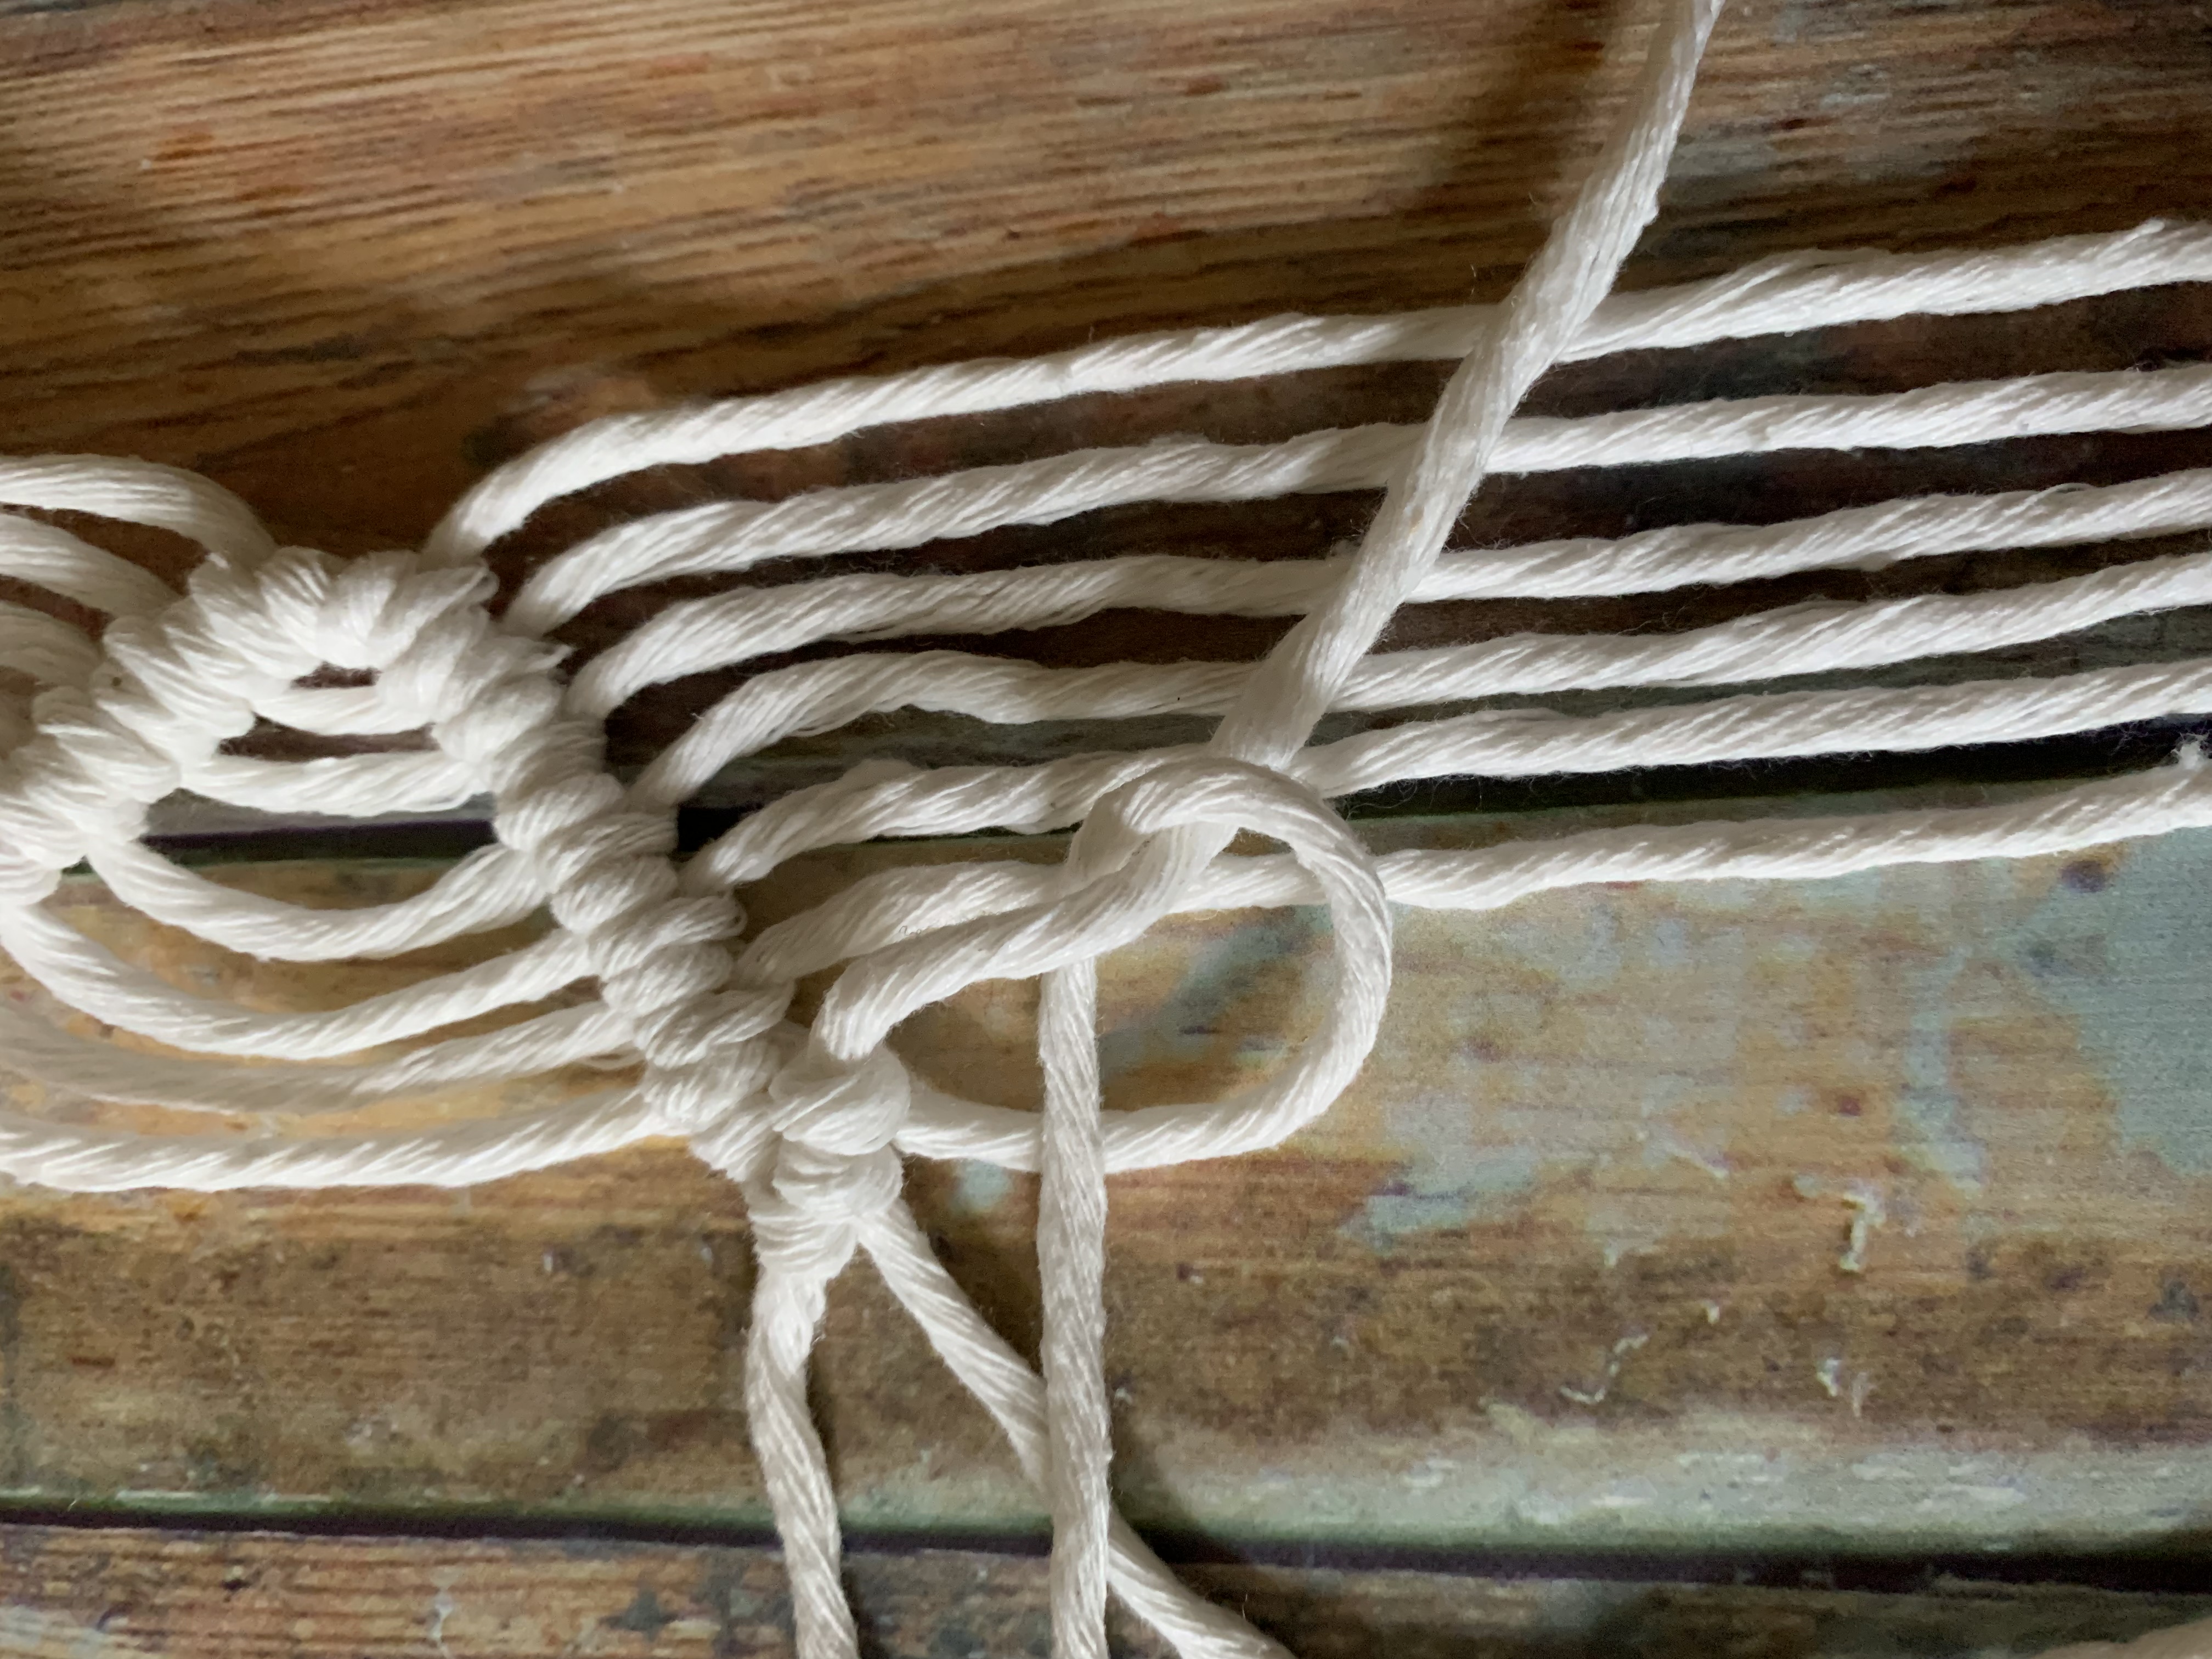
To create a curve or to make this knot going from right to left, you will follow the same steps, only your cord that will be the core will go to the left
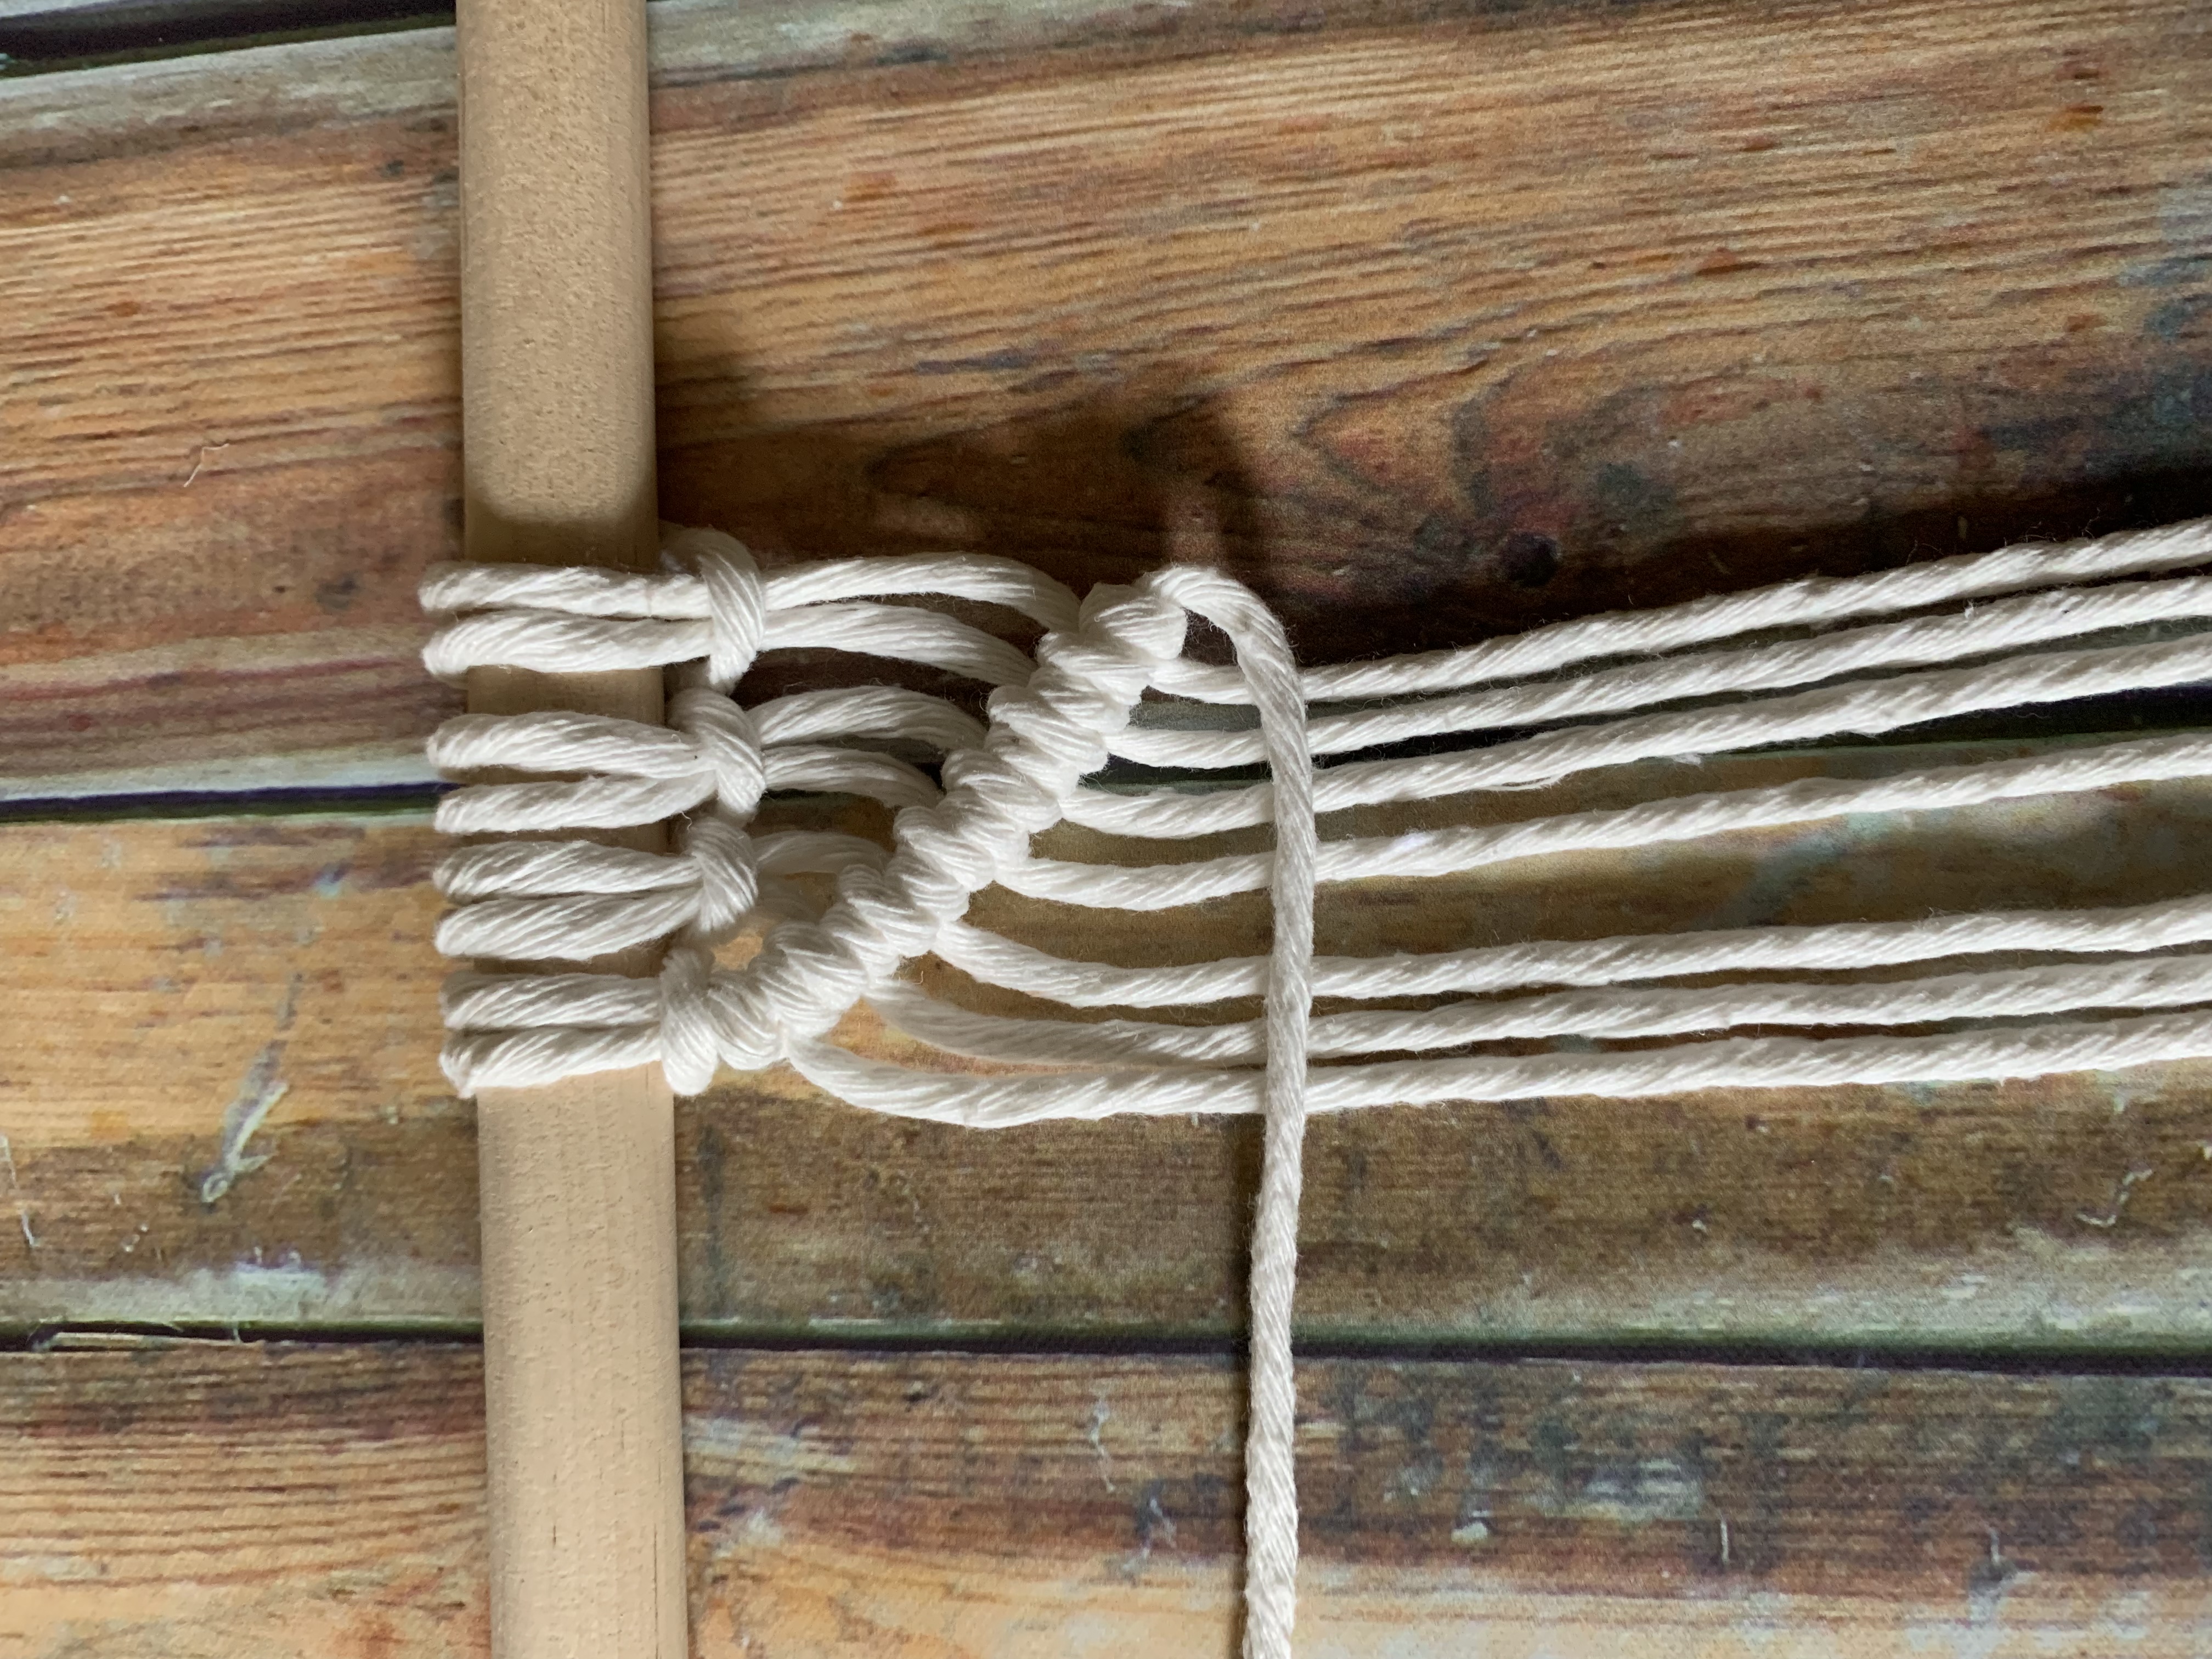
Repeat the same steps above, only going in reverse.
1. Take your first cord, behind the core cord, pull up over and pull through the loop going to the right
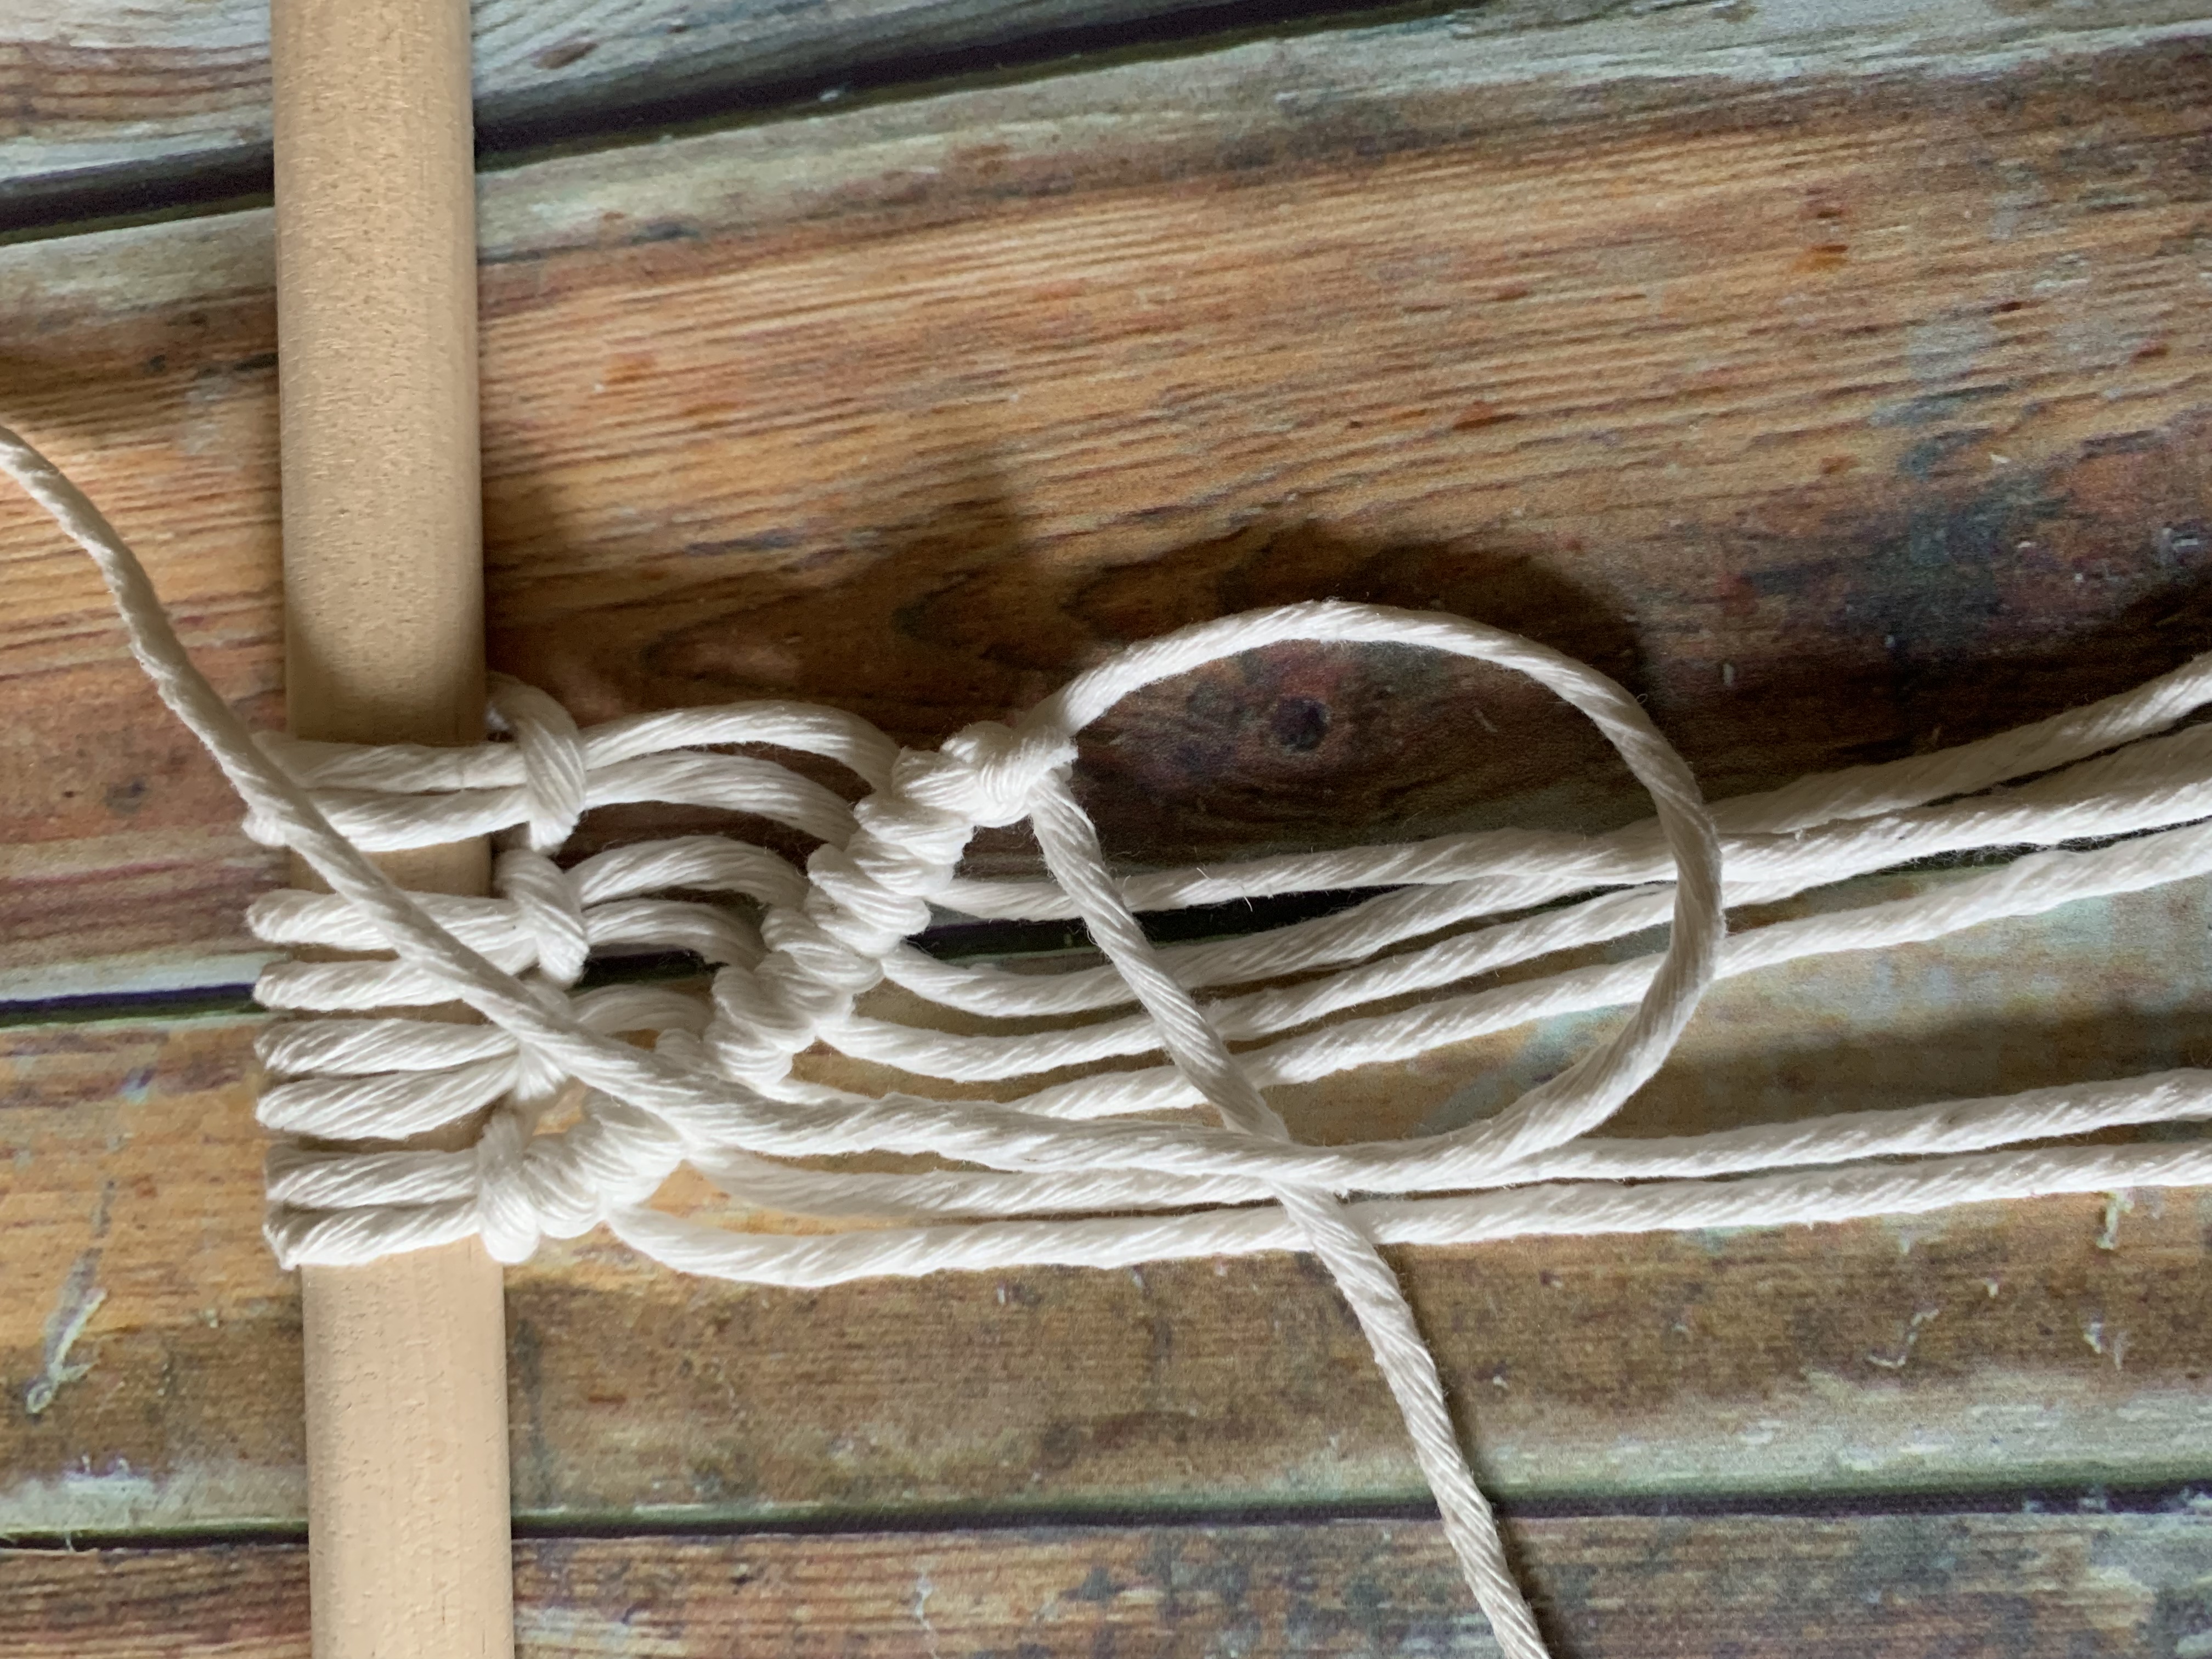

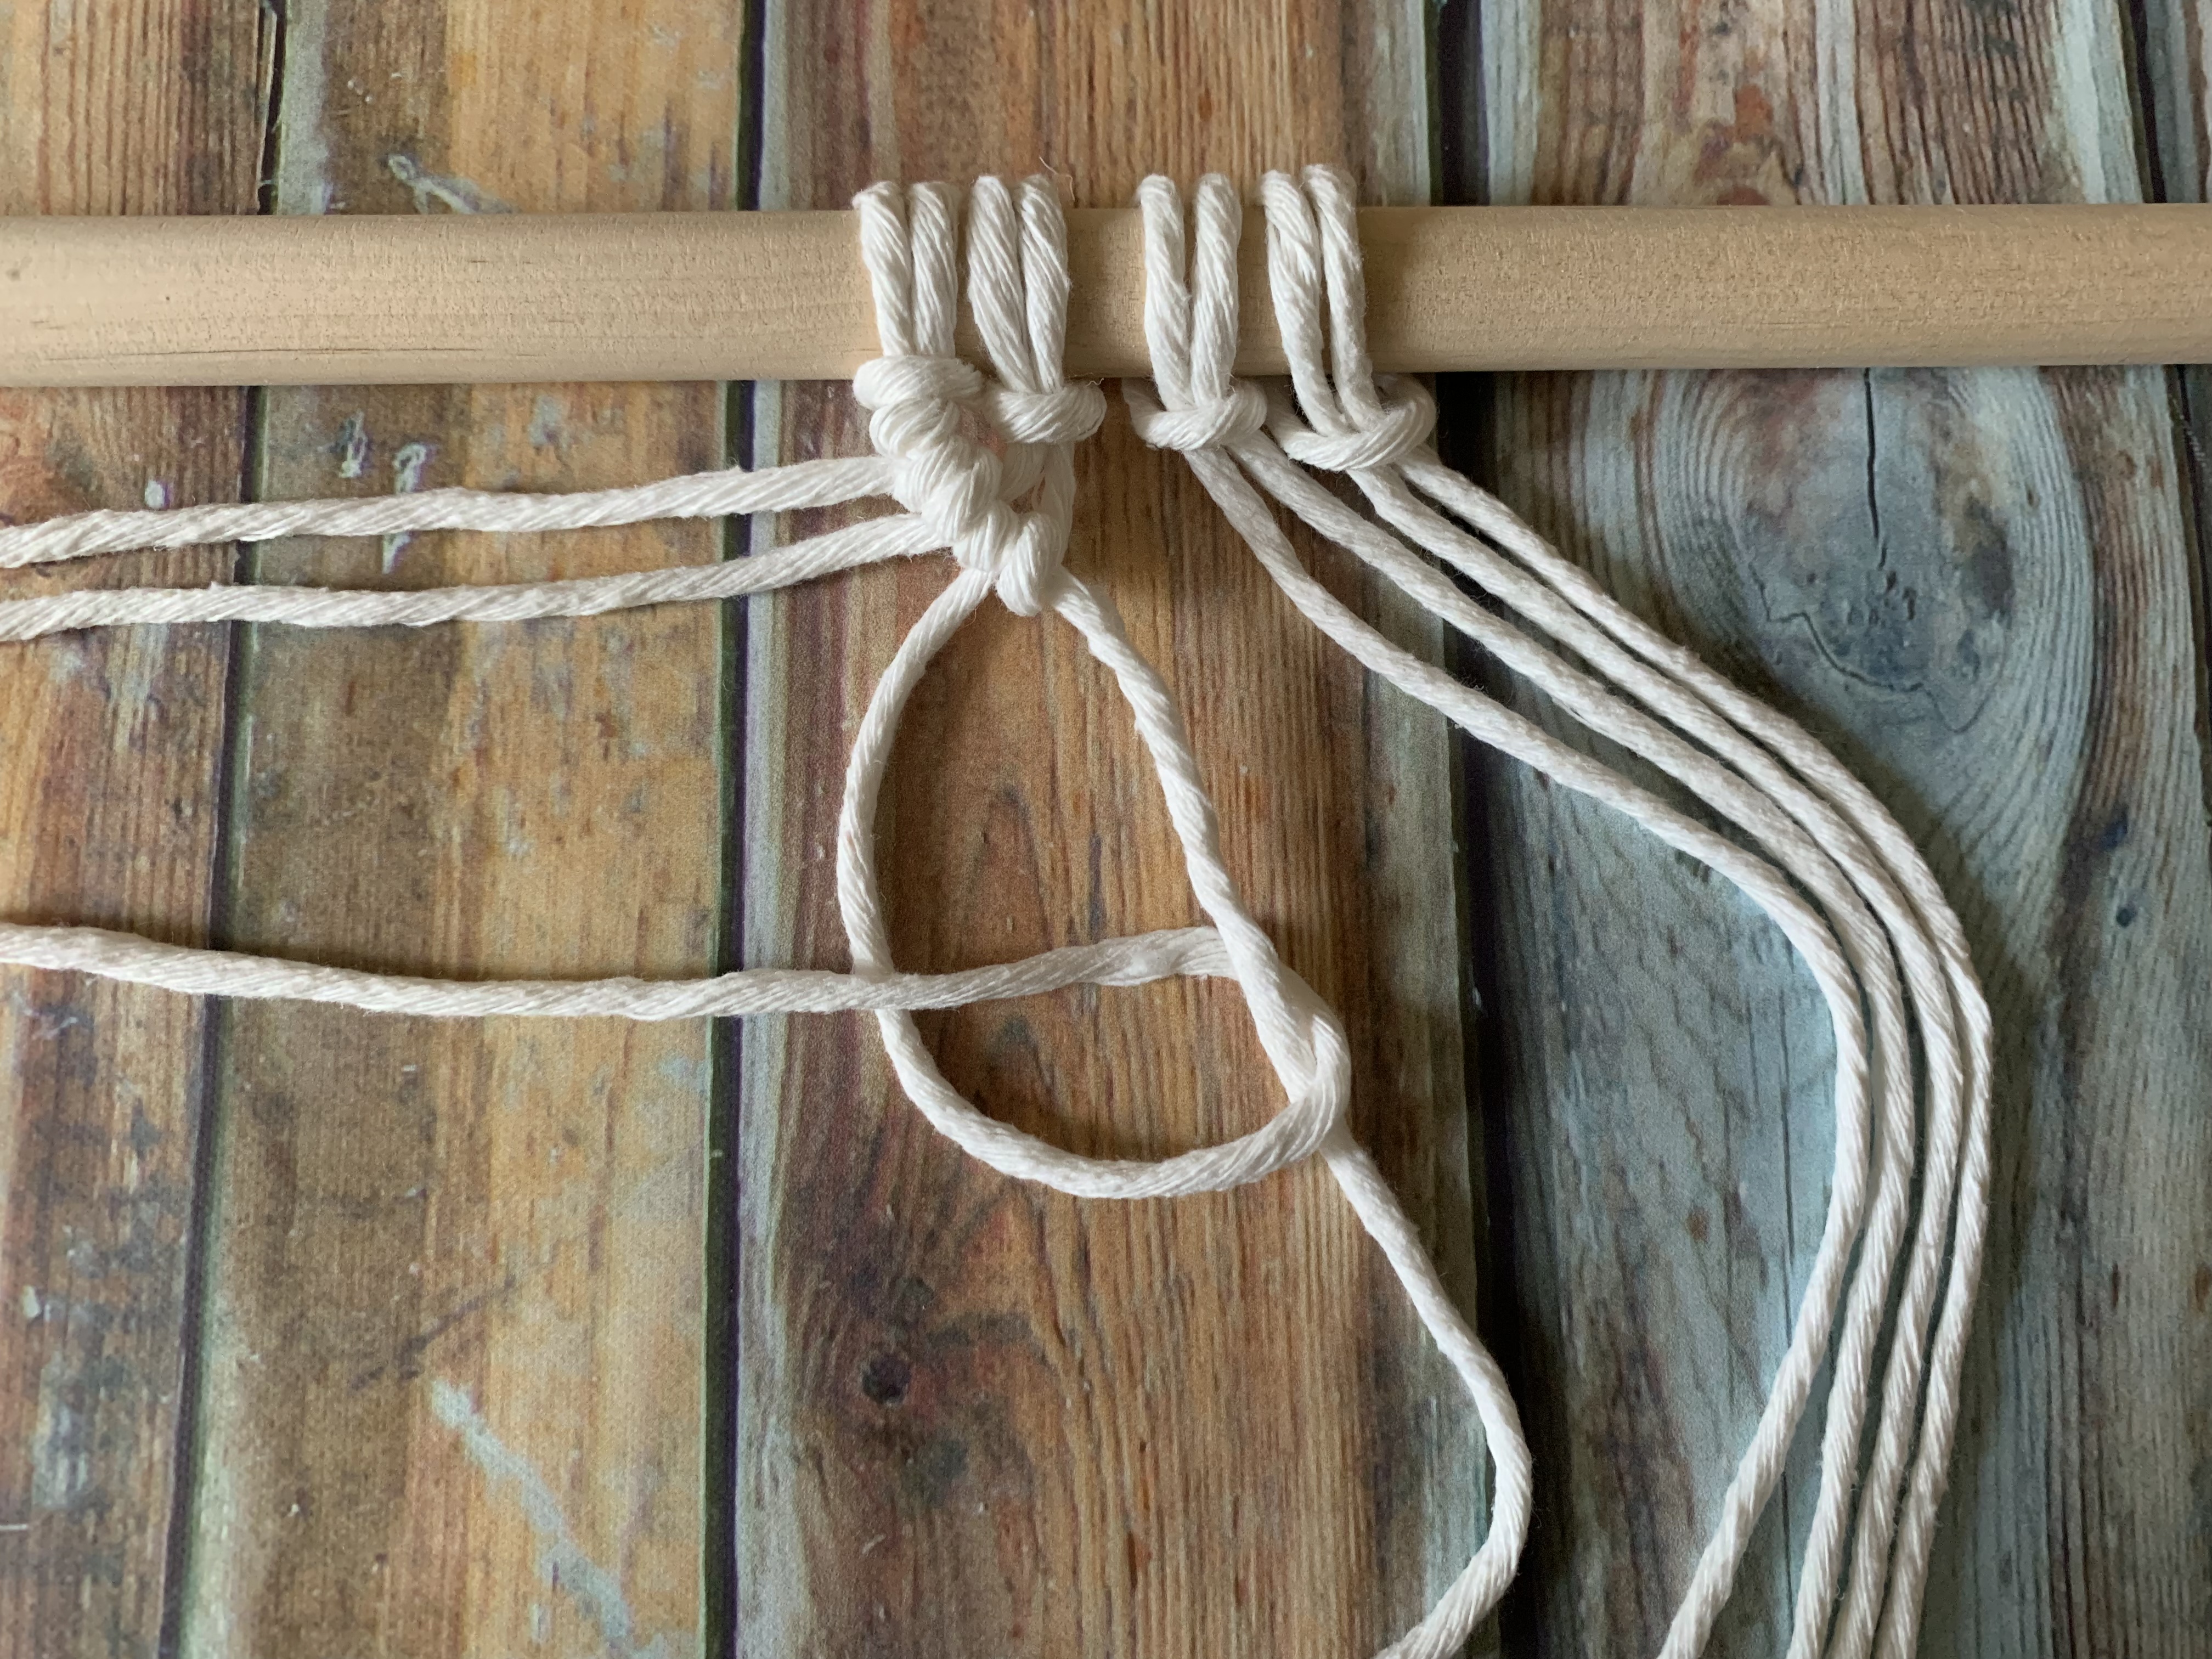
2. Repeat this a second time, to get the completed knot
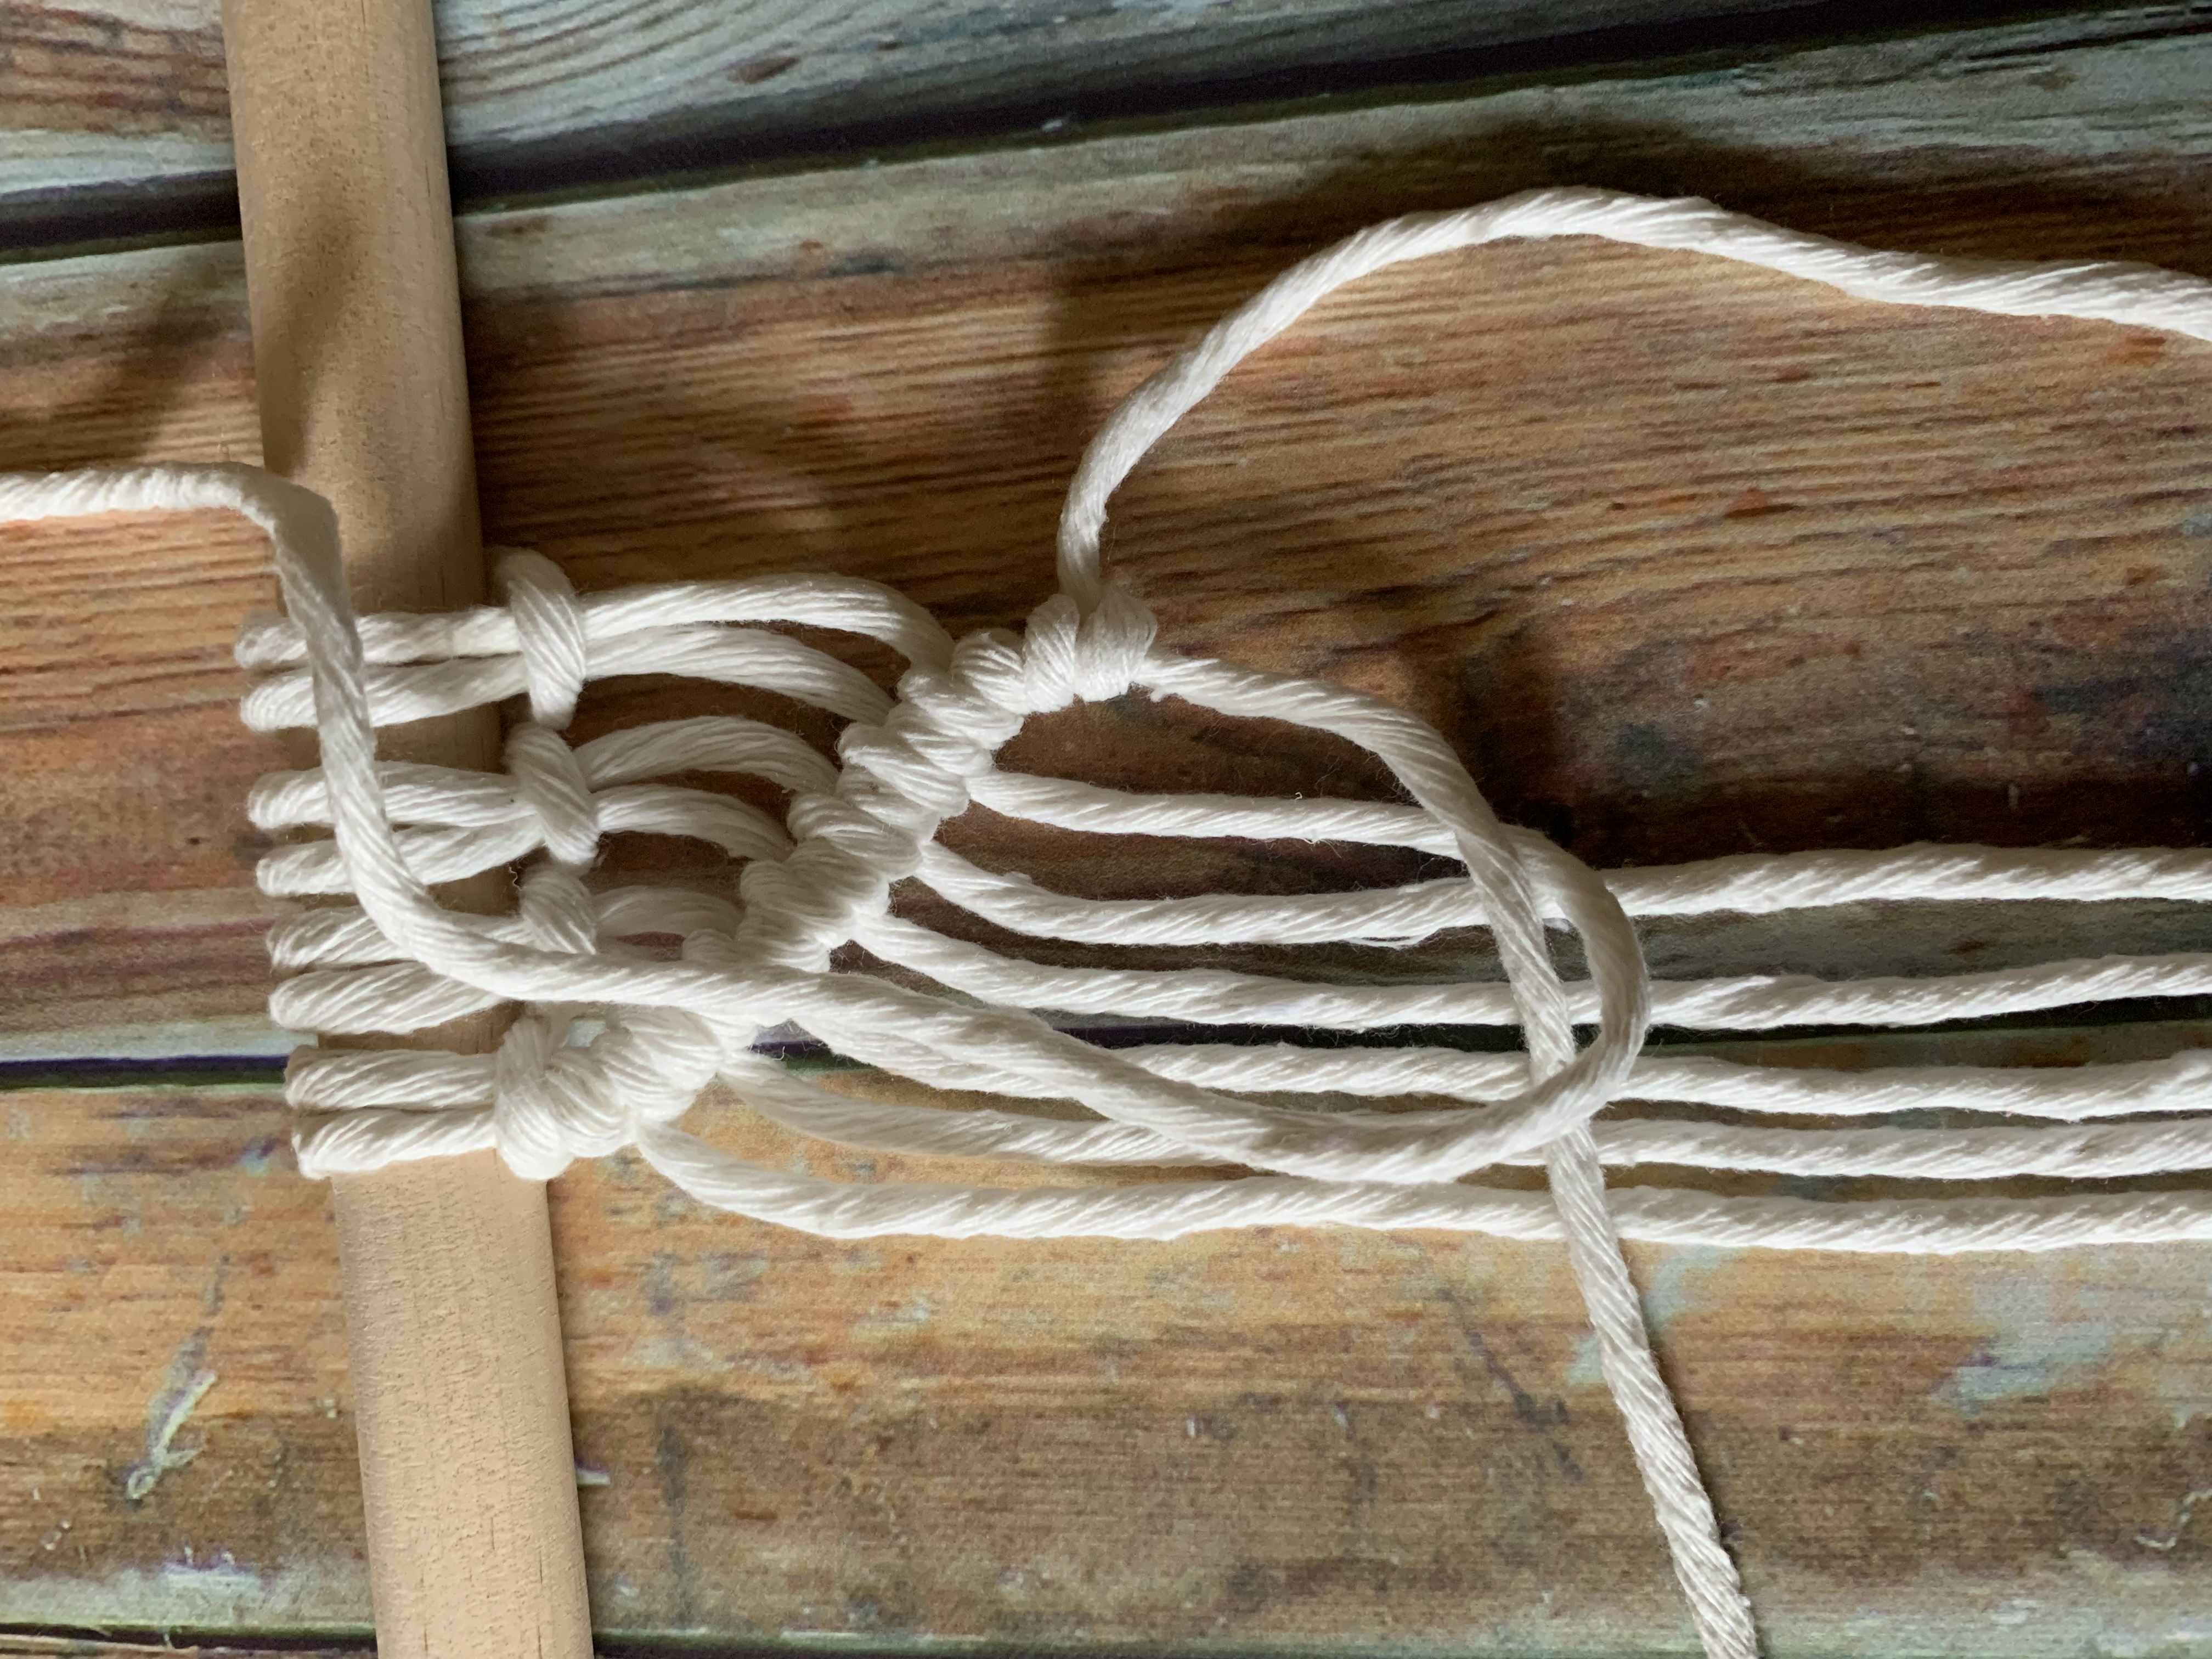
3. Repeat cord by cord, until you complete the series you are trying to achieve
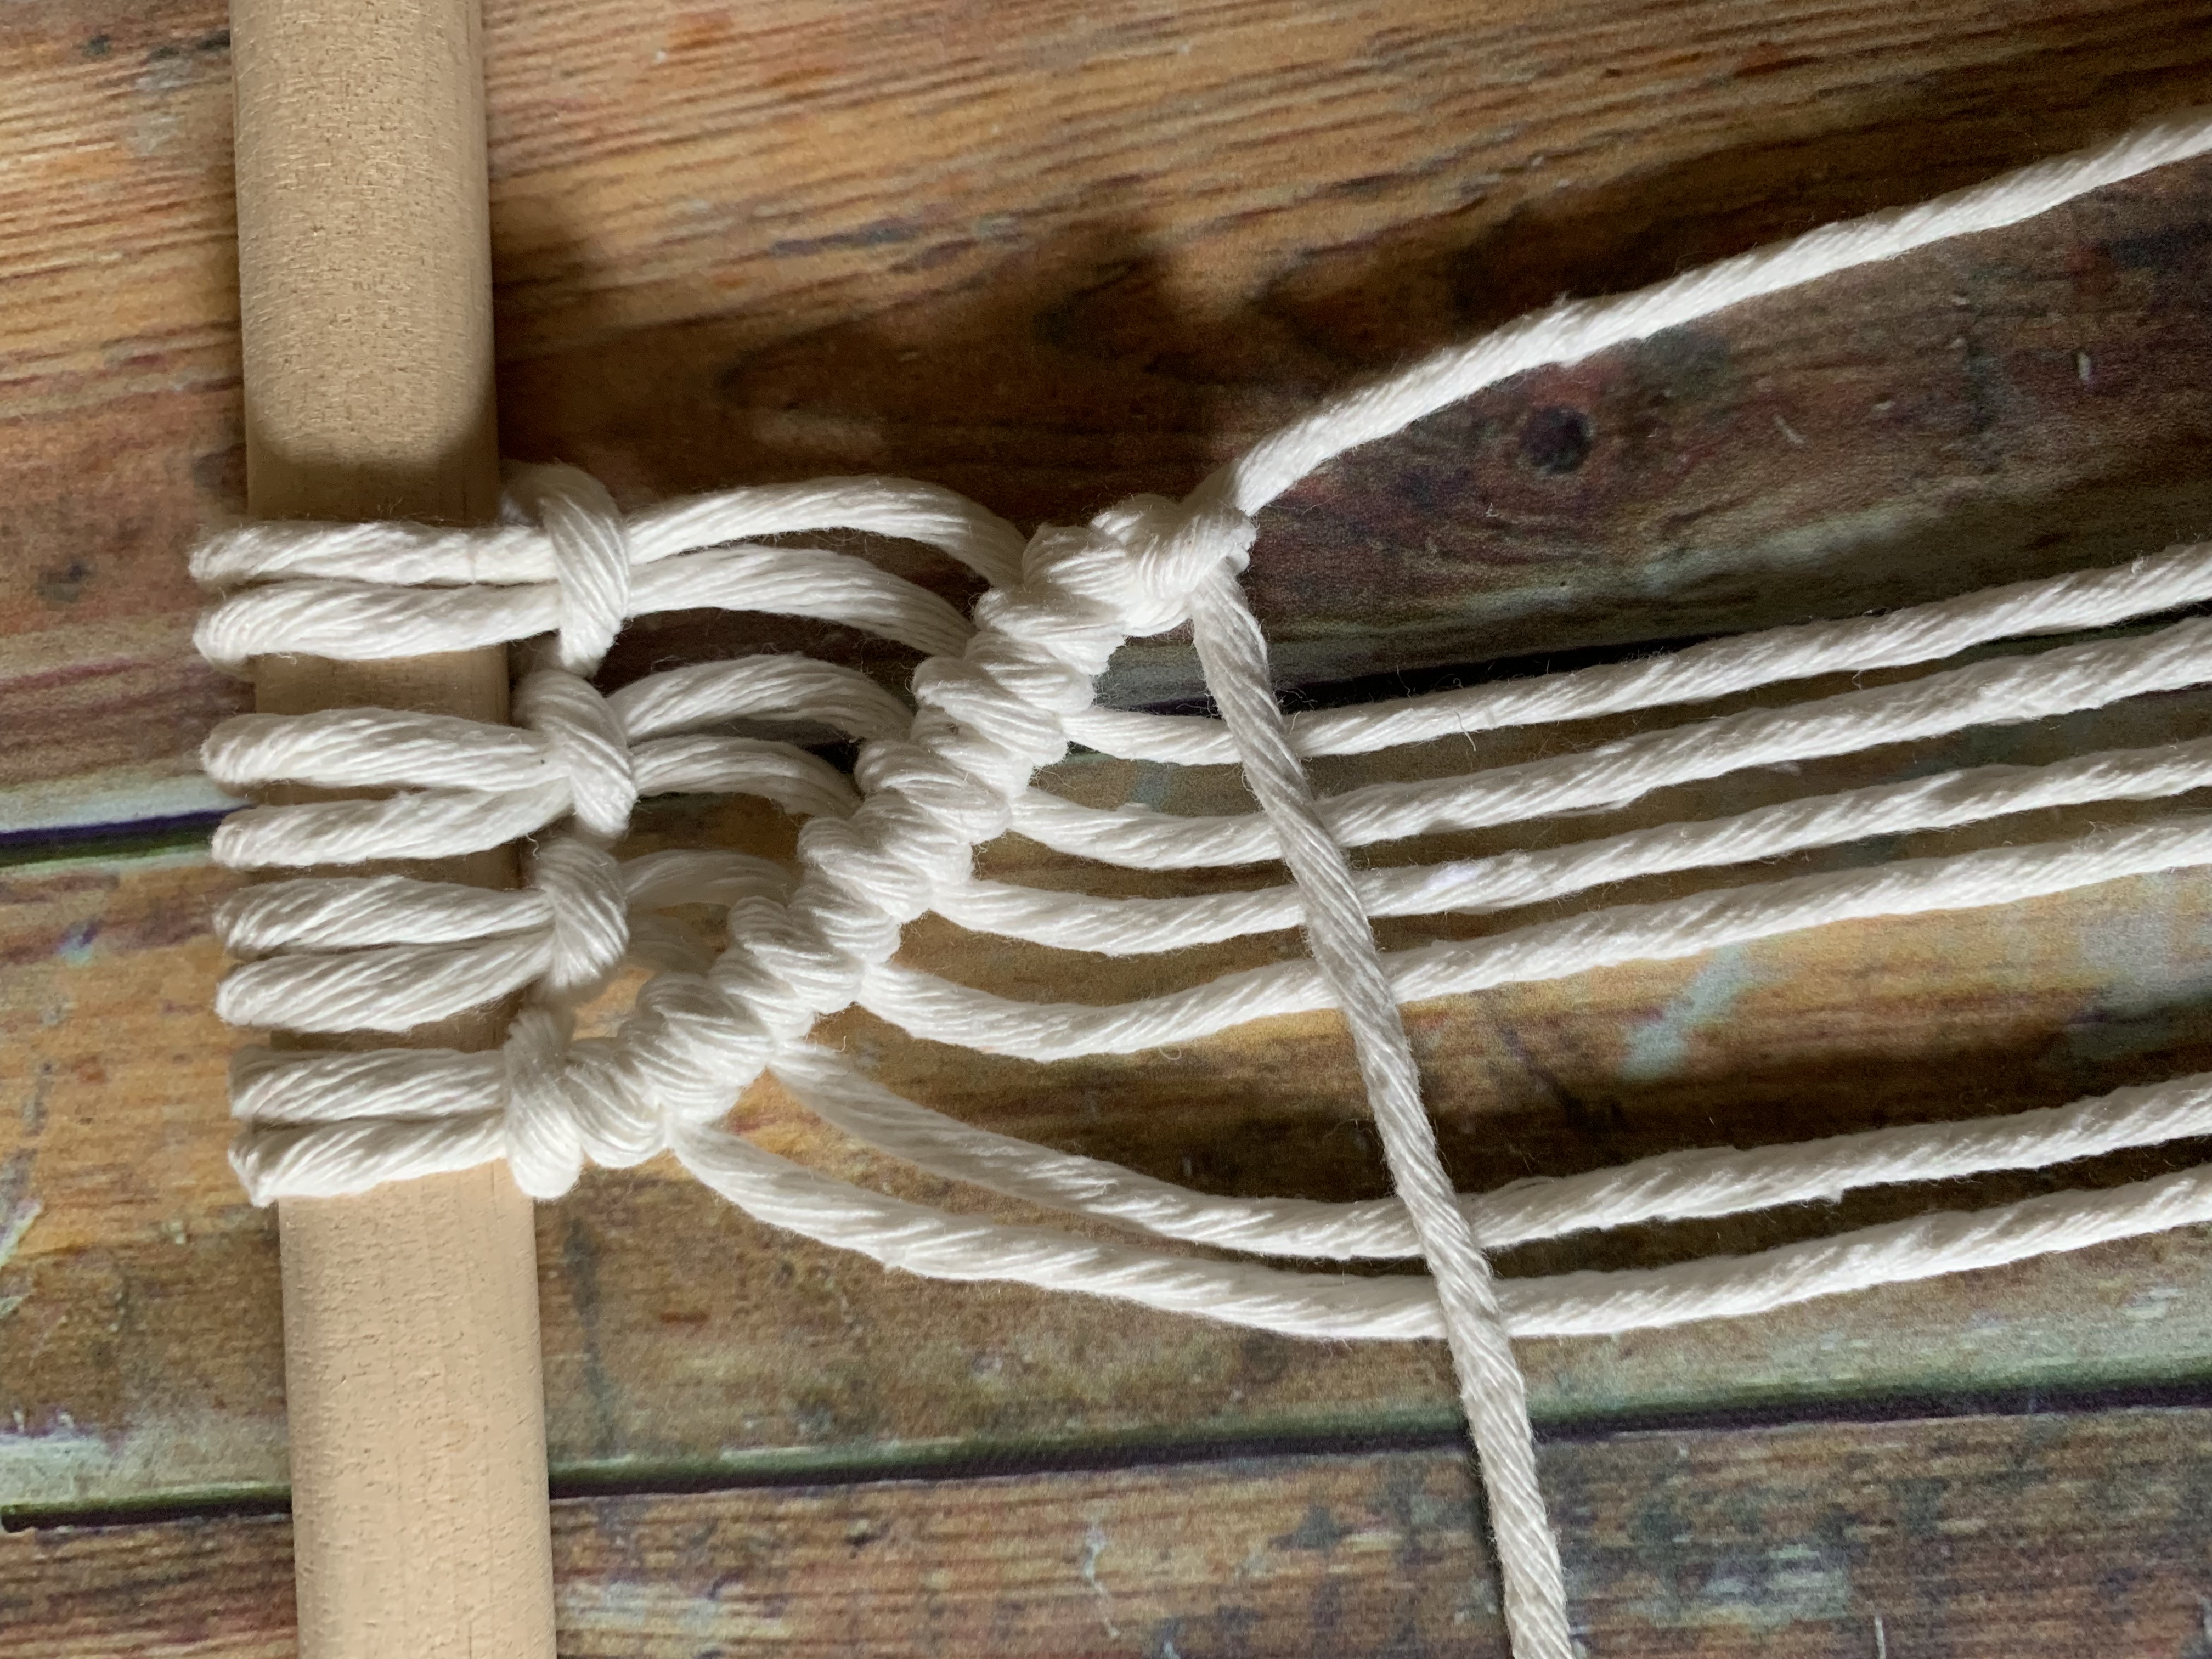
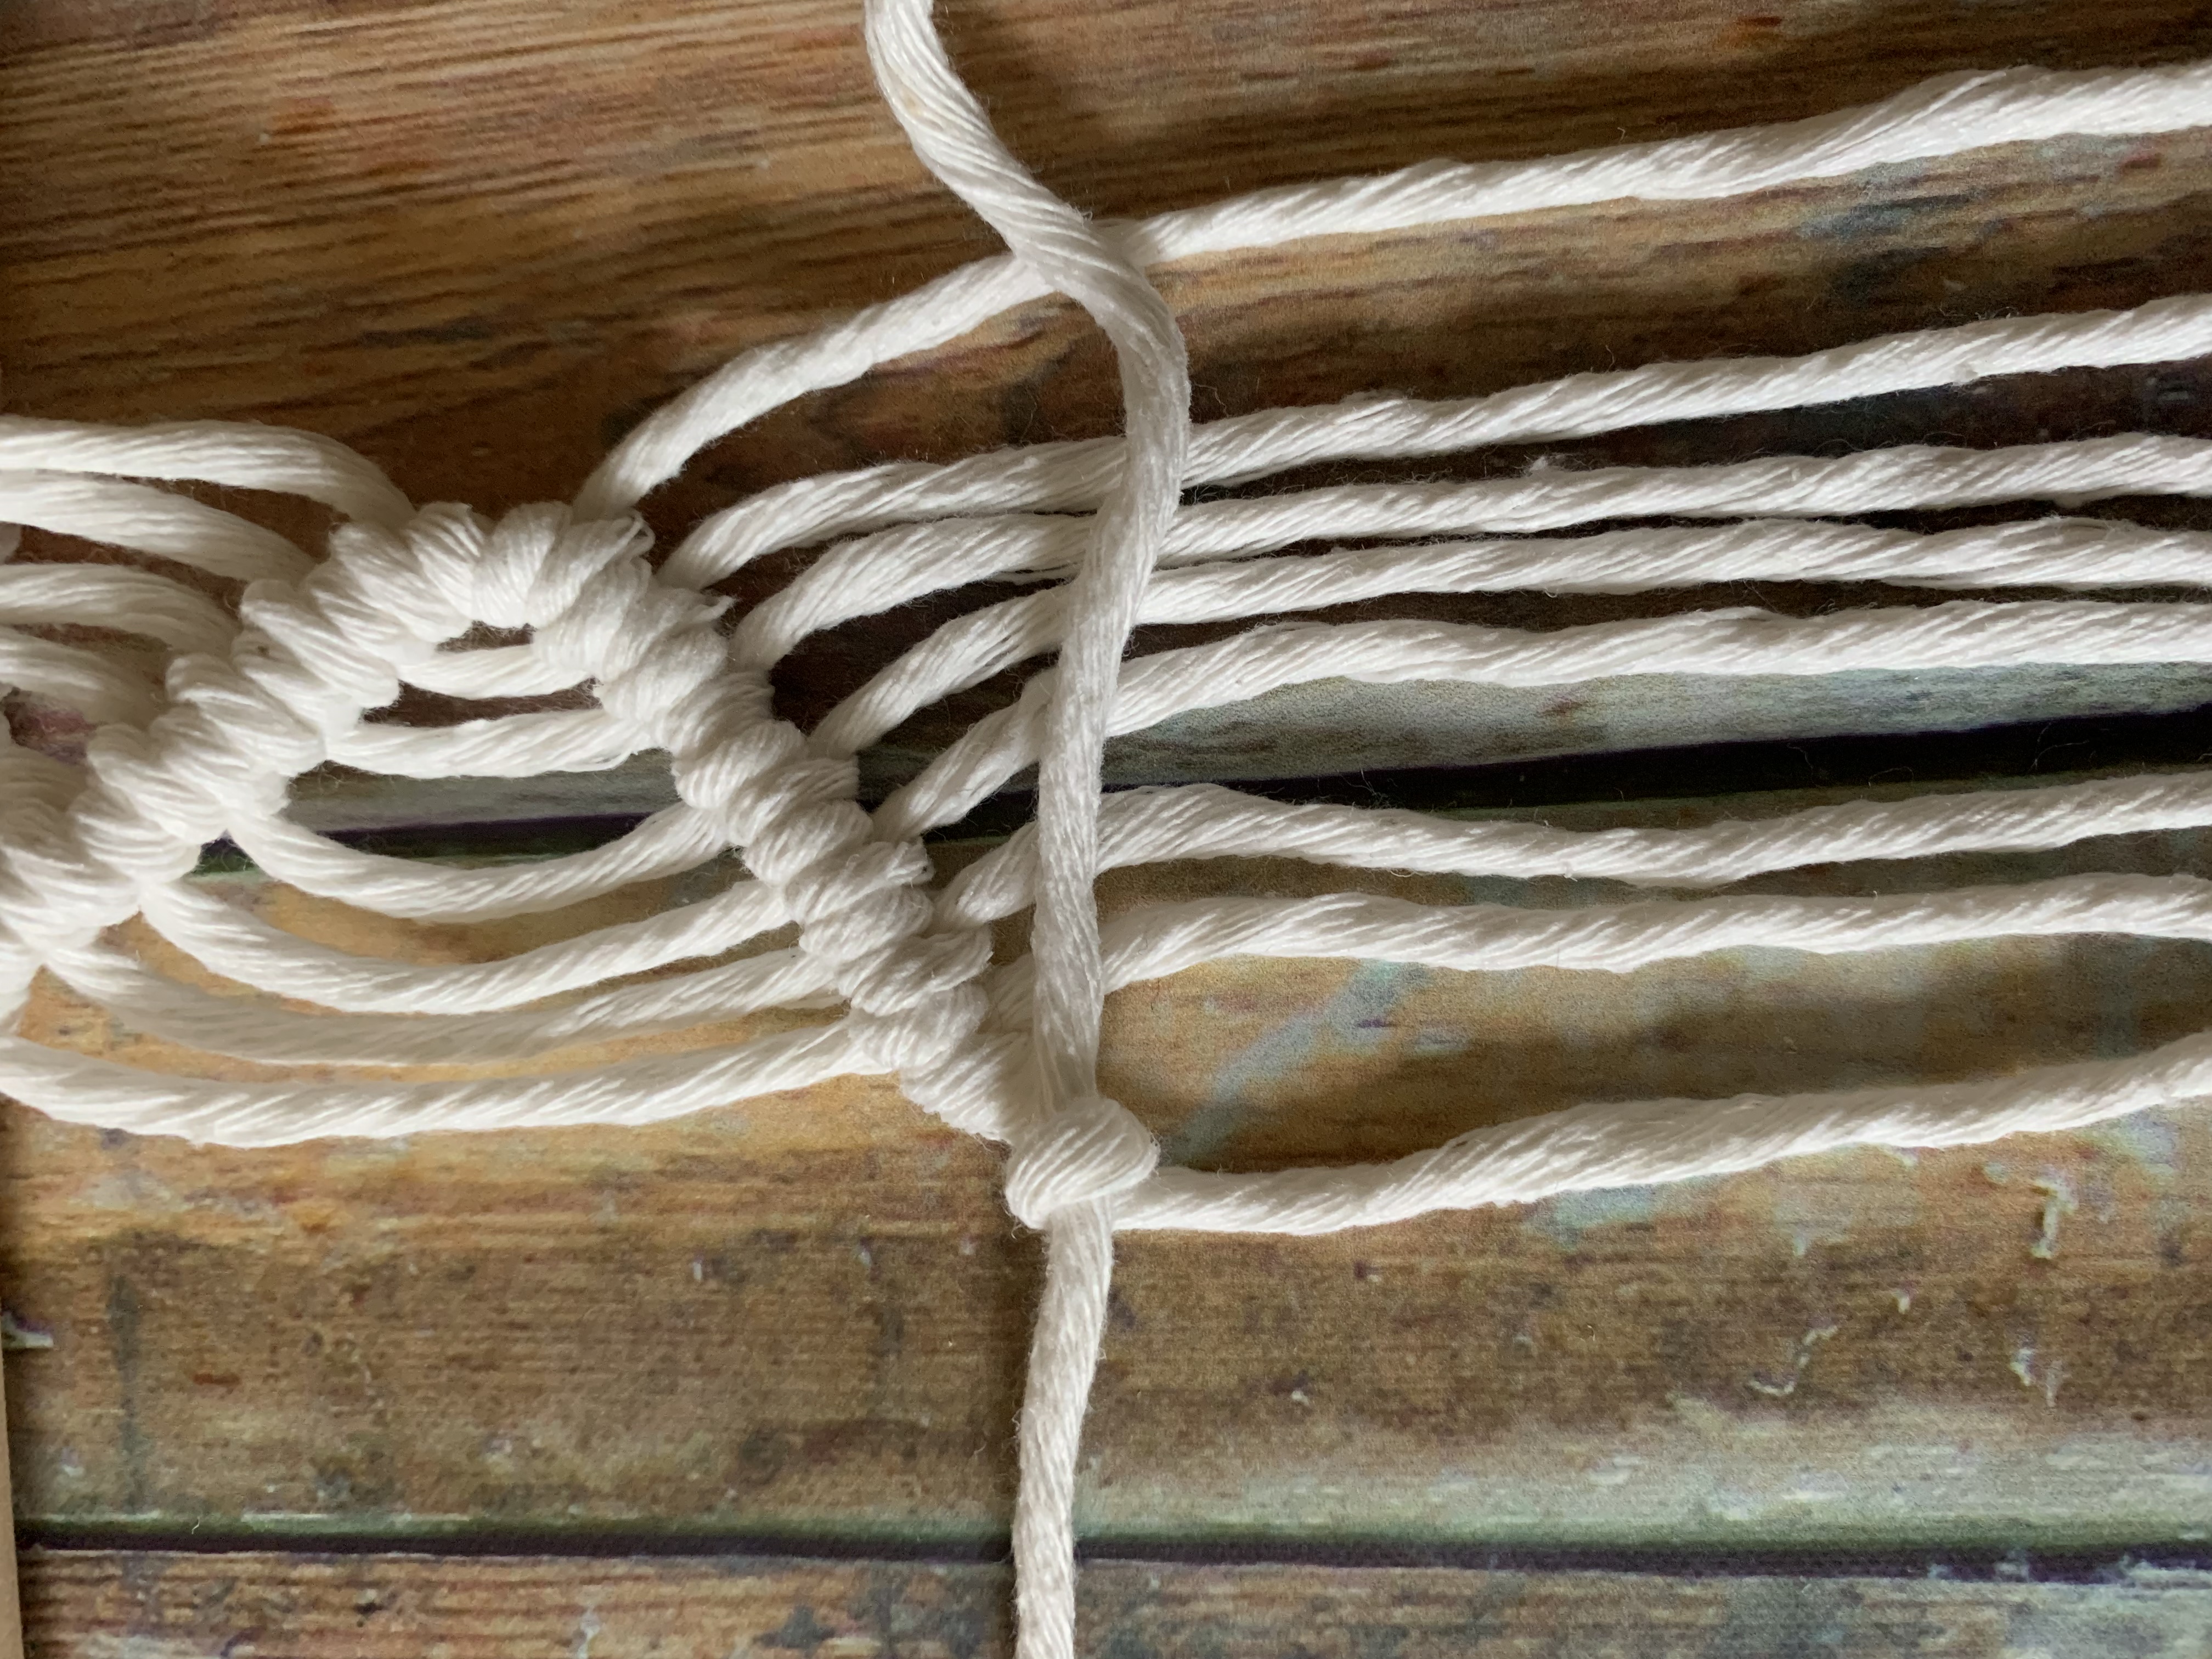
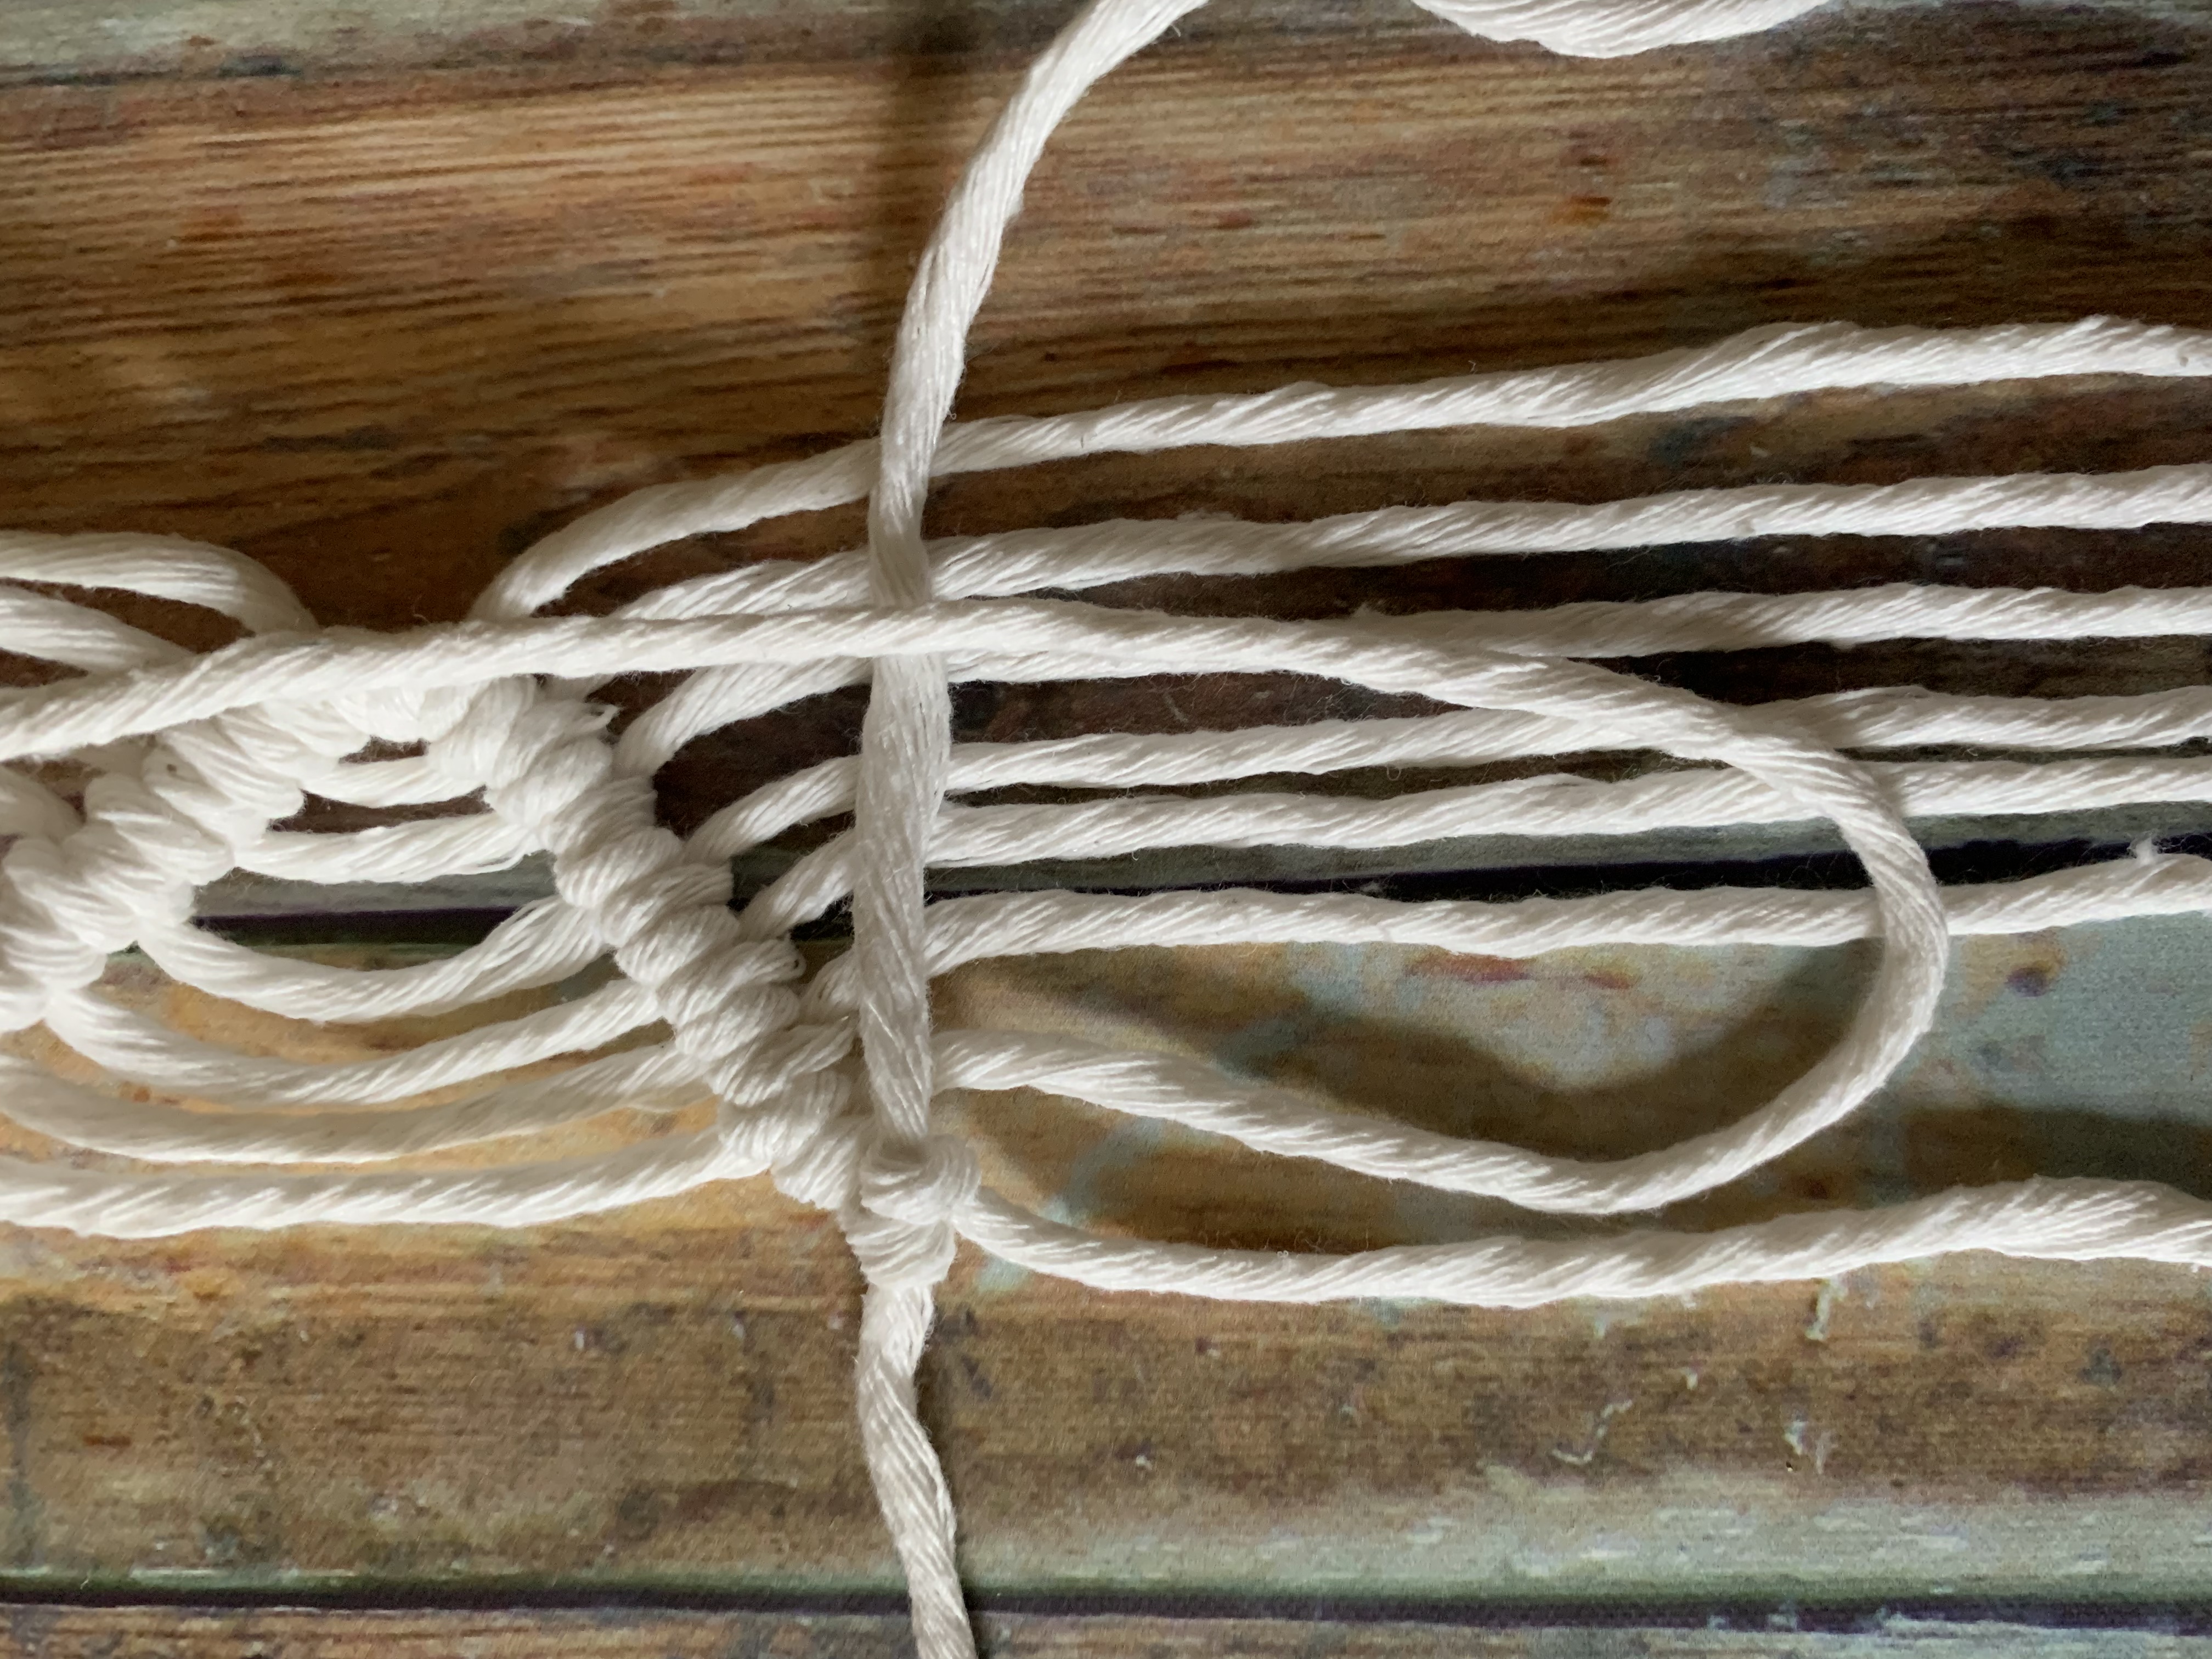
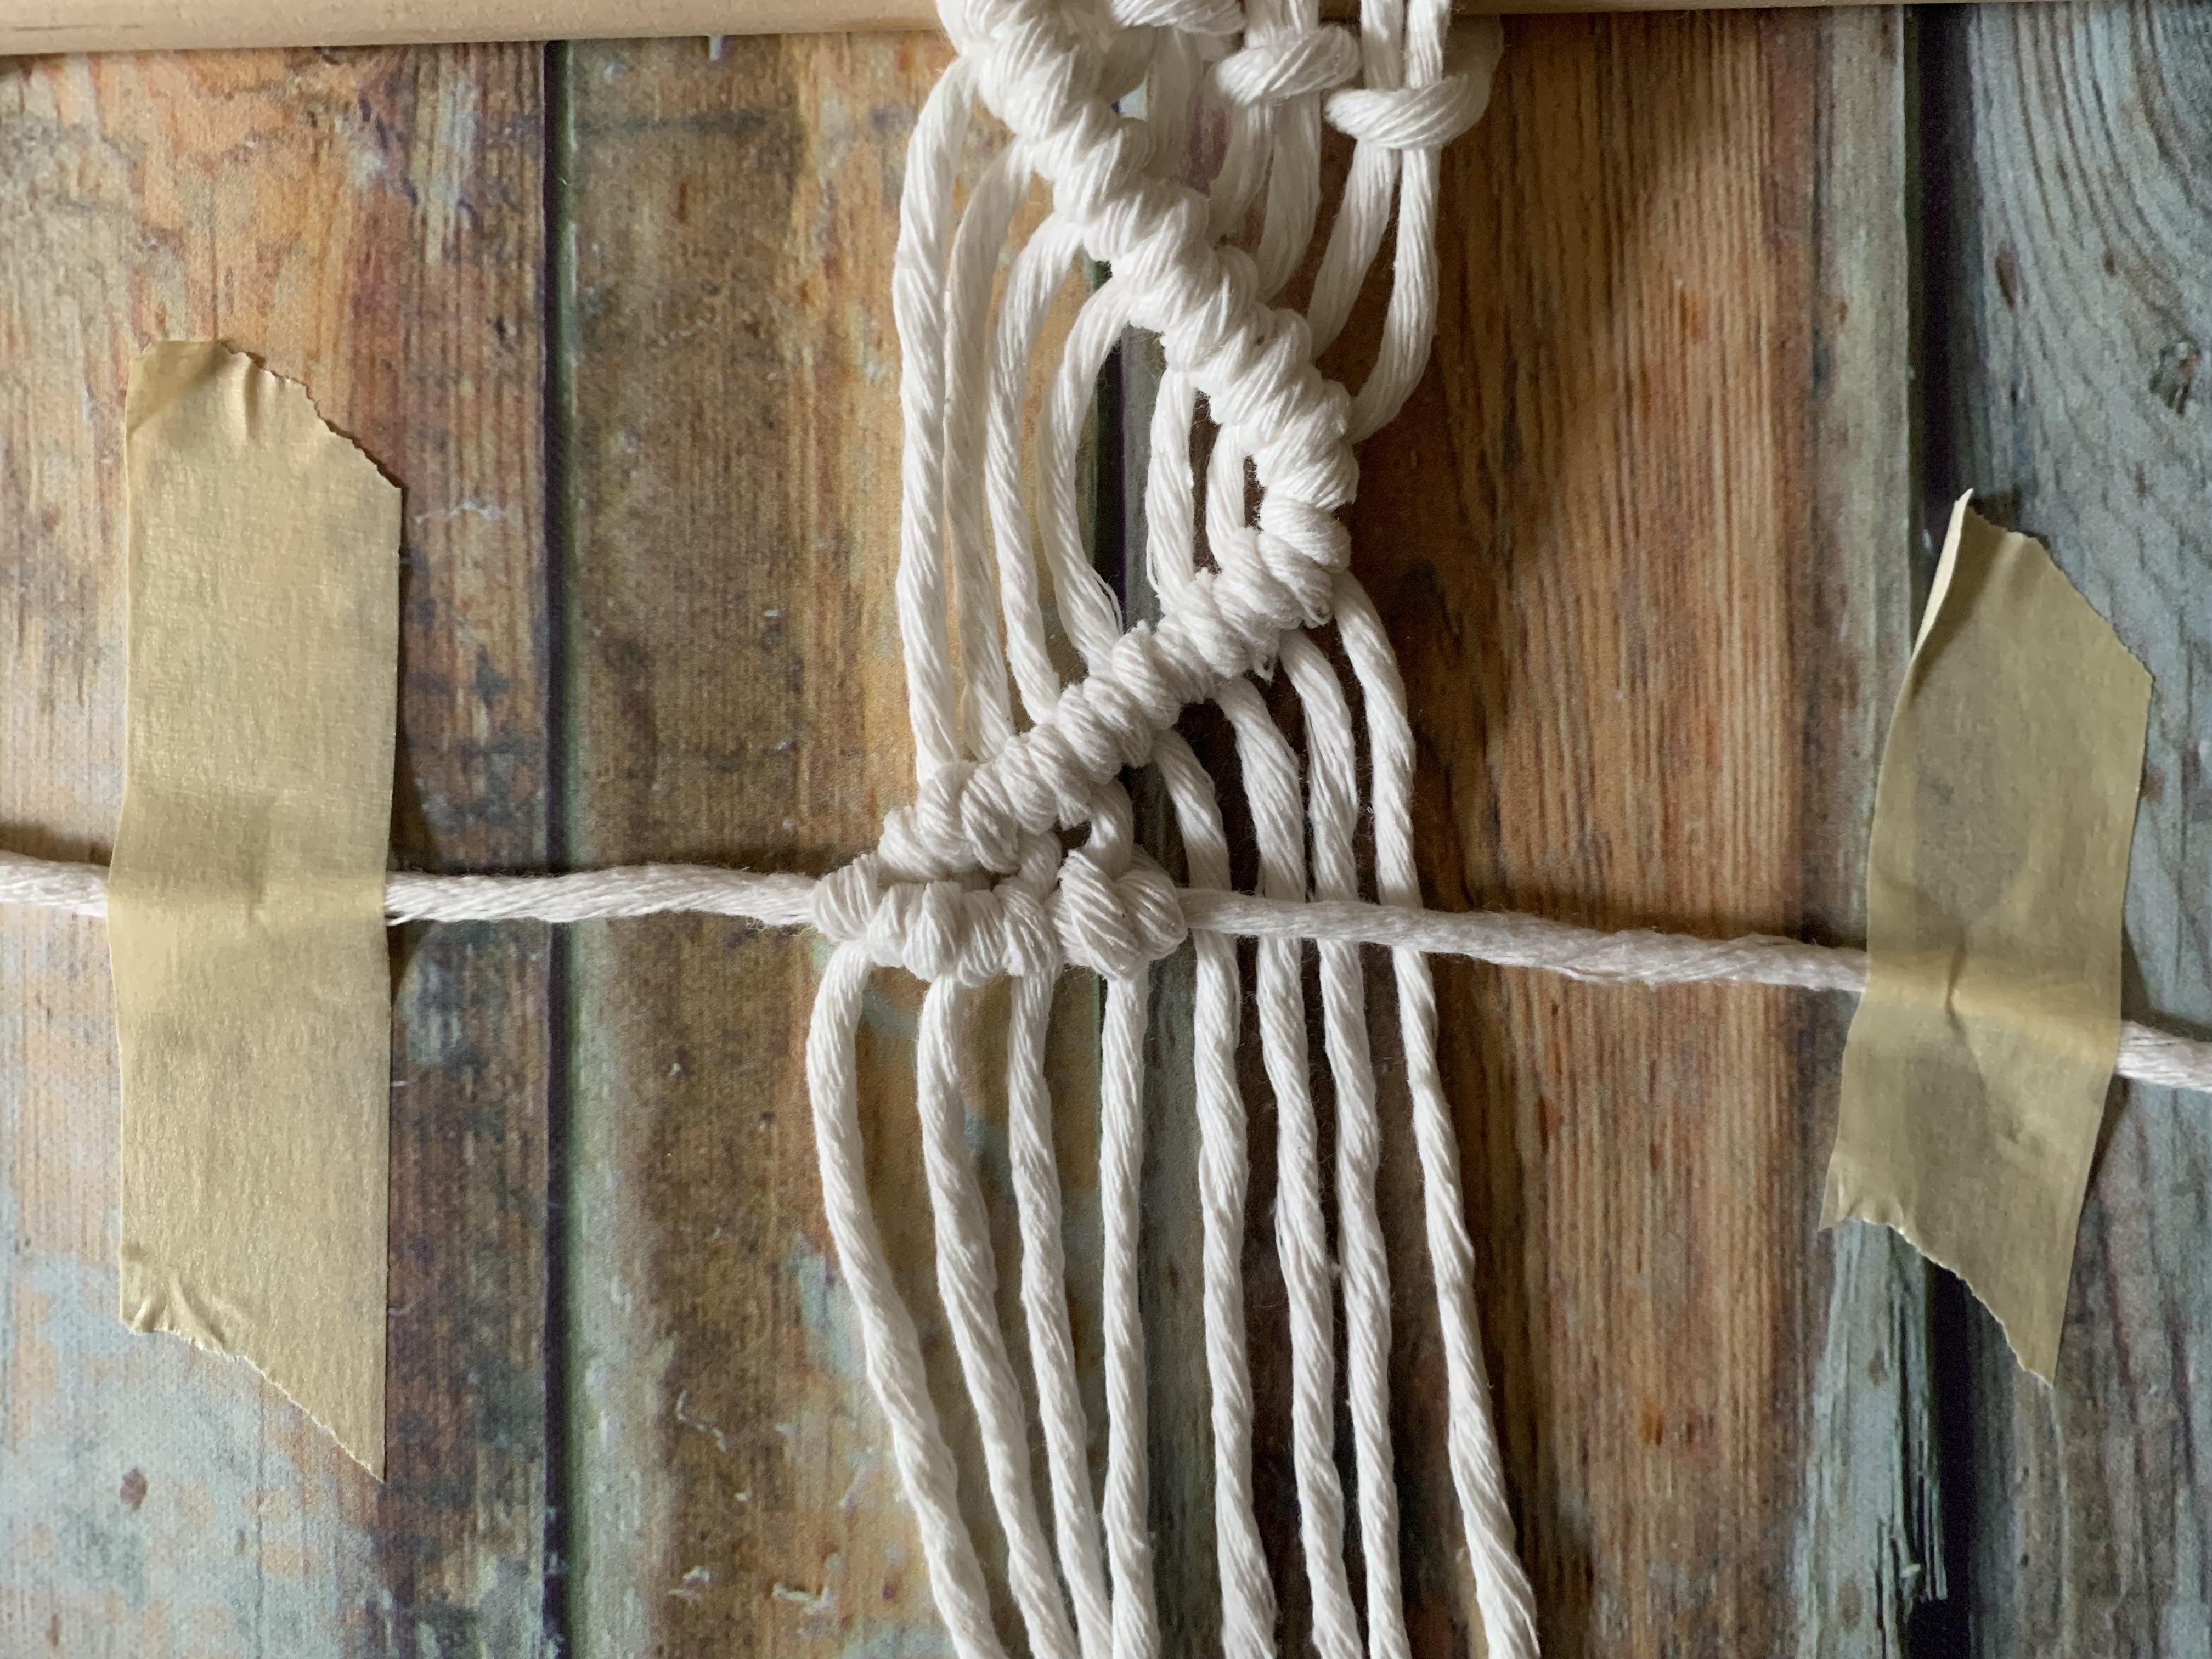
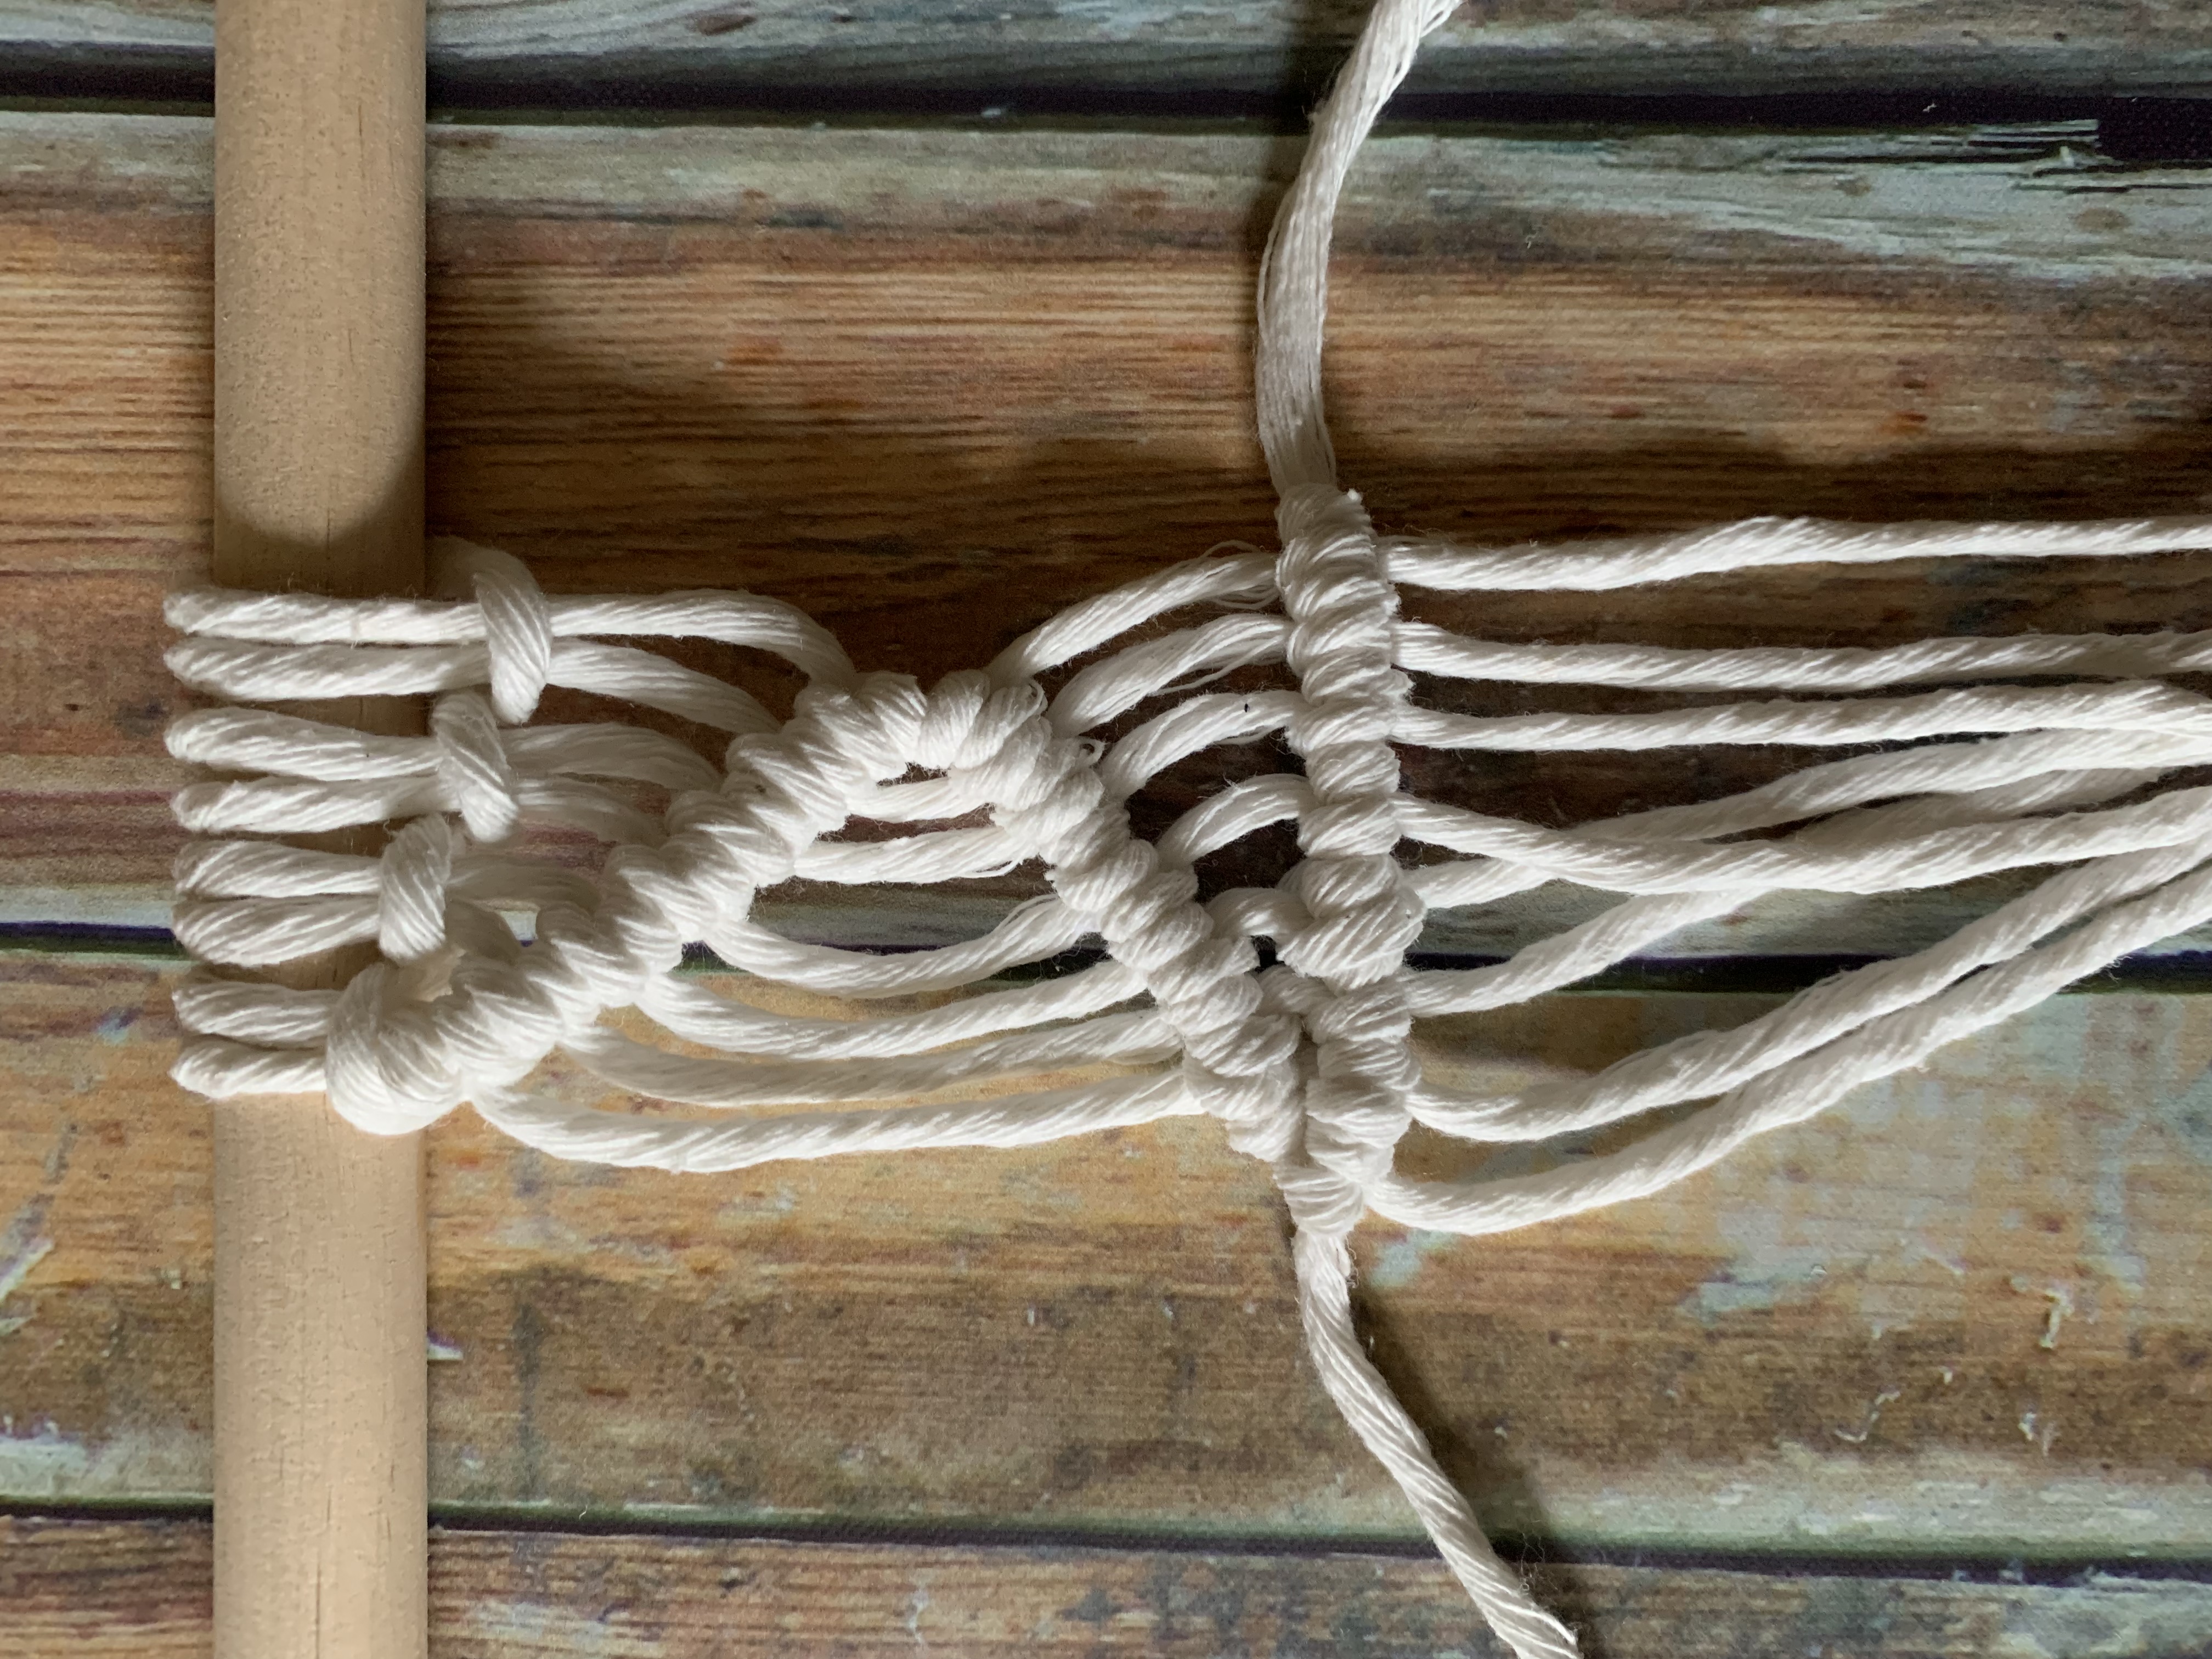
Last, but not least, there is creating a straight line. I like to use some tape to hold the cord that I’m going to use as the core in place. This helps me make sure it is straight.
1. Piece of cord that will be used as the core piece & tape the ends against the surface you are working on or the wall, if possible
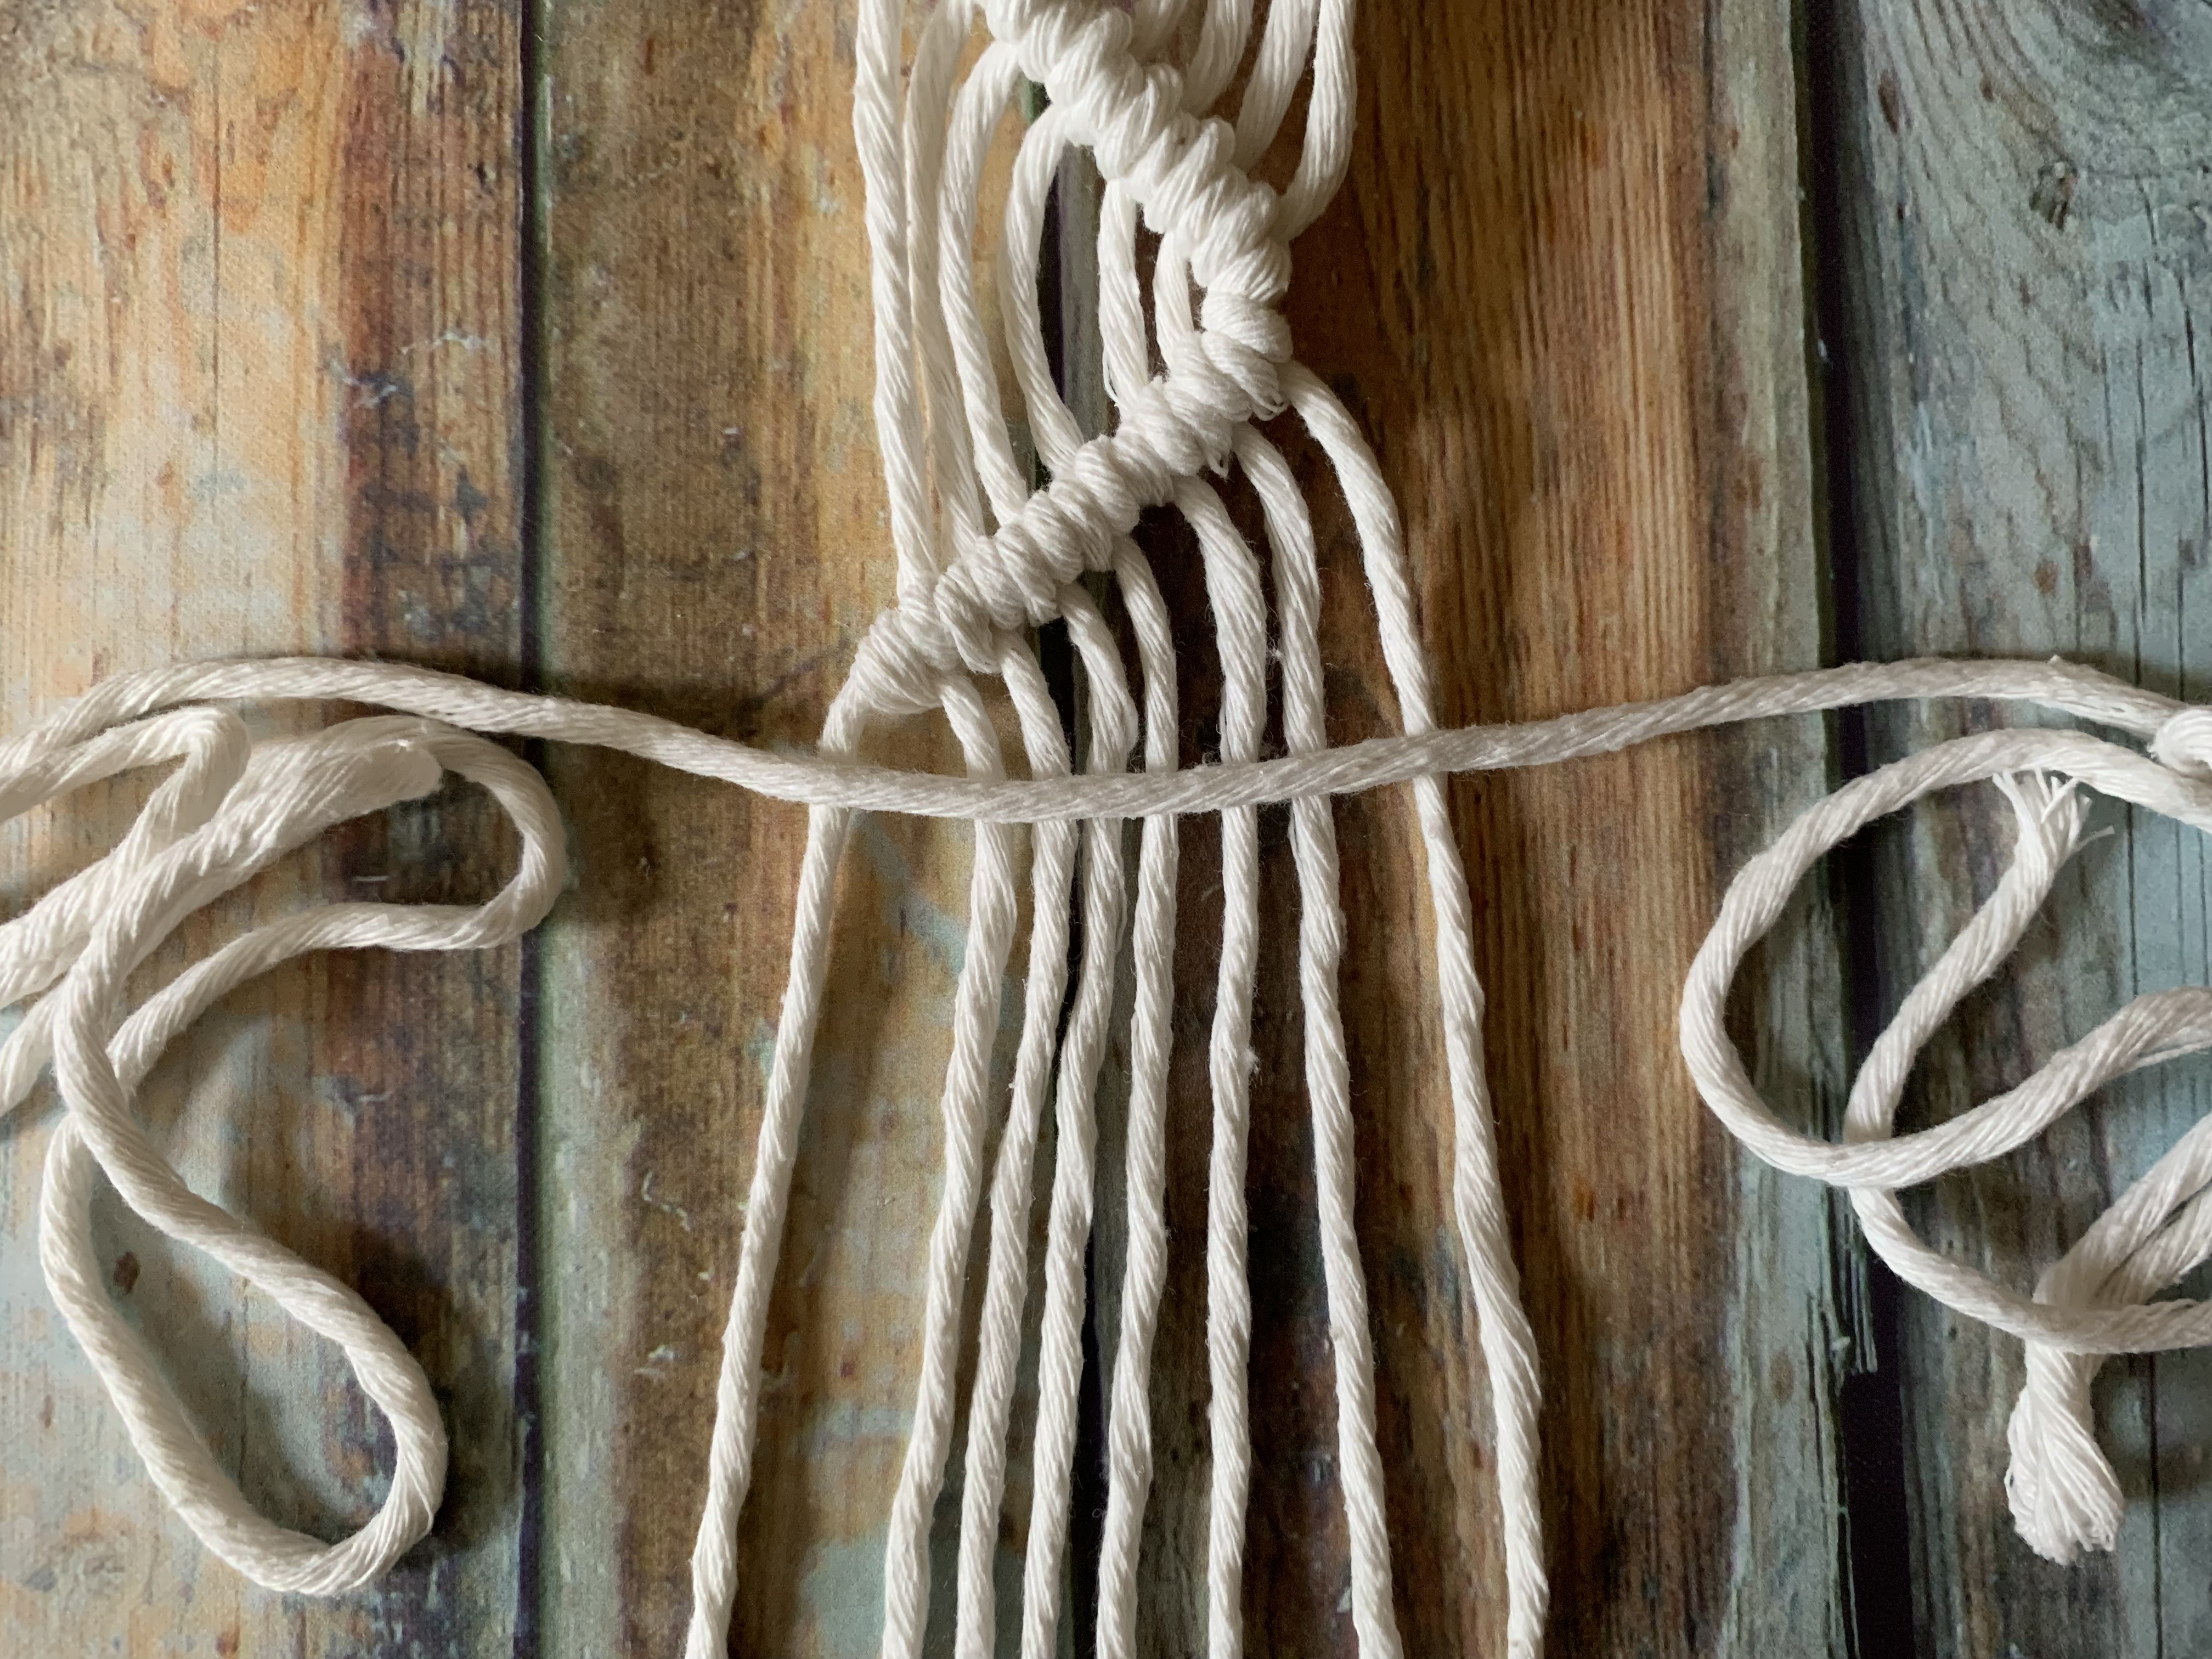
2. Follow the steps above, moving across the core cord
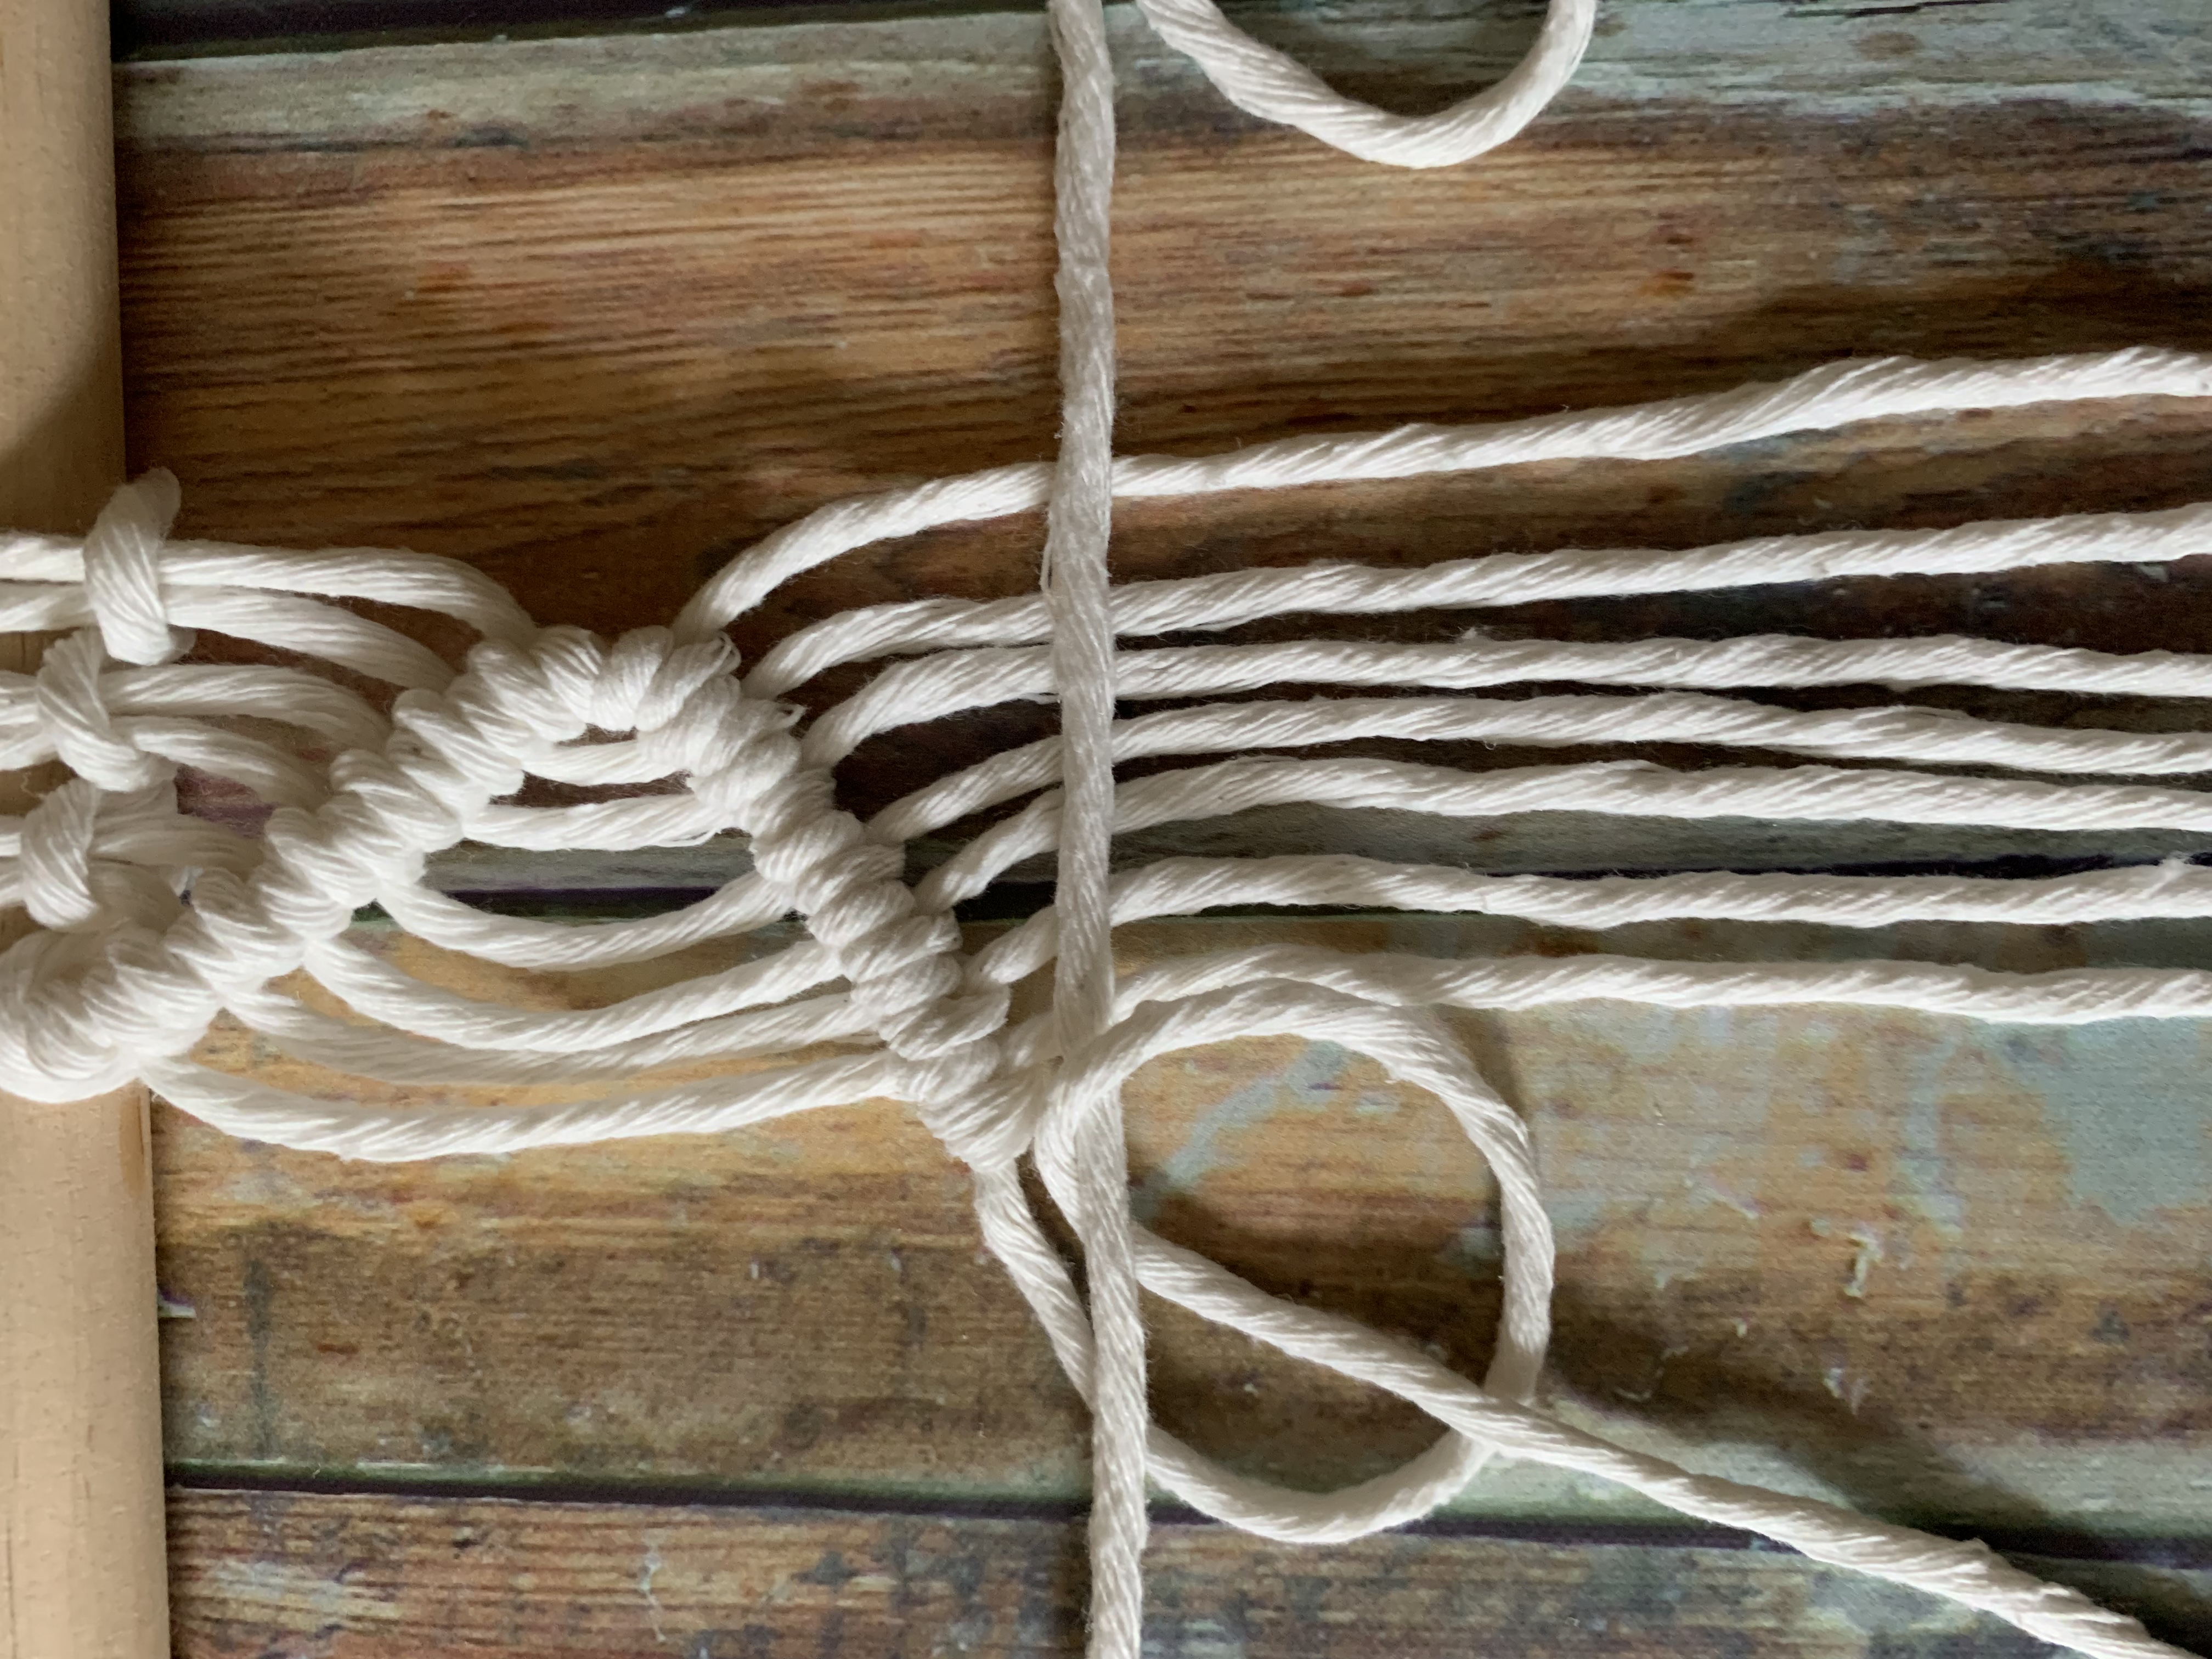

And there you have a double half hitch knot! The possibilities are endless with this knot. I use this a lot in macraweave projects; if I create two of these parallel to each other, I can weave in whatever fibers I want. This is also the frame work of my unicorn macrame pieces.
You can also check out my IG @That_Yarn_Life for examples of my work, my Etsy Shop to purchase my work, and my YouTube which has video tutorials, if you prefer that over step by step with photos.
Thank you for checking out this post and I hope this tutorial was helpful to you!